
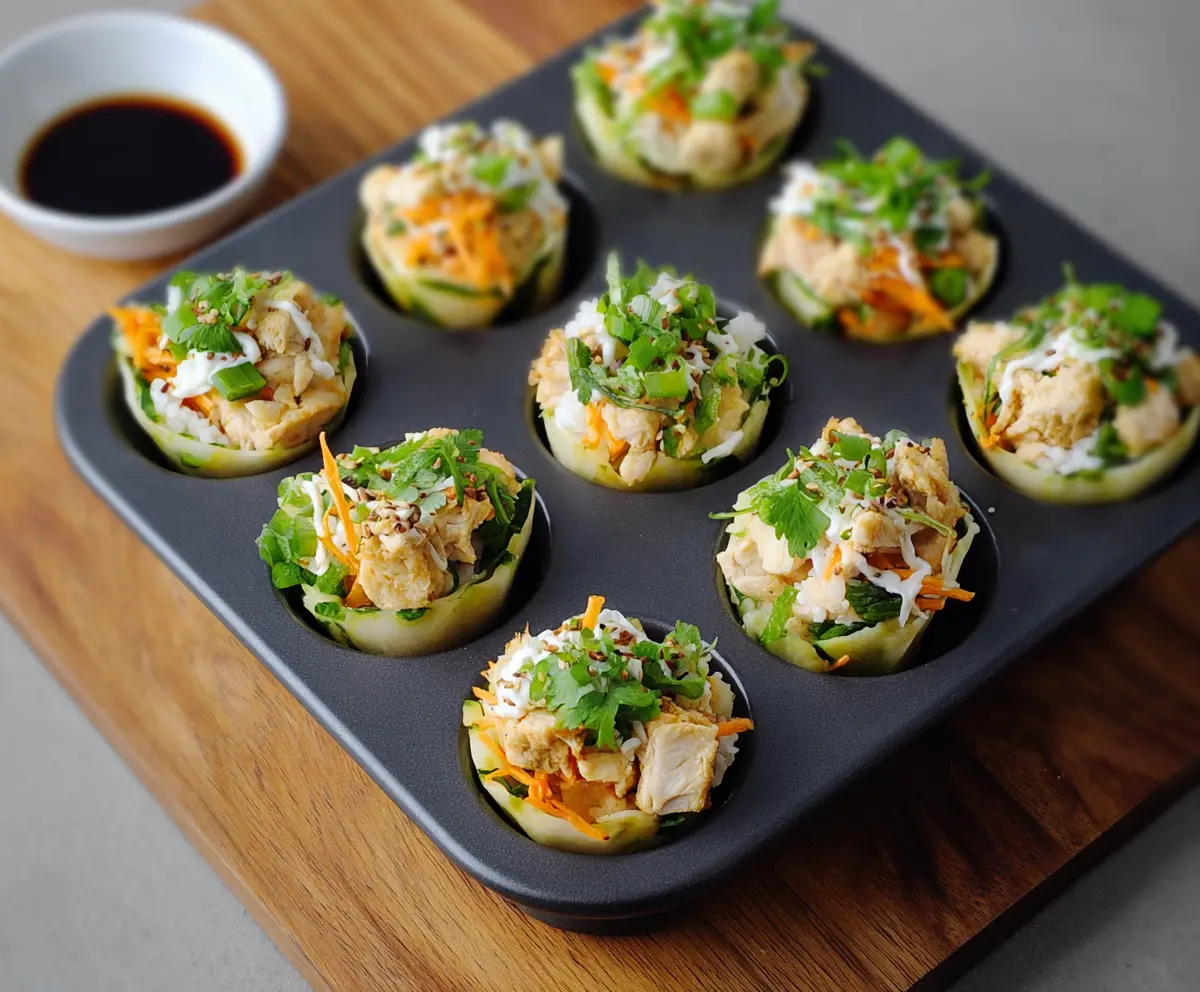
These Chicken Sushi Cups are a fun twist on the classic sushi! They’re made with tender chicken, fresh veggies, and fluffy rice, all packed into little cups. Yum!
Making these is super easy, and they look so cute on the table! I love to share them at parties or just enjoy them for a quick lunch. Who doesn’t enjoy a bite-sized treat? 🥳
Key Ingredients & Substitutions
Sushi Rice: Short-grain sushi rice is key for that sticky texture. If you can’t find it, you can substitute with short-grain white rice or even jasmine rice, but it won’t be quite the same.
Cooked Chicken: Rotisserie chicken is my go-to for convenience and flavor. If you prefer healthier options, grilled chicken or turkey works great too!
Cucumber: A large cucumber adds crunch, but you can swap it for avocado for a creamier texture or even shredded carrots for sweetness.
Eel Sauce: If eel sauce is hard to find, teriyaki sauce is a good alternative. It adds sweetness and a savory kick.
Green Onions: For a mild onion flavor, green onions are perfect. You can also use chives or leave them out if you don’t have any on hand.
How Do I Make the Perfect Sushi Rice?
Making perfect sushi rice is simple, but a few steps are crucial to getting that ideal texture. First, rinsing is essential as it removes excess starch that can make the rice too sticky when cooked.
- Rinse the sushi rice thoroughly under cold water until it runs clear.
- Cook with the right water ratio. For 2 cups of sushi rice, 2.5 cups of water is usually perfect.
- Don’t skip the resting step after cooking; let it sit covered for 10 minutes to finish cooking through.
- Mix in the rice vinegar mixture gently. Avoid being rough; this helps keep the rice fluffy and soft.
With these tips, you’ll have delicious sushi rice that’s just right for your Chicken Sushi Cups!
How to Make Chicken Sushi Cups
Ingredients You’ll Need:
- 2 cups sushi rice
- 2 1/2 cups water
- 1/4 cup rice vinegar
- 1 tbsp sugar
- 1 tsp salt
- 1 large cucumber, diced small
- 1 1/2 cups cooked chicken breast, shredded or chopped
- 2 tbsp soy sauce
- 1 tbsp sesame oil
- 2 tbsp mayonnaise (optional, for mixing with chicken)
- 2 green onions, thinly sliced
- 1/4 cup shredded mozzarella or Japanese Katsuobushi flakes (optional)
- 2 tbsp sesame seeds, toasted
- 2 tbsp eel sauce or teriyaki sauce for drizzling
- Non-stick cooking spray or oil for muffin tin
How Much Time Will You Need?
This recipe takes about 30 minutes to prepare and cook, plus some additional time for the rice to cool down after cooking. Overall, you’ll have these tasty Chicken Sushi Cups ready to go in about 45 minutes!
Step-by-Step Instructions:
1. Prepare the Sushi Rice:
Start by rinsing the sushi rice under cold water until the water runs clear. This helps remove excess starch. In a pot, combine the rinsed rice and 2 1/2 cups water, and bring it to a boil. Once boiling, reduce the heat to low, cover, and simmer for about 15-20 minutes or until the rice is tender and the water is absorbed. After that, let the rice sit covered for another 10 minutes to finish cooking. This will give you perfectly fluffy rice!
2. Season the Rice:
While the rice is cooling, mix together the rice vinegar, sugar, and salt in a small bowl. Heat it slightly to dissolve the sugar and salt if needed. Once the rice has cooled to room temperature, gently fold this mixture into the rice to season it. Make sure you don’t mash the rice; you want to keep it fluffy!
3. Prepare the Muffin Tin:
Preheat your oven to 350°F (175°C). Lightly grease a 12-cup mini muffin tin with non-stick cooking spray or a little oil to ensure your sushi cups come out easily.
4. Prepare the Chicken:
In another bowl, mix the shredded or chopped cooked chicken with soy sauce, sesame oil, and mayonnaise (if using). The mayonnaise adds creaminess, so it’s a delicious option!
5. Assemble the Cups:
Now it’s time to build your sushi cups! Take a small amount of seasoned sushi rice and place it into each muffin cup. Press the rice down gently to form a compact layer that lines the bottom and slightly up the sides of each cup. Next, sprinkle diced cucumber over the rice layer in each cup, followed by a generous spoonful of the prepared chicken mixture. If you like, you can sprinkle some shredded mozzarella or Katsuobushi flakes on top for extra flavor!
6. Bake and Serve:
Place the muffin tin in the oven and bake the sushi cups for about 10 minutes until they are warmed through and slightly firm. Carefully remove the sushi cups from the muffin tin and place them on a serving platter. Drizzle eel sauce or teriyaki sauce over each cup and garnish with sliced green onions and toasted sesame seeds. These cups are best served immediately with a side of soy sauce or wasabi! Enjoy your delicious Chicken Sushi Cups!
These cups combine the softness and flavor of sushi rice with savory chicken and fresh veggies, presented in a cute mini muffin shape that’s perfect for parties or a fun snack!
Can I Use Leftover Rice for These Cups?
Absolutely! Leftover rice works great for this recipe. Just make sure it’s not too dry; if it is, you can add a splash of water and microwave it briefly to soften it up.
What Can I Substitute for Chicken?
If you’re looking for a substitute, shredded tofu or a mix of your favorite cooked veggies can make a delicious vegetarian option. You could also try using crab meat or shrimp if you prefer seafood!
How Should I Store Leftovers?
Store any leftover Chicken Sushi Cups in an airtight container in the fridge for up to 2 days. To reheat, pop them in the microwave for about 30 seconds or until warmed through, but keep in mind they’re best fresh!
Can I Make These Ahead of Time?
Yes! You can prepare the sushi rice and chicken mixture ahead of time. Just store them separately in the fridge and assemble the cups just before baking for the best texture!