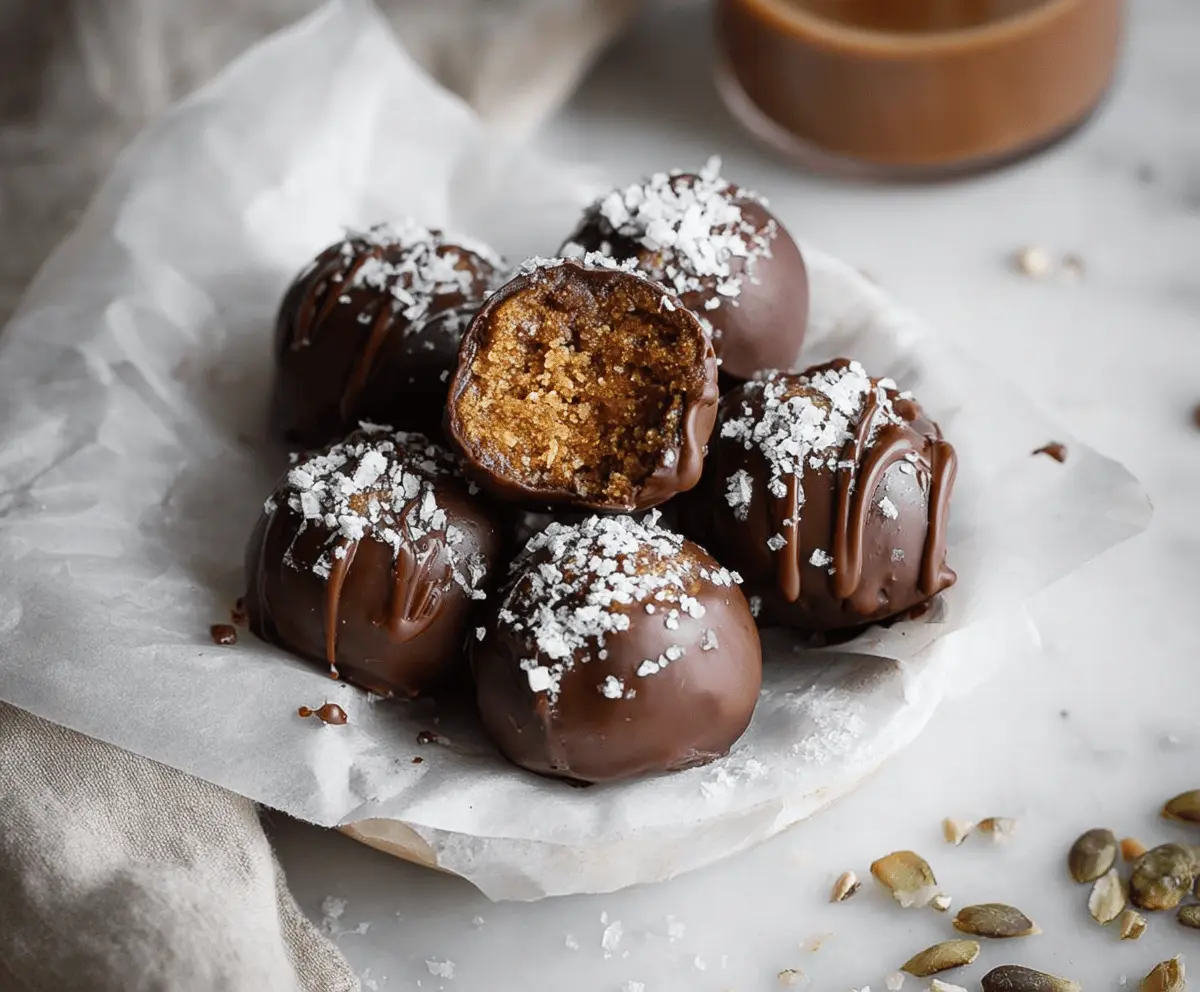
These Chocolate Covered Pumpkin Protein Balls are a tasty treat packed with nutrients. Made from pumpkin puree, protein powder, and a drizzle of chocolate, they’re sweet and satisfying!
They’re perfect for an energy boost during the day or as a post-workout snack. Honestly, who can resist chocolate? 😋 Plus, they’re super easy to whip up—just mix, roll, and chill!
Key Ingredients & Substitutions
Canned Pumpkin Puree: Use pure pumpkin puree for this recipe, not pumpkin pie filling. If you don’t have pumpkin puree, you can substitute it with mashed sweet potatoes or butternut squash for a similar flavor.
Rolled Oats: Regular rolled oats work great for the texture. If you need a gluten-free option, be sure to use certified gluten-free oats. You can also use quick oats, but the texture will be slightly different.
Protein Powder: I suggest vanilla or pumpkin spice protein powder to add flavor. If you’re vegan or have allergies, use a plant-based protein powder or nutritional yeast as a substitute for a savory option.
Nut/Seed Butter: Almond butter is my favorite for its creamy texture, but you can swap it for peanut butter, cashew butter, or sunflower seed butter if you’re allergic to nuts. Each will change the flavor a bit, so pick what you love!
Dark Chocolate: Use at least 70% cocoa for rich flavor. If you want to make it dairy-free, opt for a dairy-free chocolate or carob chips. You could also drizzle the dipped balls with white chocolate for a twist.
How Do You Get the Right Consistency for the Mixture?
Getting the right texture for your protein balls can be tricky, but here’s how to nail it:
- Start with the wet ingredients—pumpkin puree, nut butter, and syrup—in a bowl and mix well. This base should be smooth.
- When adding dry ingredients like oats and protein powder, stir until they’re fully combined. The mixture should be thick and hold together. If it’s too sticky, gradually add more oats or protein powder until it’s manageable.
- Form 1-inch balls with your hands or a small scoop. If the mixture sticks, wet your hands slightly with water to help shape the balls without mess.
Remember, if your mixture feels too dry to stick together, you can add a splash of almond milk or more nut butter to get the right consistency. Happy rolling!
Chocolate Covered Pumpkin Protein Balls
Ingredients:
- 1 cup canned pumpkin puree (not pumpkin pie filling)
- 1 cup rolled oats (plus extra for topping)
- 1/2 cup vanilla protein powder (or pumpkin spice-flavored protein powder)
- 1/4 cup almond butter (or any nut/seed butter)
- 2 tbsp maple syrup or honey
- 1 tsp pumpkin pie spice
- 1/2 tsp cinnamon
- 1/4 tsp salt
- 6 oz dark chocolate (70% cocoa or higher), chopped or chocolate chips
- 1 tsp coconut oil (optional, for smoother chocolate)
- Pumpkin seeds or rolled oats for garnish
How Much Time Will You Need?
This recipe takes about 15 minutes to prepare, plus additional time to chill in the refrigerator. You’ll need about 30 minutes to firm up the pumpkin balls before dipping them in chocolate and another 15-20 minutes for the chocolate to set. So, overall, plan for about an hour for the chilling and setting time.
Step-by-Step Instructions:
1. Mix Your Base:
In a medium-sized bowl, combine the canned pumpkin puree, almond butter, and maple syrup. Mix these ingredients well until they are smooth and completely blended together. This will be the delicious base of your pumpkin balls!
2. Add Dry Ingredients:
Next, it’s time to incorporate the dry ingredients! Add the rolled oats, protein powder, pumpkin pie spice, cinnamon, and salt to the pumpkin mixture. Stir gently until everything is well combined and it forms a thick dough-like consistency. If the mixture feels too sticky, don’t worry! Just sprinkle in a bit more oats or protein powder until it reaches the right texture.
3. Shape the Balls:
Using your hands or a small cookie scoop, scoop and form the mixture into 1-inch balls. Place each ball onto a parchment-lined baking sheet, giving them a little space to breathe. Once you’re done shaping, pop them into the fridge for about 30 minutes to let them firm up.
4. Melt the Chocolate:
While the pumpkin balls are chilling, it’s time to melt the chocolate! In a microwave-safe bowl, add the dark chocolate and coconut oil (if using) and microwave in 20-second intervals. Be sure to stir in between each interval until the chocolate is smooth and melted. You can also melt it using a double boiler if you prefer!
5. Coat the Balls:
After about 30 minutes, take out your pumpkin balls from the fridge. Dip each ball halfway or fully into the melted chocolate, letting any excess chocolate drip off gently before placing it back onto the parchment-lined sheet. This step is sure to get your mouth watering!
6. Garnish and Set:
If you’d like, sprinkle the tops of the chocolate-covered balls with extra rolled oats or pumpkin seeds for a fun garnish. Then, place the baking sheet back into the fridge for another 15-20 minutes so the chocolate can fully set.
7. Serve and Enjoy:
Once the chocolate is set, serve these delightful pumpkin protein balls chilled or at room temperature. Store any leftovers in an airtight container in the fridge for up to one week—if they last that long!
Enjoy these nutrient-packed, delicious pumpkin protein balls coated in rich chocolate—a perfect healthy snack or dessert! Happy munching!

Can I Use a Different Nut Butter?
Absolutely! While almond butter is a great choice, feel free to substitute it with peanut butter, cashew butter, or sunflower seed butter based on your preference or dietary needs. Just keep in mind that the flavor might vary slightly depending on your choice!
How Should I Store These Protein Balls?
Store any leftover chocolate-covered pumpkin protein balls in an airtight container in the fridge for up to one week. They can also be frozen for longer storage; just make sure to place parchment paper between layers to prevent sticking!
Can I Make These Vegan?
Yes, you can make these protein balls vegan! Simply use maple syrup instead of honey and choose a plant-based protein powder. For the chocolate coating, look for dairy-free chocolate options.
What If the Mixture Is Too Dry?
If the mixture feels too dry and crumbly, add a splash of almond milk or a bit more almond butter to help bind the ingredients together. Mix well until you reach a dough-like consistency that’s easy to shape into balls!