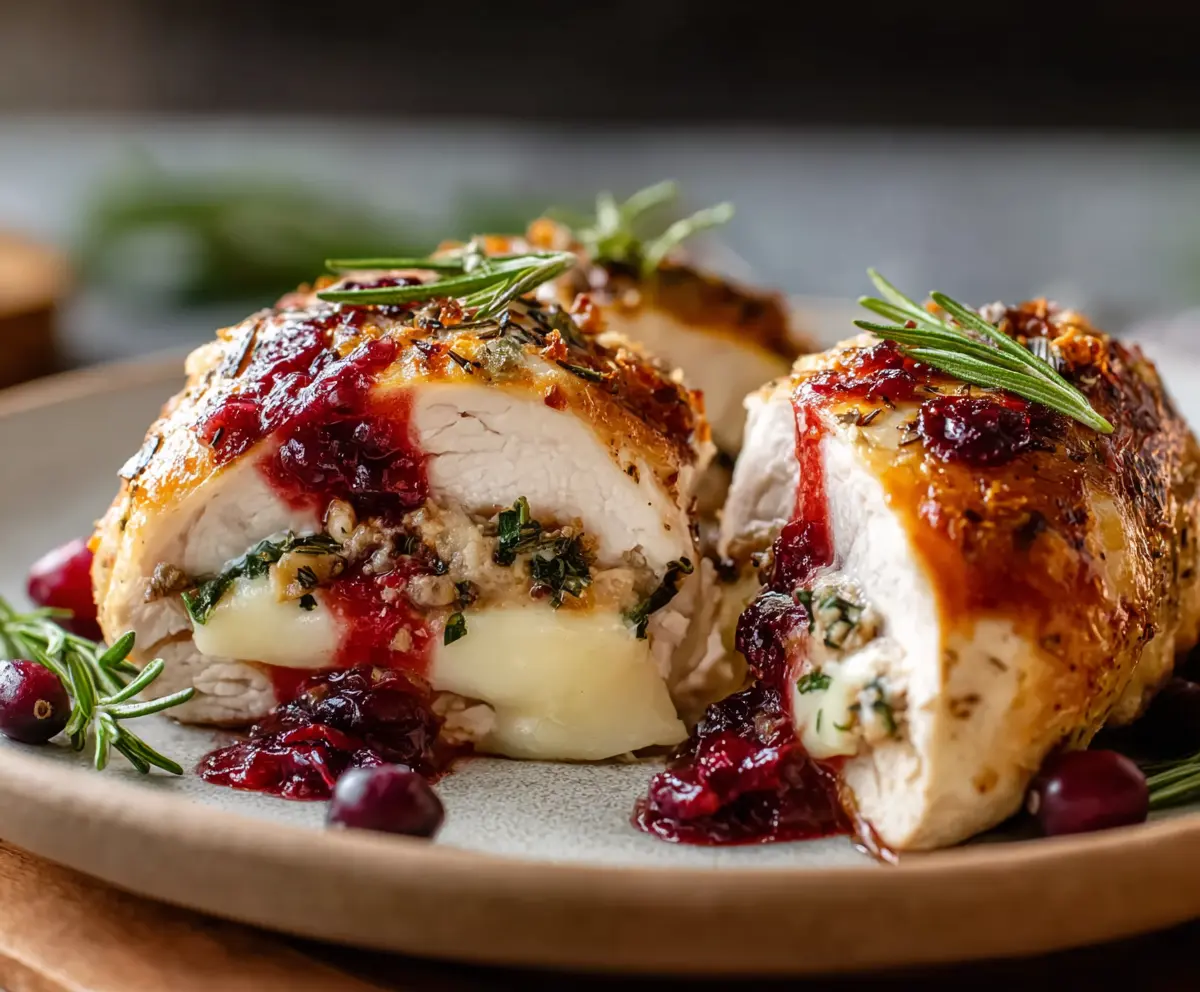
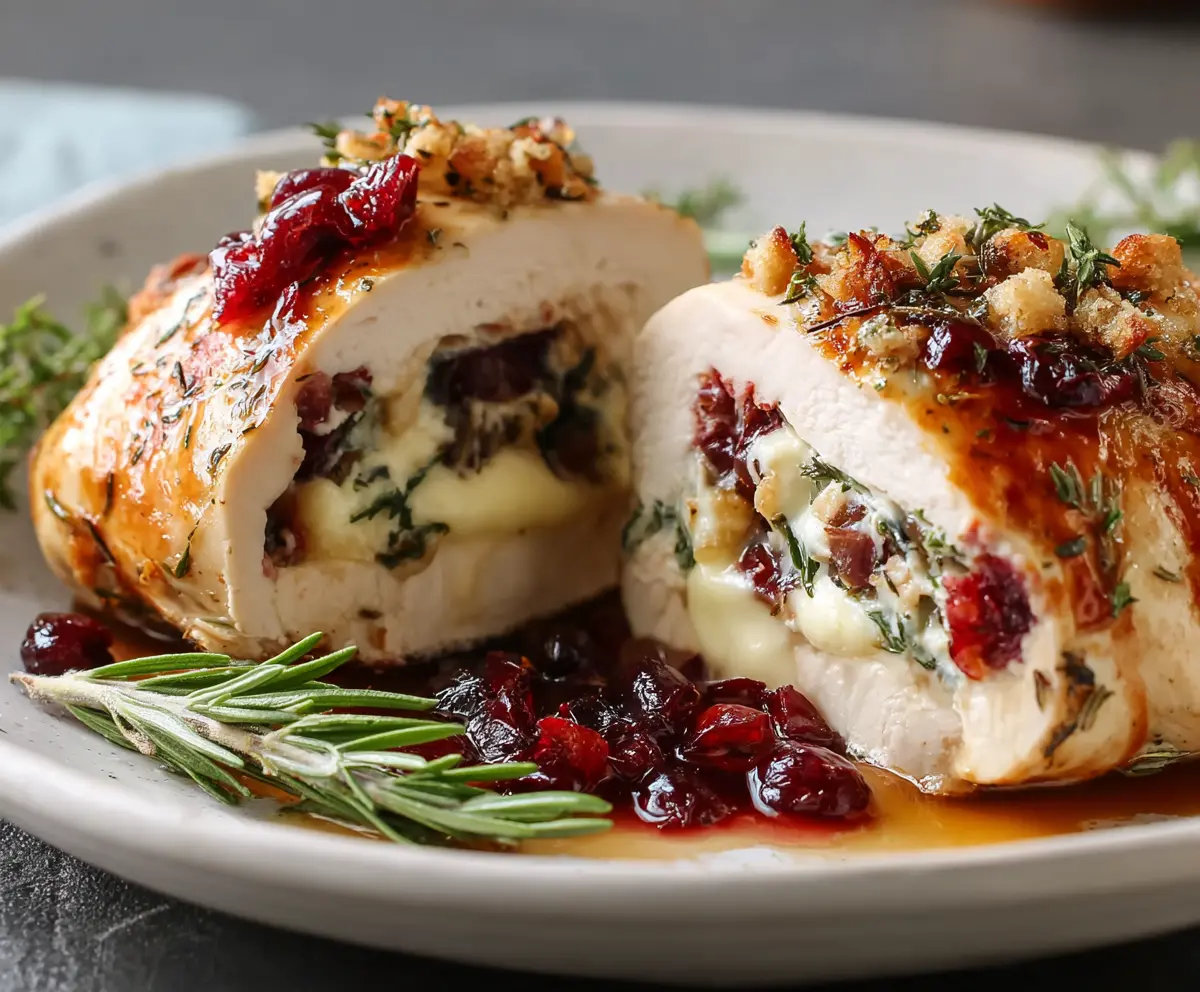
This chicken dish is a tasty treat! Juicy chicken breasts are filled with creamy Brie cheese and tangy cranberries, making each bite a flavorful burst.
Honestly, I’m a big fan of the sweet and cheesy combo. It feels fancy, but it’s super easy to make—perfect for impressing guests or just treating yourself!
Serve it with some steamed veggies or a simple salad, and you’ve got a beautiful meal that’s as delicious as it is easy to whip up. Yum!
Key Ingredients & Substitutions
Chicken Breasts: Boneless, skinless chicken breasts are best for this dish. If you’re looking for a healthier option, you can use chicken thighs, which also stay moist and tender.
Brie Cheese: Brie adds a creamy richness. You can substitute it with Camembert for a similar flavor or use a soft goat cheese for a tangy twist.
Cranberry Sauce: Whole berry cranberry sauce gives a delightful tartness. If you’re in a pinch, you can use homemade cranberry sauce or even raspberry jam for a different flavor.
Herbs: Fresh rosemary is ideal, but if you don’t have any, dried rosemary or thyme can work, though I usually prefer fresh for stronger flavor.
How Do You Safely Stuff Chicken Breasts?
Stuffing chicken can be tricky, but with the right technique, it’s easy! Here’s how to do it without making a mess:
- First, use a sharp knife to create a pocket in the chicken breasts. Be careful not to cut all the way through; you want to create a deep pocket for your filling.
- Season generously! Don’t just flavor the outside; season the inside of the pocket too.
- Carefully stuff each pocket with Brie slices and a spoonful of cranberry sauce. You can use your fingers or a small spoon for this.
- To secure the filling, use toothpicks or kitchen twine. This helps keep the delicious filling inside while cooking.
Following these tips will help ensure your stuffed chicken breasts come out perfectly every time!
Cranberry Brie Stuffed Chicken
Ingredients You’ll Need:
For the Chicken:
- 4 boneless, skinless chicken breasts
- 8 oz Brie cheese, sliced
- 1/2 cup cranberry sauce (preferably whole berry)
- 2 tbsp fresh rosemary, chopped (plus extra sprigs for garnish)
- 2 cloves garlic, minced
- 1 tbsp olive oil
- 1 tsp dried thyme or herbes de Provence
- Salt and black pepper, to taste
- Toothpicks or kitchen twine (to secure the chicken)
How Much Time Will You Need?
This recipe takes about 15 minutes to prepare and about 30 minutes to cook. You’ll spend a bit of time stuffing the chicken and searing it, then let your oven do the work while you prepare the sides. Altogether, your delicious meal will be ready in under an hour!
Step-by-Step Instructions:
1. Preheat the Oven:
Begin by preheating your oven to 375°F (190°C). This way, it will be hot and ready when it’s time to bake the chicken!
2. Prepare the Chicken Breasts:
Take your boneless, skinless chicken breasts and, using a sharp knife, carefully cut a pocket into each one. Slice horizontally, making sure not to cut all the way through—just enough to create a nice space to stuff.
3. Season the Chicken:
Generously season the inside and outside of each chicken breast with salt, black pepper, minced garlic, dried thyme, and chopped rosemary. This will enhance the flavors beautifully!
4. Stuff the Chicken:
Now, it’s time to stuff each chicken pocket with slices of creamy Brie cheese and a spoonful of cranberry sauce. Feel free to get creative and adjust the amounts, depending on your taste!
5. Secure the Stuffing:
To keep all that yummy filling inside, use toothpicks or kitchen twine to secure the opening of each chicken breast. Make sure it’s tightly closed so the cheese doesn’t ooze out while cooking.
6. Sear the Chicken:
In a large oven-safe skillet, heat the olive oil over medium-high heat. Once it’s hot, carefully place the stuffed chicken breasts in the skillet. Sear them for about 3-4 minutes on each side, until they’re golden brown.
7. Bake the Chicken:
After searing, transfer the skillet to your preheated oven. Bake the chicken for 20-25 minutes or until the internal temperature reaches 165°F (74°C). This ensures the chicken is cooked through and safe to eat!
8. Let It Rest:
Once they’re done baking, remove the skillet from the oven and let the chicken rest for about 5 minutes. This allows the juices to redistribute, making the chicken tender and juicy!
9. Serve and Enjoy:
Finally, remove the toothpicks or twine carefully. Plate the stuffed chicken and add a spoonful of extra cranberry sauce on top. Garnish with fresh rosemary sprigs for a lovely touch. Serve warm, and enjoy your flavorful meal!
This delicious dish pairs perfectly with steamed vegetables, mashed potatoes, or a fresh salad—but feel free to get creative with your sides!
Can I Use Frozen Chicken Breasts for This Recipe?
Yes, you can use frozen chicken breasts, but be sure to thaw them fully before cooking. The safest way to thaw is in the fridge overnight, or you can use the quick method by placing them in a sealed bag and submerging in cold water for about an hour.
What Can I Substitute for Brie Cheese?
If you don’t have Brie on hand, Camembert is a great alternative with a similar texture and flavor. For a different twist, goat cheese or cream cheese can also work well, providing creaminess and a unique taste.
How Can I Make This Recipe Ahead of Time?
You can prepare the chicken up to the point of searing, then cover it and refrigerate for up to 24 hours. When ready to cook, simply sear and bake as instructed. You may need to add a few extra minutes to the baking time since the chicken will be colder.
What’s the Best Way to Store Leftovers?
Store any leftover stuffed chicken in an airtight container in the fridge for up to 3 days. To reheat, warm slowly in the oven or microwave, covered, to retain moisture. You can add a splash of broth to the container to help keep the chicken juicy.