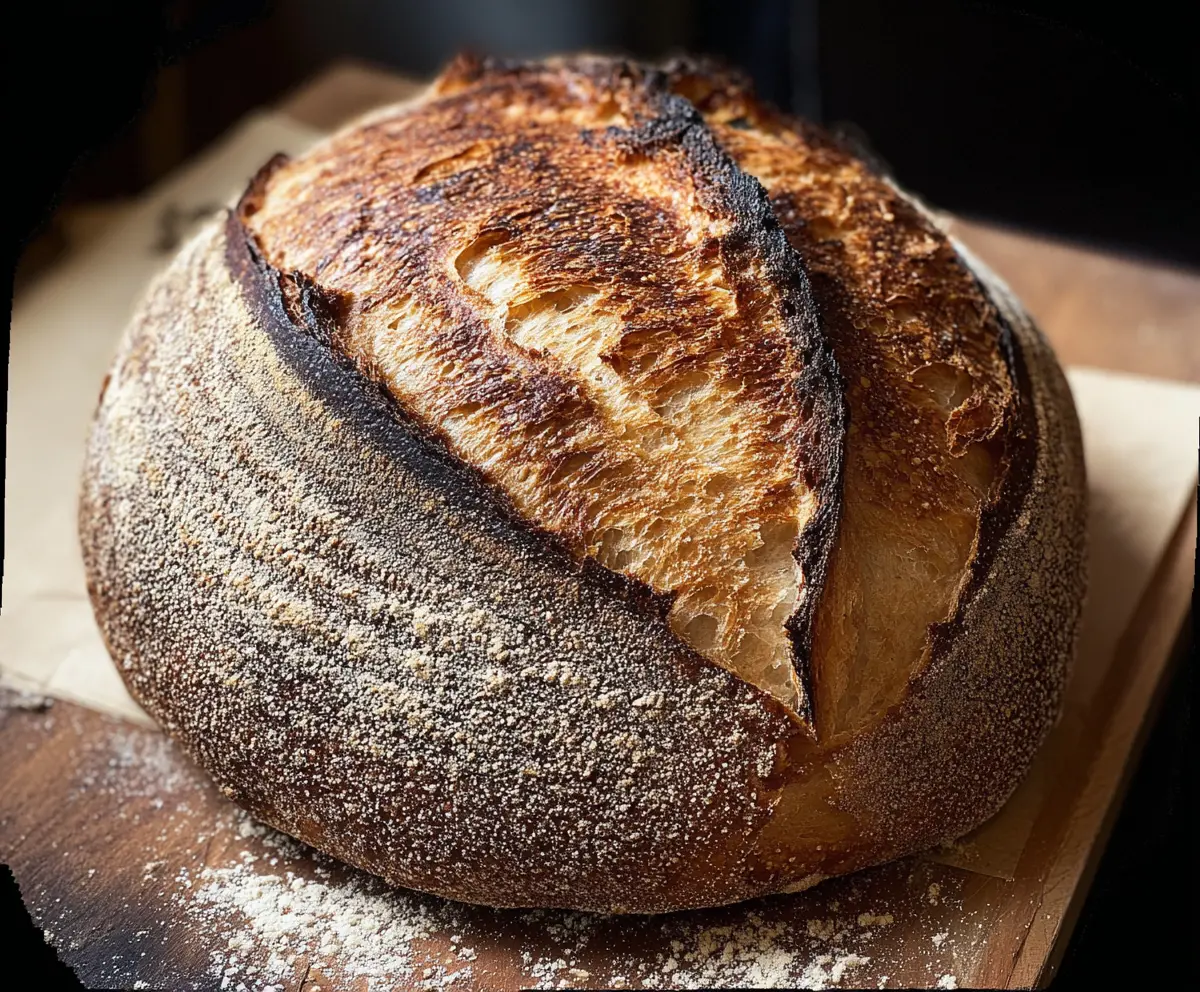
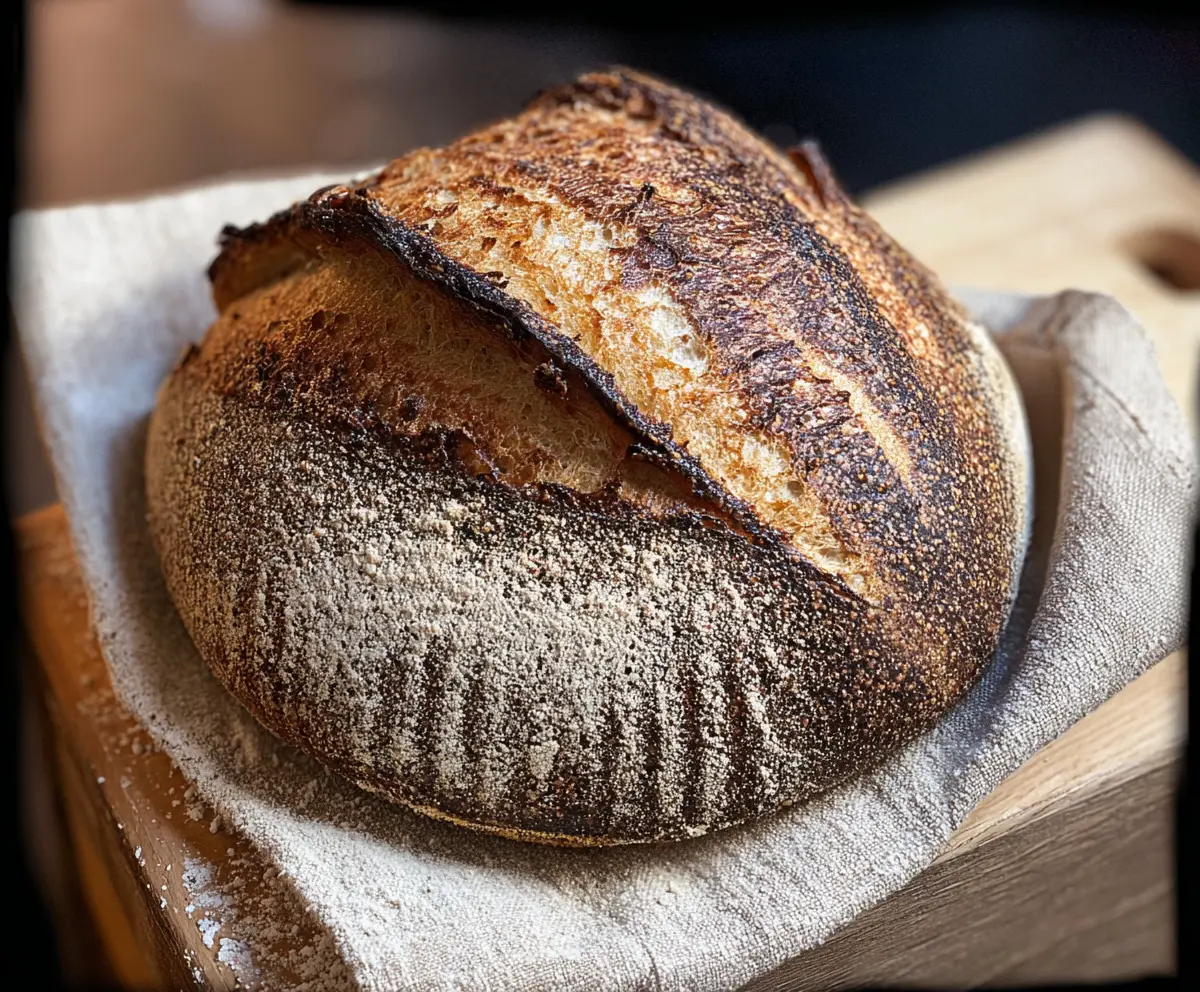
This crusty sourdough bread has a lovely, chewy texture and a tangy flavor that makes it simply amazing. Pair it with coffee, and you have a cozy treat for any time of the day!
Nothing beats toasting a slice topped with butter and enjoying it with a hot cup of coffee. It’s like a warm hug for your taste buds! ☕️
I cherish the simple joy of baking this bread. It’s great for breakfast or as a snack. And honestly, who can resist that crusty goodness right out of the oven?
Key Ingredients & Substitutions
Bread Flour: Use unbleached bread flour for best results. It offers the necessary protein for strong gluten development. If you don’t have it, all-purpose flour can be a substitute, but the texture might be slightly less chewy.
Water: Ideally, use filtered or bottled water, especially if your tap water is heavily chlorinated. It helps in better fermentation. For lower hydration, you can adjust the water to about 320g, but this may make the dough harder to work with.
Sourdough Starter: Your starter should be active and bubbly. If you’re short on starter, you can create a quick starter with flour and water and let it sit for 6-12 hours. However, the flavor won’t be as strong.
Salt: Sea salt is my favorite for this bread recipe. It enhances the flavor without overpowering the sourdough taste. If you’re avoiding salt, I suggest adding a bit of extra tanginess with a splash of vinegar instead, though textures will vary.
Why is Autolyse Important?
Autolyse is a vital step in sourdough baking. It allows the flour and water to fully hydrate, which enhances gluten development without needing vigorous mixing. This means less work for you!
- Mix flour and water until there are no dry bits. Cover and let sit for an hour.
- The dough will be softer and stretchier after autolyse, making it easier to shape later.
What Do I Need to Know About Stretch and Folds?
Stretch and folds help develop gluten strength in your dough. This step is crucial for obtaining that great chewy texture.
- Instead of kneading, reach under the dough and stretch it upward, then fold it over itself.
- Do this every 30 minutes for the first two hours of bulk fermentation.
- Be gentle to retain air bubbles; they’ll help your bread rise!
How Do I Get a Perfectly Crispy Crust?
To achieve that amazing crust, baking in a Dutch oven traps steam, which is essential during the first half of baking.
- Preheat the Dutch oven well to create a hot environment; this increases oven spring.
- Score the dough; it helps direct the expansion during baking.
- Once the lid is off, bake until deep golden to ensure your crust is crispy.
Enjoy baking and pairing your sourdough with coffee for a lovely moment of comfort!
How to Make Crusty Sourdough Bread
Ingredients You’ll Need:
- 500g bread flour (unbleached)
- 350g water (about 70% hydration)
- 100g active sourdough starter (100% hydration)
- 10g salt
How Much Time Will You Need?
This crusty sourdough bread takes about 30 minutes of active preparation time, plus an overnight refrigeration for the final proof (12 to 16 hours) and about 45 minutes for baking. So, plan for a full day of fermentation and baking time, and you’ll have delicious bread ready to enjoy!
Step-by-Step Instructions:
1. Mixing the Dough:
In a large bowl, combine the bread flour and the water. Use a spoon or your hand to mix until all the flour is fully incorporated and there are no dry bits left. Cover the bowl with a cloth and let the mixture rest for 1 hour. This step is called autolyse and helps to develop the dough’s structure.
2. Adding Starter and Salt:
After the autolyse, add your active sourdough starter and salt into the dough. Mix it all together with your hands or a spatula until everything is well combined and cohesive. This is the base for your bread!
3. Bulk Fermentation & Folds:
Cover the bowl with a lid or cloth and let the dough ferment at room temperature (about 22°C or 72°F) for 4 to 5 hours. During the first 2 hours, every 30 minutes, gently reach under the dough and stretch it upwards before folding it over itself. This gentle stretching and folding helps develop gluten in the dough, making it stronger.
4. Shaping the Dough:
After the bulk fermentation, place the dough onto a lightly floured surface. Shape it into a round loaf by folding the edges toward the center, and then gently round it by cupping your hands around it and rolling. This helps create surface tension.
5. Final Proof:
Now, place the shaped dough seam-side up in a well-floured banneton or a bowl lined with a floured kitchen towel. Cover it and pop it into the fridge to proof overnight (12 to 16 hours). This cold fermentation develops deeper flavors and improves the dough’s texture.
6. Preheating the Oven:
The next day, preheat your oven to 250°C (480°F) while your dough is still in the fridge. Place a Dutch oven or a heavy oven-safe pot inside to heat up for at least 30 minutes. This will help create a great crust!
7. Scoring and Baking:
Once the oven is ready, carefully remove the dough from the fridge. Flip the dough seam-side down onto a piece of parchment paper. Use a sharp knife or bread lame to score the top of the dough; this allows it to expand while baking.
8. Baking:
Transfer the parchment paper with the dough into the hot Dutch oven. Cover it with the lid and bake for 20 minutes. After that, remove the lid and continue baking for another 20-25 minutes until the crust is beautifully golden brown and crusty.
9. Cooling:
Once baked, carefully take the bread out of the oven and let it cool completely on a wire rack before slicing. This will ensure the inside finishes setting and maintains its texture.
Serve your freshly baked crusty sourdough bread with your favorite cup of coffee and enjoy each bite! Happy baking!
Can I Use Whole Wheat Flour Instead of Bread Flour?
Yes, you can substitute whole wheat flour for bread flour, but it will require some adjustments. Start with 400g of whole wheat flour and reduce the water slightly to about 320g since whole wheat absorbs more water. The texture will be denser, but it will have a wonderful nutty flavor!
How Do I Know If My Sourdough Starter is Active?
Your sourdough starter is active when it has doubled in size and is bubbly within 4-6 hours after feeding. To test it, drop a spoonful in a glass of water; if it floats, it’s ready to use!
What If My Dough is Too Sticky?
Stickiness is normal for wet sourdough dough, but if it’s unmanageable, lightly flour your hands, work surface, and the dough itself while shaping. Avoid adding too much flour, as it can make the bread dense. A bit of stickiness can be fixed with gentle handling!
How Should I Store Leftover Bread?
Let the bread cool completely, then store it in a paper bag to keep it crusty or a plastic bag for softer texture. For longer storage, slice and wrap it tightly, then freeze it for up to 3 months. To enjoy, toast slices directly from frozen for a warm treat!