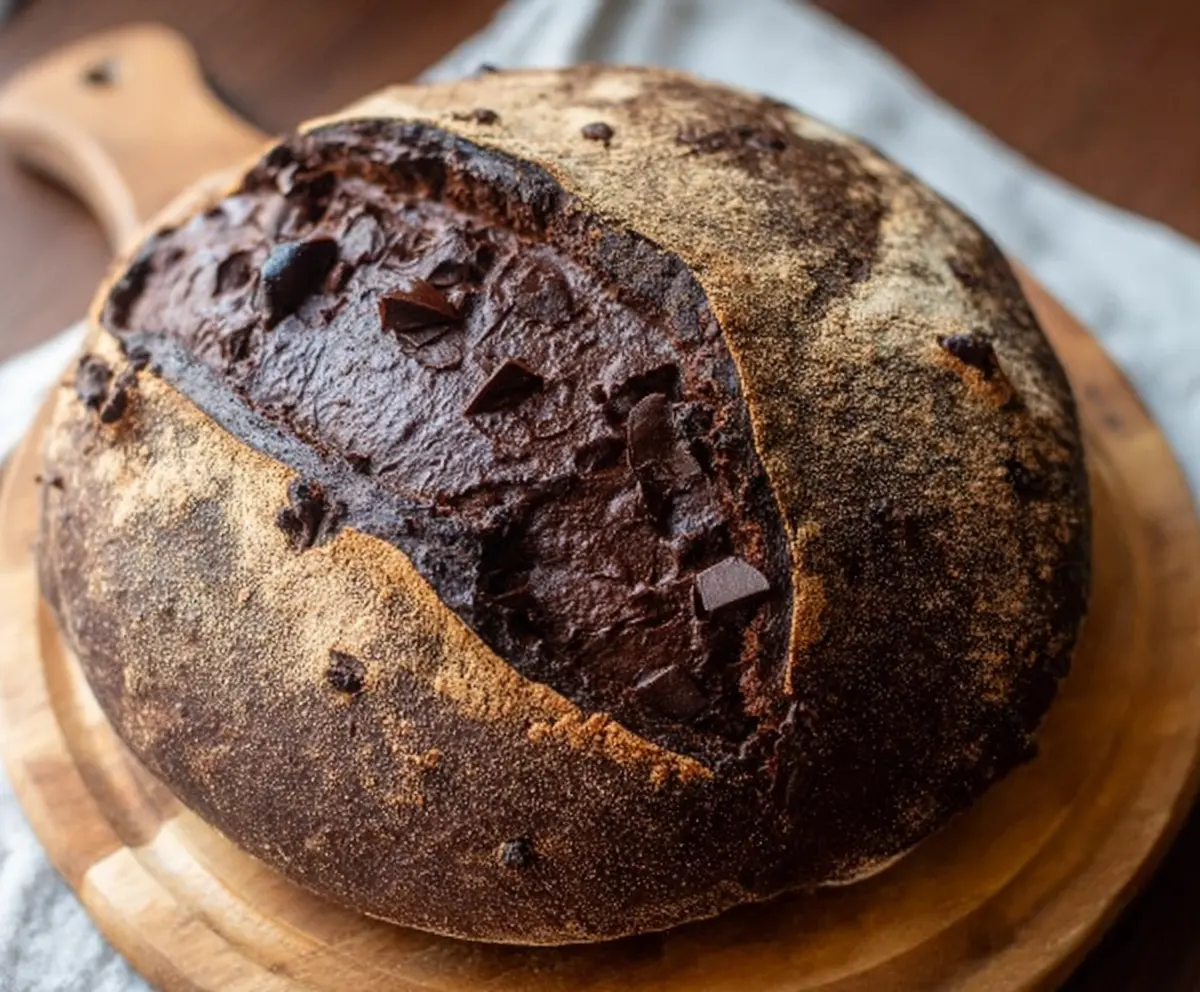
Double Chocolate Sourdough Bread is a delicious twist on your usual bread. It combines rich cocoa and tasty chocolate chips, making it perfect for chocolate lovers!
I love to enjoy this bread warm with a bit of butter or even toast it for breakfast. It’s like having dessert first thing! Can’t resist a good slice of chocolatey goodness! 😋
Key Ingredients & Substitutions
Bread Flour: It’s best to use bread flour for this recipe. It has a higher protein content that creates a chewier texture. If you don’t have it, you can substitute with all-purpose flour, but the bread may not rise as well.
Cocoa Powder: Unsweetened cocoa powder adds that deep chocolate flavor. If you’re looking for a less intense flavor, consider using a lighter cocoa or even carob powder. Just know it may change the overall taste.
Sourdough Starter: Be sure your starter is active and bubbly! If you are new to sourdough and don’t have a starter, you can try using store-bought yeast instead (about 2-3 tsp), but the flavor won’t be quite the same.
Dark Chocolate: Use good quality dark chocolate for rich flavor. You can swap it for milk chocolate if you prefer something sweeter, or even use chocolate chips. Adjust the amount to your taste!
How Do I Get the Bread to Rise Well?
Getting fluffy, well-risen bread takes some patience. The right fermentation time is key. After mixing your dough, let it sit at room temperature until you see bubbles and it has increased in size—this usually takes 4-6 hours, depending on the temperature in your home.
- Watch for visible air bubbles, which means the yeast is active and producing gas.
- Don’t rush the process! The longer fermentation helps develop flavor too.
Also, proofing the dough in the fridge overnight gives it more flavor and improves the dough’s structure. So, try not to skip this step for the best results!
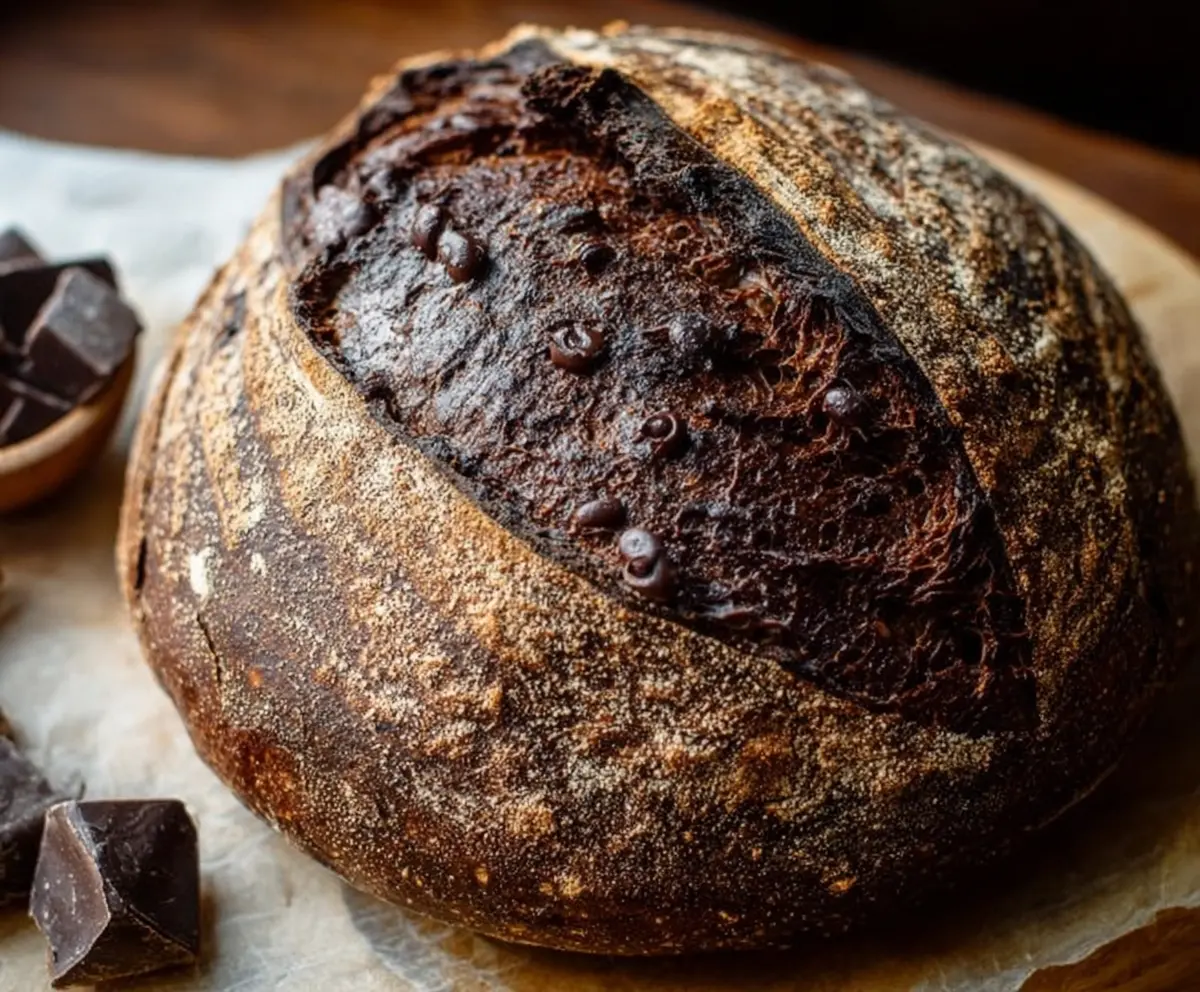
Double Chocolate Sourdough Bread
Ingredients You’ll Need:
For the Dough:
- 500g bread flour
- 50g unsweetened cocoa powder
- 350g water (room temperature)
- 100g active sourdough starter (fed and bubbly)
- 10g salt
- 150g dark chocolate chunks or chips
How Much Time Will You Need?
This recipe will take approximately 15 minutes for prep time, plus about 4-6 hours for fermentation, and then an overnight proofing in the fridge (8-12 hours). Baking adds another 40-45 minutes, so keep in mind you’ll need to plan ahead but the result is well worth the wait!
Step-by-Step Instructions:
1. Mixing the Ingredients:
In a large bowl, thoroughly mix the bread flour and cocoa powder together. It’s crucial to get them well integrated for even flavor. Once they are combined, add the room temperature water and your active sourdough starter. Stir everything until you get a shaggy dough. After that, let the dough rest for about 30 minutes. This resting period is called autolyse and helps develop the gluten!
2. Adding Salt and Developing Gluten:
Once the dough has rested, sprinkle the salt on top. To mix it in, gently fold the dough over itself a few times in the bowl, making sure the salt is well incorporated. Now you’ll develop the gluten! For the next 2 hours, perform a series of stretch and folds every 30 minutes. This means pulling one side of the dough up and folding it over the center. Rotate the bowl and repeat this process until you’ve gone around the whole dough.
3. Adding Chocolate:
After your last stretch and fold, gently fold in the dark chocolate chunks to coat them evenly throughout the dough. It’s delightful to have pockets of melty chocolate in your finished bread!
4. Fermenting the Dough:
Now it’s time to let the dough ferment! Cover the bowl with a cloth or plastic wrap and set it at room temperature. Let it rise for about 4-6 hours until you see it has increased in size and has those beautiful, visible air bubbles.
5. Shaping the Dough:
Once the dough has fermented, transfer it to a lightly floured surface. Shape it into a tight round boule by gently tucking the edges towards the center. This will help create surface tension which makes for a nice round loaf!
6. Final Proofing:
Place the dough seam side up into a basket or bowl lined with a floured towel. Cover it and slide it into the fridge for an overnight proof (8-12 hours). This cold fermentation is key for great flavor and texture.
7. Baking the Bread:
The next day, preheat your oven to 250°C (480°F) with a Dutch oven inside for at least 30 minutes. When ready, carefully transfer your dough onto a piece of parchment paper and score the top with a sharp knife to allow the bread to expand while baking. Now, place the dough into the hot Dutch oven and cover it with the lid.
8. Perfectly Baking:
Bake your bread for 20 minutes with the lid on. Then, remove the lid and bake for another 20-25 minutes until the crust is deep brown and sounds hollow when tapped. This is when it can achieve that beautiful crust!
9. Cooling:
Once it’s done baking, carefully transfer the loaf to a wire rack and let it cool completely before slicing. This will ensure that the crumb sets properly and makes for easier slicing.
Enjoy your deliciously rich and chocolate-filled sourdough bread—perfect as a decadent snack or dessert!
Can I Use All-Purpose Flour Instead of Bread Flour?
Yes, you can use all-purpose flour, but keep in mind that the bread may not rise as well and could result in a slightly different texture. Bread flour has a higher protein content that helps develop gluten for a chewier crumb.
What If My Sourdough Starter Isn’t Active?
Your sourdough starter should be fed and bubbly for best results. If it’s not active, try feeding it and waiting a few hours until it rises and becomes frothy. If you’re short on time, you can substitute with 2-3 teaspoons of instant yeast instead, but the flavor will differ.
Can I Make This Dough the Night Before and Bake in the Morning?
Absolutely! After shaping the dough, proof it in the refrigerator overnight. Just ensure to let it warm up a bit before baking, or you can bake it straight from the fridge—just be aware it might take a bit longer in the oven.
How Do I Store Leftover Bread?
Store any leftover bread in an airtight container at room temperature for up to 3 days. For longer storage, wrap it tightly in plastic wrap or foil and place it in the freezer. Just remember to let it thaw at room temperature before slicing!