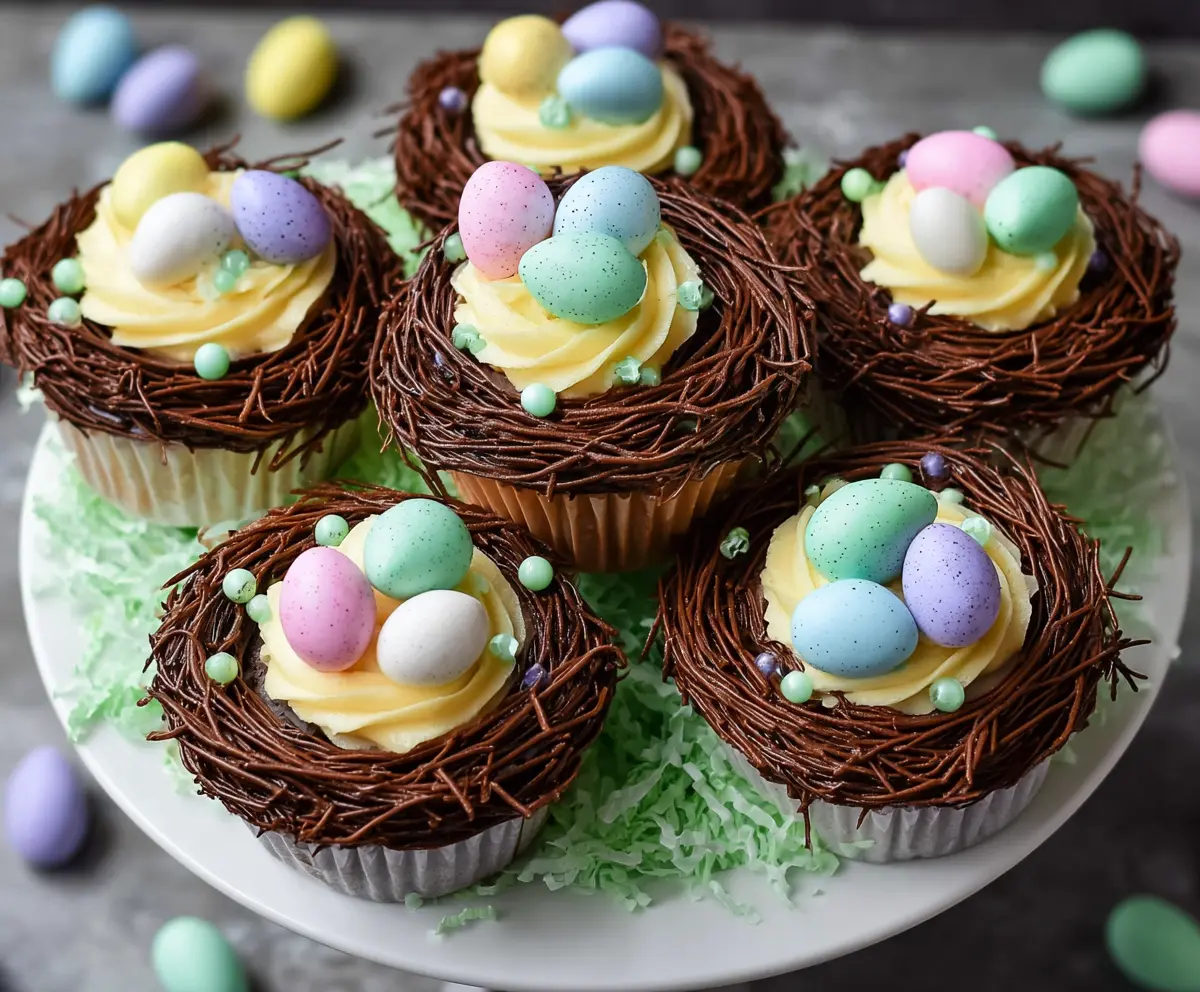
These fun Easter Egg Nest Cupcakes are a sweet treat that kids and adults love! They’re fluffy cupcakes topped with chocolate frosting and a sprinkle of crunchy chow mein noodles to create cute nests.
The best part? You get to decorate them with colorful candy eggs! It’s a great way to bring the family together in the kitchen. Trust me, the giggles and mess while decorating are half the fun! 🐣
Key Ingredients & Substitutions
All-Purpose Flour: This is your go-to flour for a light and fluffy cupcake. If you need a gluten-free option, consider using a 1:1 gluten-free flour blend. It’s a great way to make these cupcakes accessible.
Unsalted Butter: I always use unsalted butter so I can control the saltiness. If you’re short on butter, you can swap in margarine or a plant-based butter for a dairy-free option.
Granulated Sugar: This adds sweetness and moisture. You can substitute coconut sugar for a slightly different flavor. Just note that your cupcakes might turn out a little darker in color.
Cocoa Powder: For the chocolate nests, using semi-sweet chocolate gives a rich flavor. If you prefer a sweeter taste, milk chocolate works great too! For dairy-free, opt for dark chocolate that’s labeled as dairy-free.
Candy Coated Chocolate Eggs: These really bring color and fun! If you can’t find these, you could use small chocolate candies or even jelly beans for a similar look.
How Can I Make Sure My Cupcakes Are Fluffy and Tender?
Getting the right texture in your cupcakes is key! Follow these simple tips to ensure they are fluffy:
- **Creaming Butter & Sugar**: Beat them until light and fluffy. This incorporates air into the batter, helping it rise.
- **Don’t Overmix**: Once you combine the wet and dry ingredients, mix just until no flour spots remain. Overmixing can toughen the cupcakes.
- **Proper Baking**: Fill cupcake liners about 2/3 full. This allows room for the cupcakes to rise without overflowing.
What’s the Best Way to Prepare the Chocolate Nests?
Creating those cute chocolate nests can be a fun activity! Here’s how to nail it:
- **Melt the Chocolate**: Use gentle heat in the microwave or a double boiler. Stir until smooth, adding coconut oil to help with texture.
- **Create Nest Shape**: Use a fork or piping bag to drizzle the melted chocolate onto parchment, criss-crossing the lines. The goal is to make thin, twig-like shapes.
- **Set Carefully**: Let the nests set at room temperature or pop them in the fridge briefly. Work quickly but carefully when transferring them to your cupcakes.
With these tips and insights, you’re all set to make delightful Easter Egg Nest Cupcakes that will impress everyone! Enjoy your baking!
How to Make Easter Egg Nest Cupcakes
Ingredients You’ll Need:
For The Cupcakes:
- 1 1/2 cups all-purpose flour
- 1 1/2 tsp baking powder
- 1/4 tsp salt
- 1/2 cup unsalted butter, softened
- 1 cup granulated sugar
- 2 large eggs
- 2 tsp vanilla extract
- 1/2 cup whole milk
For The Buttercream Frosting:
- 1 cup unsalted butter, softened
- 3-4 cups powdered sugar, sifted
- 2-3 tbsp heavy cream or milk
- 2 tsp vanilla extract
- Yellow food coloring (optional)
For The Chocolate Nests:
- 6 oz semi-sweet or dark chocolate (chopped or chips)
- 1 tbsp coconut oil or vegetable oil
For Decoration:
- Candy coated chocolate eggs in pastel colors (pink, blue, green, purple, white)
- Small sugar pearls or edible beads in pastel shades
Time Needed:
This delightful recipe will take you about 30 minutes to prepare, plus an additional 18-22 minutes for baking and time for cooling the cupcakes. Make sure you have a little extra time for decorating and setting the chocolate nests!
Step-by-Step Instructions:
1. Preheat and Prepare:
Start by preheating your oven to 350°F (175°C). Line a 12-cup muffin pan with colorful cupcake liners to make your treats look festive!
2. Mix Dry Ingredients:
In a medium bowl, whisk together the flour, baking powder, and salt until combined. This will be the foundation for your cupcakes.
3. Cream Butter and Sugar:
In a large bowl, use an electric mixer to cream the softened butter and granulated sugar together until the mixture is light and fluffy. This should take about 3-4 minutes.
4. Add Eggs and Vanilla:
Crack in the eggs one at a time, beating well after each addition. Then, mix in the vanilla extract for that lovely flavor.
5. Combine Dry and Wet Ingredients:
Now, it’s time to combine! Alternately add the prepared dry ingredients and the milk to the butter mixture, starting and ending with the dry ingredients. Mix just until everything is combined.
6. Fill Cupcake Liners:
Divide the batter evenly among the cupcake liners, filling each one about 2/3 full to allow room for rising. This ensures they don’t overflow!
7. Bake the Cupcakes:
Pop the muffin pan into your preheated oven and bake for 18-22 minutes. Check for doneness by inserting a toothpick into the center; if it comes out clean, they’re good to go! Allow the cupcakes to cool completely on a wire rack.
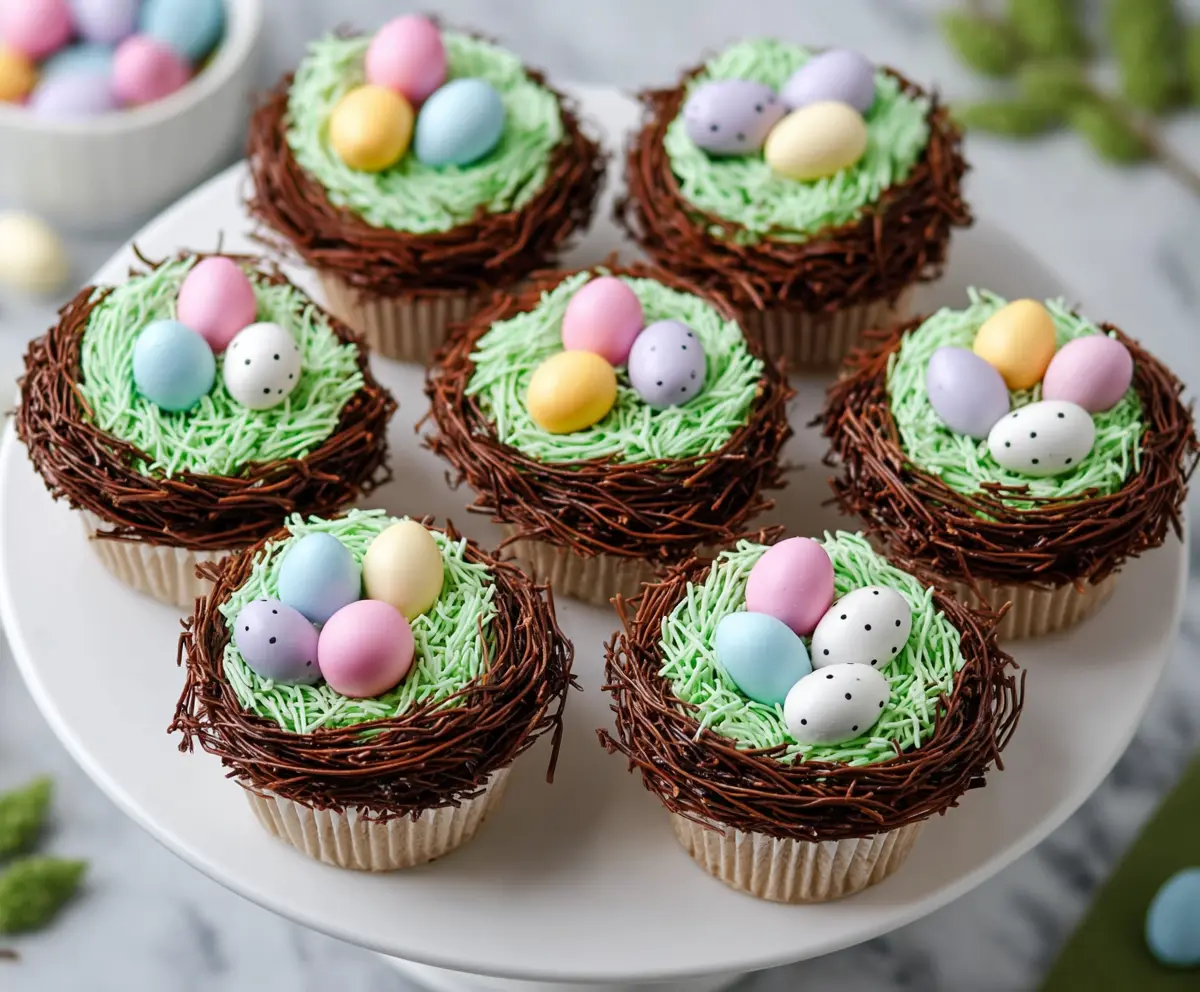
8. Make the Buttercream Frosting:
While the cupcakes are cooling, let’s prepare the frosting! Beat the softened butter in a bowl until creamy. Gradually add the sifted powdered sugar and mix until combined. Then add the vanilla and heavy cream. Beat the frosting until it’s light and fluffy. If you want a soft yellow color, add a few drops of yellow food coloring!
9. Prepare the Chocolate Nests:
For your chocolate nests, melt the chocolate with coconut oil in a microwave-safe bowl or double boiler. Stir until smooth and well combined.
10. Create Nest Designs:
To form the nests, spread the melted chocolate in thin lines on a piece of parchment paper using a fork or a piping bag. Crisscross the lines to imitate twigs. Let them set at room temperature or pop in the fridge briefly until they are firm but still pliable.
11. Frost the Cupcakes:
Once the cupcakes are completely cooled, pipe a swirl of the yellow buttercream frosting on top of each one.
12. Add the Chocolate Nests:
Carefully lift some of the chocolate twig shapes and arrange them around the frosting in a circular pattern, creating a nest shape.
13. Decorate with Candy:
Finally, place 2-3 pastel-colored candy eggs in the center of each nest and sprinkle small sugar pearls or edible beads around the nests for a finishing touch.
14. Serve and Enjoy:
Your festive Easter Egg Nest Cupcakes are now ready! Serve them immediately, or store them in a cool place to maintain the integrity of the chocolate nests. Happy celebrating!
Enjoy these adorable and delicious cupcakes that are perfect for any spring celebration!
Can I Use Different Types of Flour?
Yes! You can substitute all-purpose flour with a gluten-free flour blend if needed. Just make sure it’s a 1:1 conversion to maintain the right texture.
Can I Make the Cupcakes in Advance?
Absolutely! You can bake the cupcakes a day ahead. Just store them in an airtight container at room temperature. Frost them on the day you plan to serve to keep the frosting fresh.
What Should I Do If My Chocolate Nests Won’t Hold Their Shape?
If your chocolate nests aren’t setting well, make sure the chocolate is the right consistency – not too hot or runny. If needed, place them in the fridge for a few minutes to firm up further.
How Should I Store Leftover Cupcakes?
Store any leftover cupcakes in an airtight container in the refrigerator for up to 3 days. For best results, keep the decorating separate if possible, especially the chocolate nests, to preserve their texture.