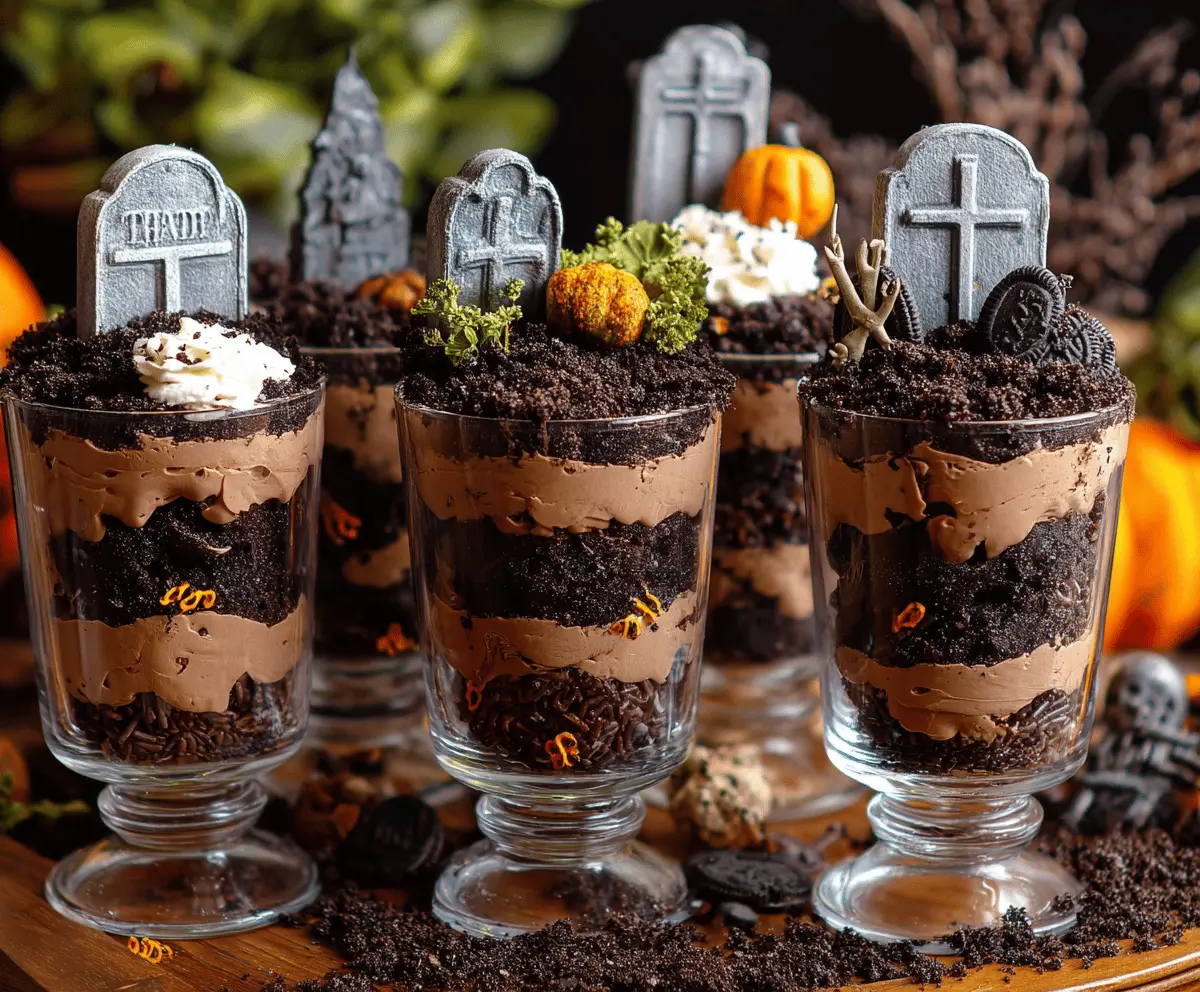
Graveyard Dirt Cups are a spooky and fun dessert perfect for Halloween! These cups are made with layers of chocolate pudding, crushed cookies, and whipped cream, all topped with gummy worms.
It’s like a little monster party in a cup! I love serving these to kids; their faces light up when they see the “dirt” and worms. It’s super easy to make and always a hit!
Key Ingredients & Substitutions
Chocolate Pudding: You can use store-bought or homemade chocolate pudding. If dairy-free is your preference, try almond or coconut milk pudding as a delicious substitute.
Oreo Cookies: While Oreos give that classic dirt flavor, feel free to use any chocolate sandwich cookies if you’re looking for a more budget-friendly option or a gluten-free version.
Whipped Cream: If you want a lighter option, consider using whipped coconut cream or a dairy-free whipped topping. It’s just as fluffy and tasty!
Tombstone Decorations: You can either buy edible decorations or create your own from fondant. Personalizing them can make the treat even more fun!
How Do You Get Those Layers Perfectly without Making a Mess?
Layering can be tricky, but it’s all about the right tools and patience! Start with a clear glass or cup so everyone can see your beautiful layers.
- Use a spoon to carefully add pudding without spilling, letting it settle at the bottom.
- For even layers, use a piping bag or a zip-top bag with the corner cut off to pipe in the pudding.
- When adding the crushed Oreo mixture, sprinkle it gently on top of the pudding to keep the layers distinct.
- Don’t rush! Take your time during each layer for the best visual effect.
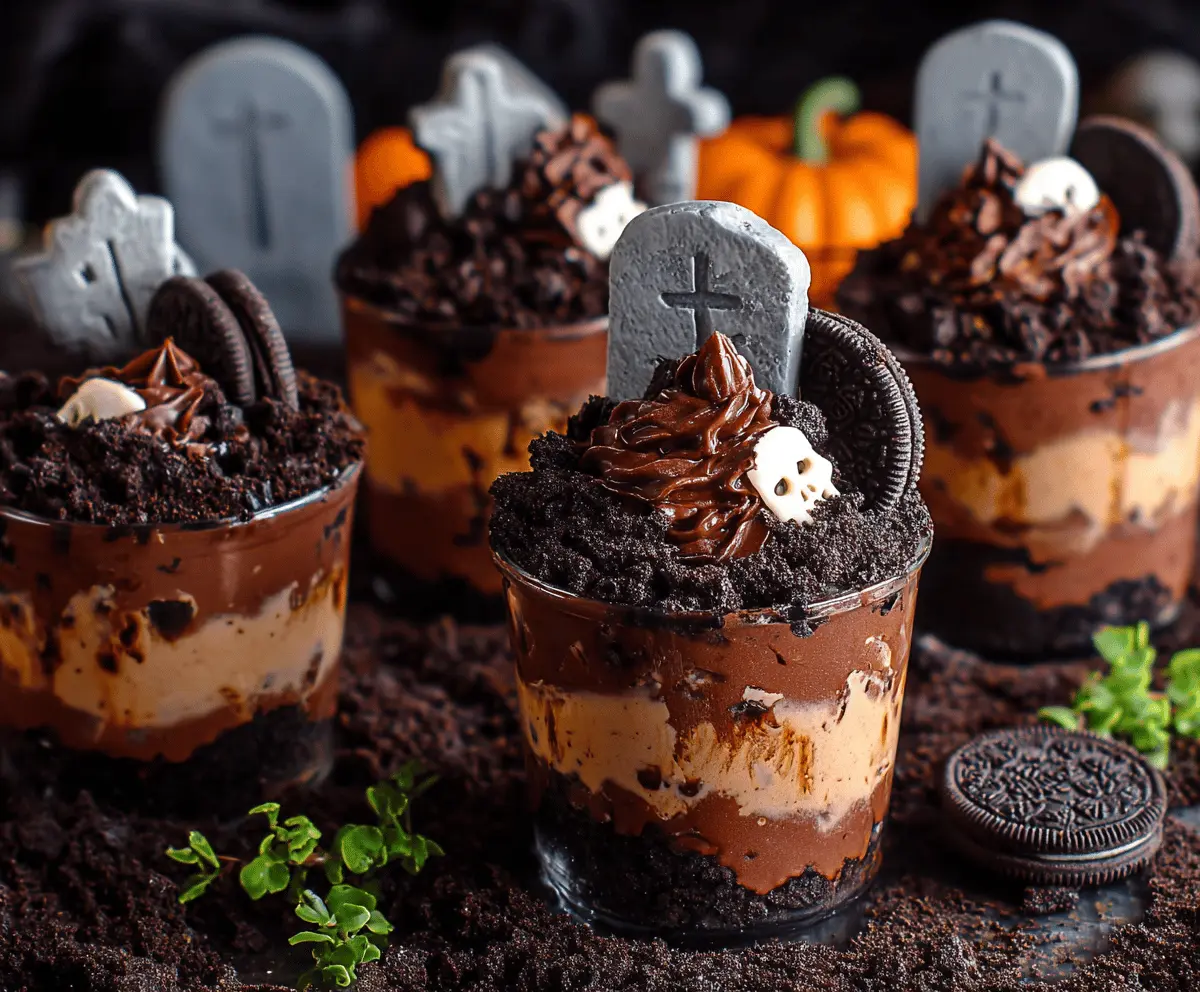
Graveyard Dirt Cups
Ingredients You’ll Need:
For the Layers:
- 2 cups chocolate pudding (prepared or store-bought)
- 1 package Oreo cookies (around 14-16 cookies)
- 1 cup chocolate sprinkles
- 1 cup whipped cream
For Decoration:
- Miniature tombstone decorations (can be edible or plastic Halloween picks)
- Small Halloween-themed candy pumpkins or candy moss (optional)
- Gummy worms or candy bones (optional for extra graveyard effect)
How Much Time Will You Need?
This recipe will take about 20 minutes of preparation time. After assembling, it’s best to chill the cups in the fridge for at least 30 minutes to set. In total, you’re looking at about 50 minutes before they’re ready to dig in!
Step-by-Step Instructions:
1. Prepare the “Dirt”:
First, place the Oreo cookies in a food processor or put them in a zip-top bag and crush them into fine crumbs. This will give you the “dirt” appearance for your graveyard. Mixing in the chocolate sprinkles will add extra fun and texture.
2. Layer the Pudding:
Take your clear cups or glasses and spoon a layer of chocolate pudding into the bottom. Fill each cup about a third of the way full so you have plenty of room for the other layers.
3. Add Crushed Oreos:
On top of the pudding layer, sprinkle a layer of the crushed Oreo and chocolate sprinkle mixture. This will look like dirt and provide a nice contrast to your creamy pudding.
4. Repeat Layers:
Next, add another layer of chocolate pudding, filling the cup slightly more. Then, top with another layer of the Oreo mixture. You want to aim for at least two or three layers in total depending on the size of your cups.
5. Final Touches:
Finish off each cup with a dusting of the crushed Oreos on top to mimic fresh dirt. Then, add a dollop of whipped cream to create a “graveyard foam” effect.
6. Decorate:
Insert a miniature tombstone decoration into each cup. Get creative with additional decor like candy pumpkins, moss, or small candy bones around the tombstone. For an added creepy effect, tuck small gummy worms or candy bones into the dirt.
7. Chill and Serve:
Cover your cups and chill them in the fridge for at least 30 minutes to let the flavors meld and to keep them cool. When ready to serve, grab a cup, let the Halloween festivities begin, and enjoy your delicious graveyard treats!
This recipe creates a striking and fun Halloween dessert with layers of creamy chocolate pudding and crunchy “dirt,” topped with themed decorations that perfectly imitate a haunted graveyard in a cup!
Can I Use Homemade Pudding Instead of Store-Bought?
Absolutely! Homemade chocolate pudding will add a rich flavor to your Graveyard Dirt Cups. Just make sure it’s fully cooled before layering to avoid melting the cookies and ruining the layers.
What Can I Substitute for Oreo Cookies?
If you need a substitute, any chocolate sandwich cookies will work well! For a gluten-free option, try using gluten-free chocolate cookies or even crushed chocolate graham crackers.
How Long Can I Store Leftovers?
You can store any leftover Graveyard Dirt Cups in an airtight container in the fridge for up to 2 days. Just keep in mind that the Oreos might lose some crunch over time!
Can I Make These Ahead of Time?
Yes, these cups are perfect for making ahead of time! You can prepare them a day in advance and keep them in the fridge until you’re ready to serve. Just add any decorations right before serving for the best presentation.