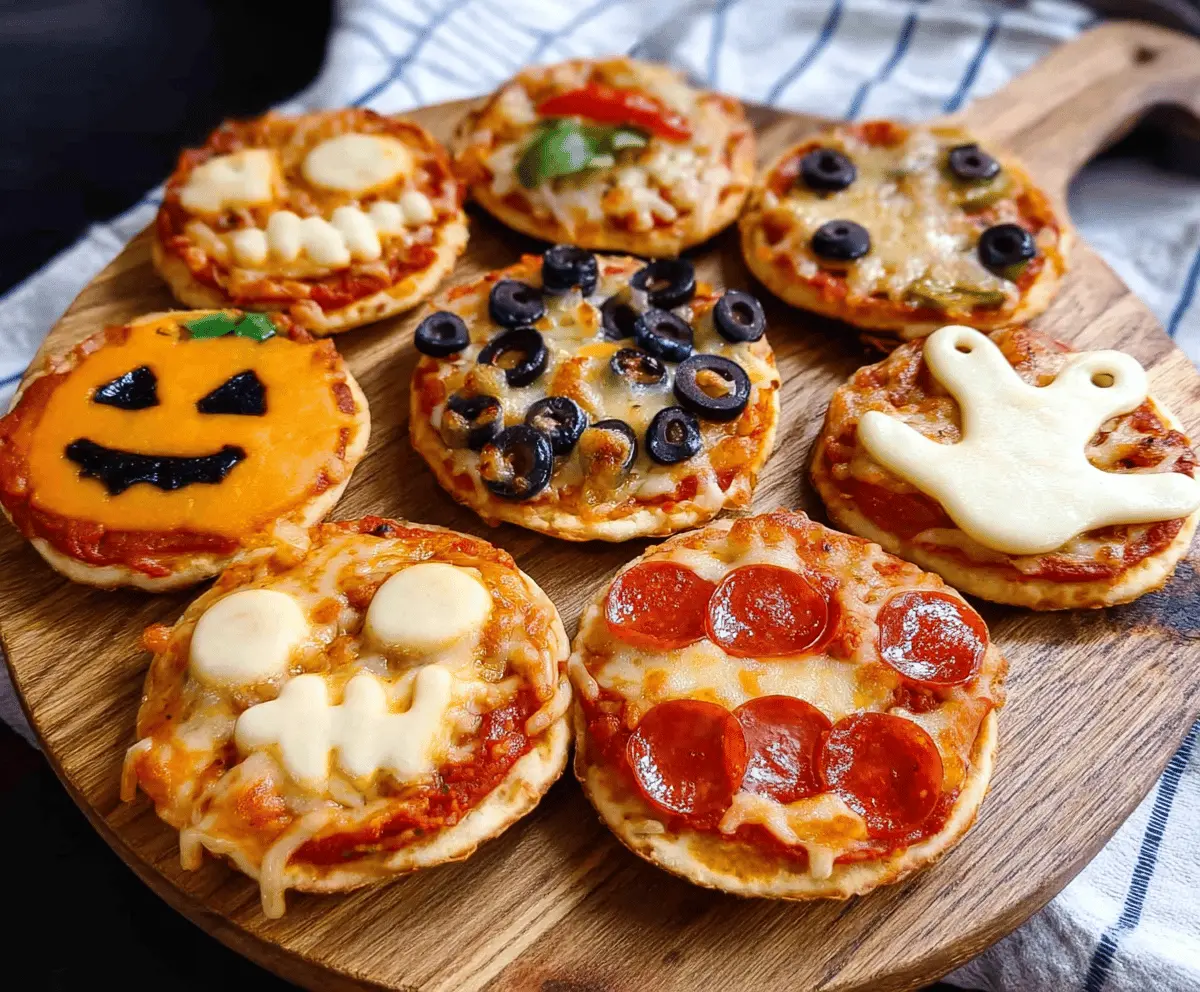
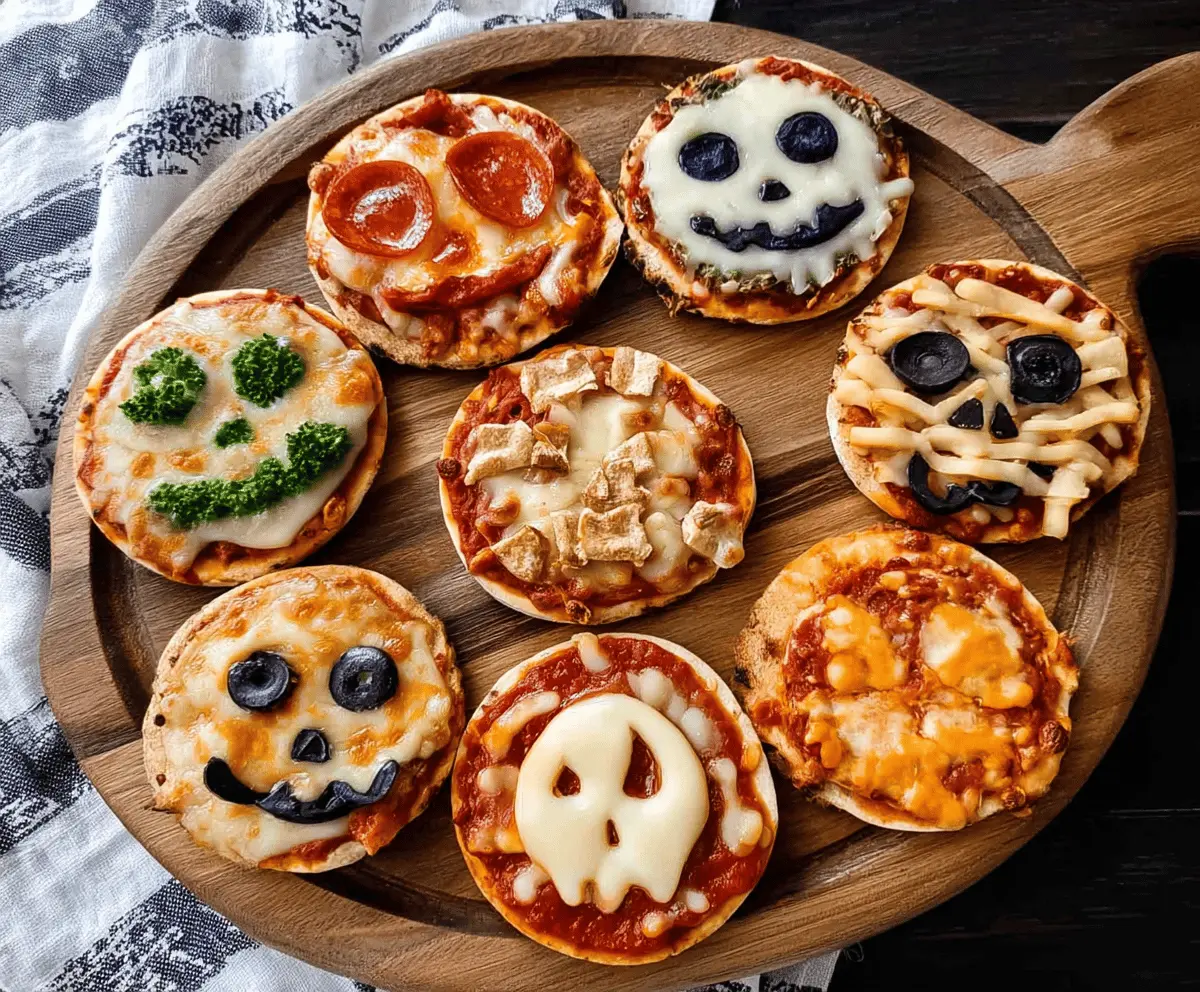
These Halloween Mini Pizzas are the ultimate spooky-fun party bite—adorably ghoulish, crispy around the edges, and irresistibly cheesy. They’re sized for little hands (or big snackers), bake in minutes, and double as a craft activity where everyone can “carve” edible Jack-o’-lanterns, arrange olive spiders, or shape string-cheese mummies. Whether you’re hosting a classroom celebration, feeding a hungry trick-or-treat crew, or planning a cozy movie night, these minis bring big smiles with minimal effort.
Start with store-bought dough or pitas/English muffins, add a quick, garlicky pizza sauce, then decorate with easy toppings that transform into ghosts, bats, and monster faces as they bake. They’re festive without being fussy—and because each pie is personal, picky eaters can customize theirs while the adventurous go wild with toppings. Serve them hot from the oven with a side of warm marinara for dipping and watch the tray vanish.
Make a double batch and keep extras warm in a low oven; they’re fantastic for grazing, and leftovers reheat beautifully in an air fryer for that fresh-from-the-oven crisp.
Key Ingredients & Substitutions
These pantry-friendly staples are easy to swap so you can use what you have—and still get picture-perfect spooky pies.
Bases (mini crusts): Refrigerated pizza dough cut into 3–4 inch rounds, mini naan, pita halves, or split English muffins all work. Gluten-free flatbreads are great for GF guests.
Pizza sauce: A jarred marinara or pizza sauce keeps things fast. Stir in a pinch of garlic powder and oregano for extra pizzeria flavor. Pesto or garlic butter are fun alternatives.
Cheese: Low-moisture mozzarella shreds for melt; string cheese strips are ideal for mummy “bandages.” Provolone or sliced mozzarella makes clean “ghost” shapes; cheddar gives bright orange pumpkins.
Olives: Black olives become spider bodies/legs or bat wings; sliced green olives make eerie “monster eyes.”
Pepperoni & cured meats: Standard or mini pepperoni for classic pies; cut with small cutters for pumpkins or mouths. Turkey pepperoni works well, too.
Vegetable toppers: Bell peppers (green stems for pumpkins), red onion, mushrooms, and spinach add color and crunch. Use strips for smiles and triangles for noses.
Accents: Candy eyes won’t bake well—use dots of cream cheese or tiny mozzarella pearls after baking for eye highlights.

Equipment You’ll Need
- Rimmed baking sheets (two for batching)
- Parchment paper or silicone mats
- 3–4 inch round cutter or drinking glass (if using dough)
- Rolling pin (for dough)
- Small knives or kitchen shears (for shaping toppings)
- Pastry brush or spoon (for sauce)
Flavor Variations & Add-Ins
- Mummy minis: Lay thin strips of string cheese in crisscross bands over sauce; add olive-slice “eyes.”
- Jack-o’-lanterns: Use cheddar slices cut into pumpkin shapes; add green pepper stems and olive or pepper “faces.”
- Ghost pies: Top with a tear-drop slice of provolone or mozzarella; dot two olive “eyes.”
- Spider webs: Pipe thin sour cream or ranch lines after baking; set a halved olive “spider” with slivered olive legs.
- Bat night: Cut bat shapes from pepperoni or black olive halves; place on a mozzarella-covered base.
- Veggie monsters: Use spinach hair, pepper eyebrows, corn teeth, and mushroom noses for goofy faces.
- BBQ chicken twist: Swap sauce for BBQ, add shredded rotisserie chicken and red onion, then “bandage” like mummies with string cheese.
How to Make Halloween Mini Pizzas
Ingredients You’ll Need:
- 1 lb refrigerated pizza dough or 8–12 mini naan/pita rounds/English muffin halves
- 3/4–1 cup pizza sauce or marinara
- 1 1/2–2 cups shredded low-moisture mozzarella
- 4 string cheese sticks (for mummy wraps), optional
- 6–8 cheddar or provolone slices (for pumpkins/ghosts), optional
- 1/2 cup sliced black olives + 1/4 cup whole olives
- 1/2 cup sliced green olives (optional)
- 1 cup assorted toppings: mini pepperoni, bell pepper strips, mushrooms, red onion, spinach
- 1–2 tablespoons olive oil
- 1 teaspoon Italian seasoning + 1/2 teaspoon garlic powder
- Kosher salt and black pepper, to taste
- For serving (optional): Warm marinara for dipping, red pepper flakes
How Much Time Will You Need?
About 15 minutes to prep and decorate, 8–12 minutes to bake the first batch (depending on base and oven), plus a few minutes to repeat. Total: roughly 30 minutes.
Step-by-Step Instructions:
1. Prep the bases
Heat oven to 450°F (232°C). Line baking sheets with parchment. If using dough, dust the counter lightly with flour and roll to 1/4 inch thick. Cut 3–4 inch rounds and transfer to sheets. Brush each base lightly with olive oil; sprinkle with a pinch of Italian seasoning and garlic powder for extra flavor.
2. Sauce & cheese
Spoon 1–2 teaspoons sauce onto each base, leaving a tiny border. For classic minis, sprinkle shredded mozzarella. For mummies/ghosts/pumpkins, reserve shredded cheese and top with sliced cheese shapes or string-cheese strips as directed below.
3. Decorate spooky faces
Create designs: crisscross string cheese for mummies with olive “eyes”; cut cheddar pumpkins and add pepper “stems” and olive features; lay a ghost-shaped provolone slice with olive eyes; arrange olive “spiders” (halved olive for body, slivered legs). Add pepperoni, peppers, mushrooms, and onion to build faces or patterns.
4. Bake
Bake on the middle rack 8–12 minutes (bases vary): cheese should be melted and bubbly and edges golden. English muffins/pitas bake on the shorter side; raw dough may need a minute or two more. Rotate pans halfway for even browning.
5. Finish & serve
Season with a pinch of salt and pepper. Cool 2 minutes to set cheese, then serve with warm marinara for dipping. Keep subsequent batches warm in a 200°F oven.
Pro Tips for Best Texture & Taste
Small tweaks make minis crispy outside, soft inside, and delightfully decorated.
- Dry toppings: Pat olives and veggies dry so cheese adheres and bases stay crisp.
- Thin sauce layer: Too much sauce leads to slippage—aim for a light swipe.
- Preheat fully: A hot oven ensures quick melt and crisp bottoms without drying.
- Cut cheese cold: Shape ghosts/pumpkins from cold slices for cleaner edges.
- Batch assembly line: Sauce all bases, then decorate—this keeps bake times consistent.

Frequently Asked Questions
Can I make these ahead?
Assemble up to 4 hours in advance (store on parchment-lined trays, uncovered in the fridge). Bake just before serving. For longer prep, par-bake bases 3–4 minutes, cool, then decorate and bake to finish.
How do I make them gluten-free or dairy-free?
Use GF flatbreads or dough and confirm toppings are GF. For dairy-free, use plant-based mozzarella shreds and skip string-cheese wraps—thin onion strips can mimic mummy bandages.
What’s the best way to reheat leftovers?
Air fryer at 350°F for 2–4 minutes or oven at 400°F for 5–7 minutes restores crisp edges and melty cheese. Microwaving softens the crust.
Can kids help decorate?
Absolutely—set up a toppings “studio” with bowls of olives, peppers, and pre-cut cheese shapes. Let kids assemble on parchment; adults handle oven duty.