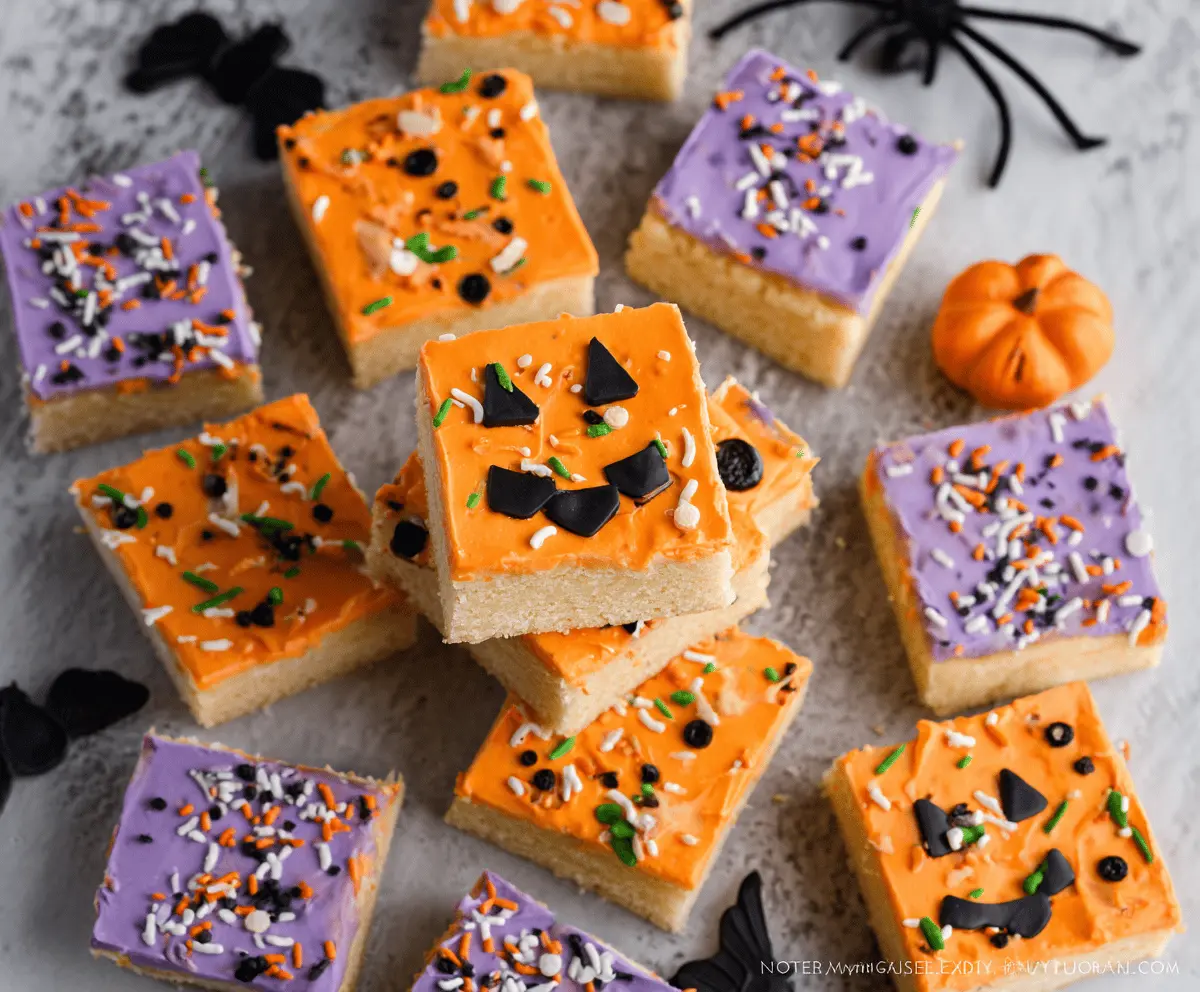
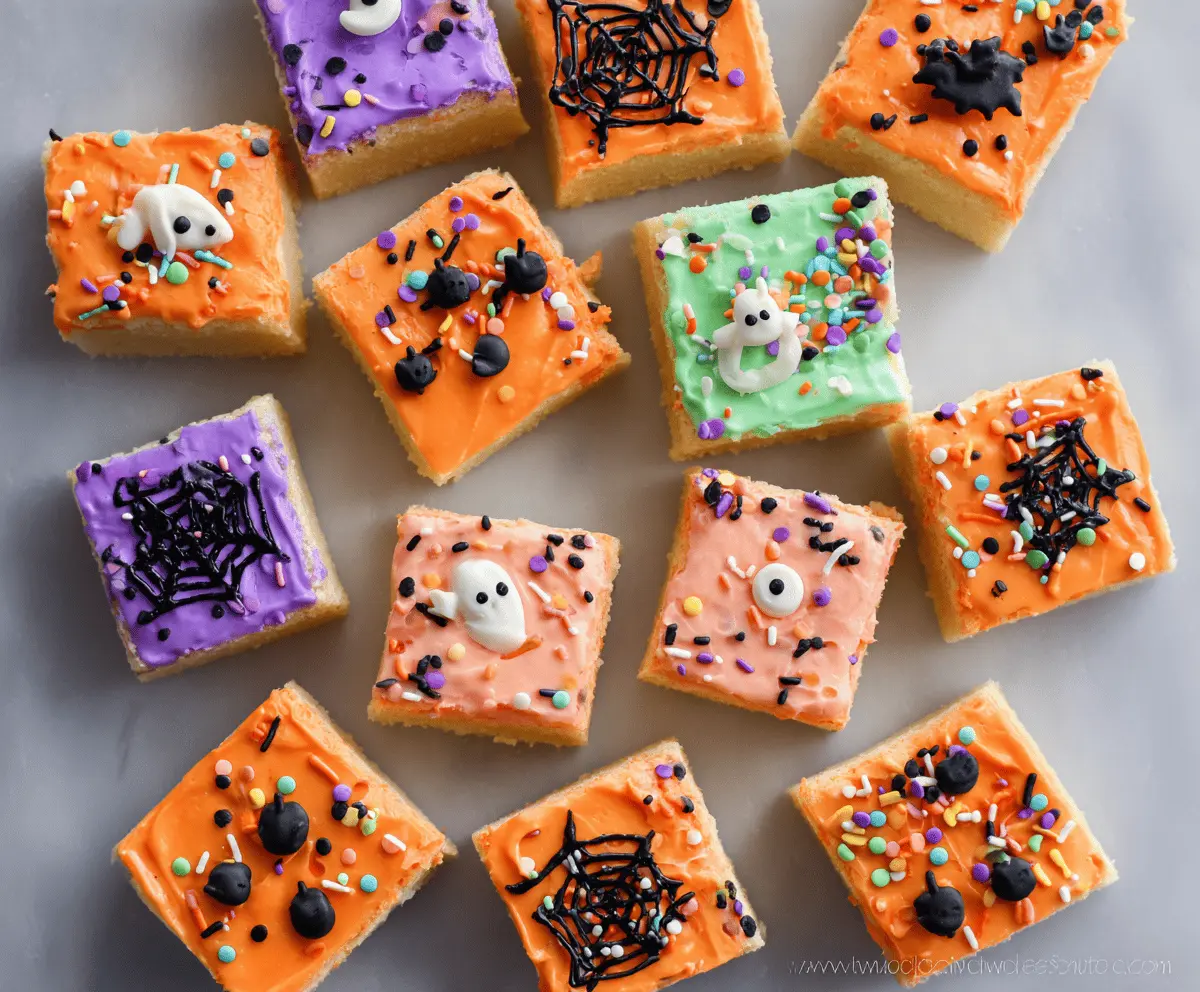
These Halloween Sugar Cookie Bars are festive and fun! Soft, chewy, and topped with vibrant sprinkles, they bring a little spooky sweetness to your holiday.
Who can resist a cookie bar that looks this cute? I love cutting them into different shapes for a festive touch. Perfect for parties or just a sweet treat at home! 🎃
Key Ingredients & Substitutions
All-Purpose Flour: This is essential for the structure of your cookie bars. If you’re looking for a gluten-free option, try using a 1:1 gluten-free baking flour blend.
Sour Cream: This adds moisture and tenderness to the cookies. Greek yogurt is a great substitute if you need a dairy-free option. You could also use plain yogurt.
Butter: Unsalted butter is preferred for better control over salt levels. If you’re in a pinch, margarine or a plant-based butter can work well too.
Food Coloring: Using gel food coloring gives a vibrant hue, but liquid coloring is okay if that’s what you have. Just remember that liquid coloring may alter the frosting’s consistency.
How Do You Make Your Cookie Bars Soft and Chewy?
For soft, chewy cookie bars, pay special attention to baking time and dough mixing. Here are a few tips:
- Ensure the butter is room temperature but not melted; this helps with a fluffy texture.
- Avoid overmixing the dough after adding the flour. Just mix until combined to keep the bars tender.
- Check for doneness a few minutes early; you want the edges nice and golden while the center is still soft.
- Let them cool completely before frosting to prevent the frosting from melting.
With these tips and tricks, you should have delicious Halloween Sugar Cookie Bars that are sure to impress! Enjoy making them as much as eating them! 🎃
How to Make Halloween Sugar Cookie Bars
Ingredients You’ll Need:
For the Cookie Bars:
- 2 ½ cups all-purpose flour
- 1 tsp baking powder
- ½ tsp salt
- 1 cup unsalted butter, softened
- 1 ¼ cups granulated sugar
- 2 large eggs
- 2 tsp vanilla extract
- ½ cup sour cream
For the Frosting:
- 1 cup unsalted butter, softened
- 4 cups powdered sugar
- 2-4 tbsp milk or heavy cream
- 2 tsp vanilla extract
- Food coloring (purple, orange, green, and pink)
For Decorating:
- Halloween-themed sprinkles (ghosts, spiders, eyeballs, etc.)
- Black decorating gel or icing for spider webs and spiders
How Much Time Will You Need?
You’ll need about 15 minutes for preparation and around 25-30 minutes for baking. Once baked, allow time for cooling and frosting, plus at least 30 minutes for the frosting to set. In total, expect about 1.5 hours before you can enjoy your sweet treats!
Step-by-Step Instructions:
1. Prepare Your Baking Pan:
Start by preheating your oven to 350°F (175°C). Line a 9×13-inch baking pan with parchment paper, and lightly grease it to prevent sticking.
2. Combine Dry Ingredients:
In a medium bowl, whisk together the flour, baking powder, and salt until well mixed. This helps to evenly distribute the dry ingredients. Set this mixture aside for later.
3. Cream Butter and Sugar:
In a large mixing bowl, beat the softened butter and granulated sugar together until the mixture is light and fluffy. This should take about 3-4 minutes.
4. Add Eggs and Vanilla:
Add the eggs one at a time, mixing well after each addition. Then, mix in the vanilla extract to add flavor.
5. Incorporate Sour Cream:
Beat in the sour cream until everything is well blended and smooth. This will give your cookie bars a nice, moist texture.
6. Mix Dry Ingredients In:
Gradually add your dry flour mixture to the wet ingredients, mixing just until combined. Be careful not to overmix; you want the dough to be soft and tender.
7. Spread the Dough:
Evenly spread the cookie dough into your prepared baking pan, smoothing out the top with a spatula.
8. Bake:
Place the pan in the preheated oven and bake for 25-30 minutes. The edges should be golden brown, and a toothpick inserted into the center should come out clean.
9. Cool:
Remove the cookie bars from the oven and let them cool completely in the pan on a wire rack. Patience is key here!
10. Make the Frosting:
In a mixing bowl, beat the softened butter until fluffy. Gradually add the powdered sugar, mixing until combined. Then add the vanilla extract and 2 tablespoons of milk. Beat until the frosting is smooth and creamy. Adjust the consistency with more milk if necessary.
11. Color the Frosting:
Divide the frosting into separate bowls and tint each with your choice of food coloring: purple, orange, green, and pink to match the festive Halloween theme.
12. Frost the Cookie Bars:
Once the cookie bars are fully cooled, spread the colored frosting over the top of each bar, creating a fun and festive look.
13. Decorate:
Add Halloween-themed sprinkles on top, and use black decorating gel or icing to pipe spider webs and cute little spiders for extra fun!
14. Set and Slice:
Let the frosting set for at least 30 minutes before cutting the bars into squares. Your treat is now ready to serve!
Enjoy your festive and delicious Halloween Sugar Cookie Bars! They’re perfect for parties, gatherings, or just a delightful treat at home. Happy Halloween! 🎃
Can I Use Whole Wheat Flour Instead of All-Purpose Flour?
Yes, you can substitute whole wheat flour for all-purpose flour, but consider using a 50/50 mix of whole wheat and all-purpose flour for better texture. Whole wheat flour can make the bars denser, so adjusting the proportions can help achieve a lighter result.
How Should I Store Leftover Cookie Bars?
Store any leftover Halloween Sugar Cookie Bars in an airtight container at room temperature for up to 3 days. For longer storage, you can refrigerate them for up to a week. Make sure to separate layers with parchment paper to prevent sticking.
Can I Freeze the Cookie Bars?
Absolutely! To freeze, wrap the cooled cookie bars tightly in plastic wrap and then place them in a freezer-safe container. They can be frozen for up to 3 months. Thaw in the refrigerator overnight before enjoying!
What Should I Do If My Frosting Is Too Thick?
If your frosting is too thick, simply add a tablespoon of milk or heavy cream at a time, mixing well until you reach your desired consistency. It should be smooth and spreadable but not runny!