
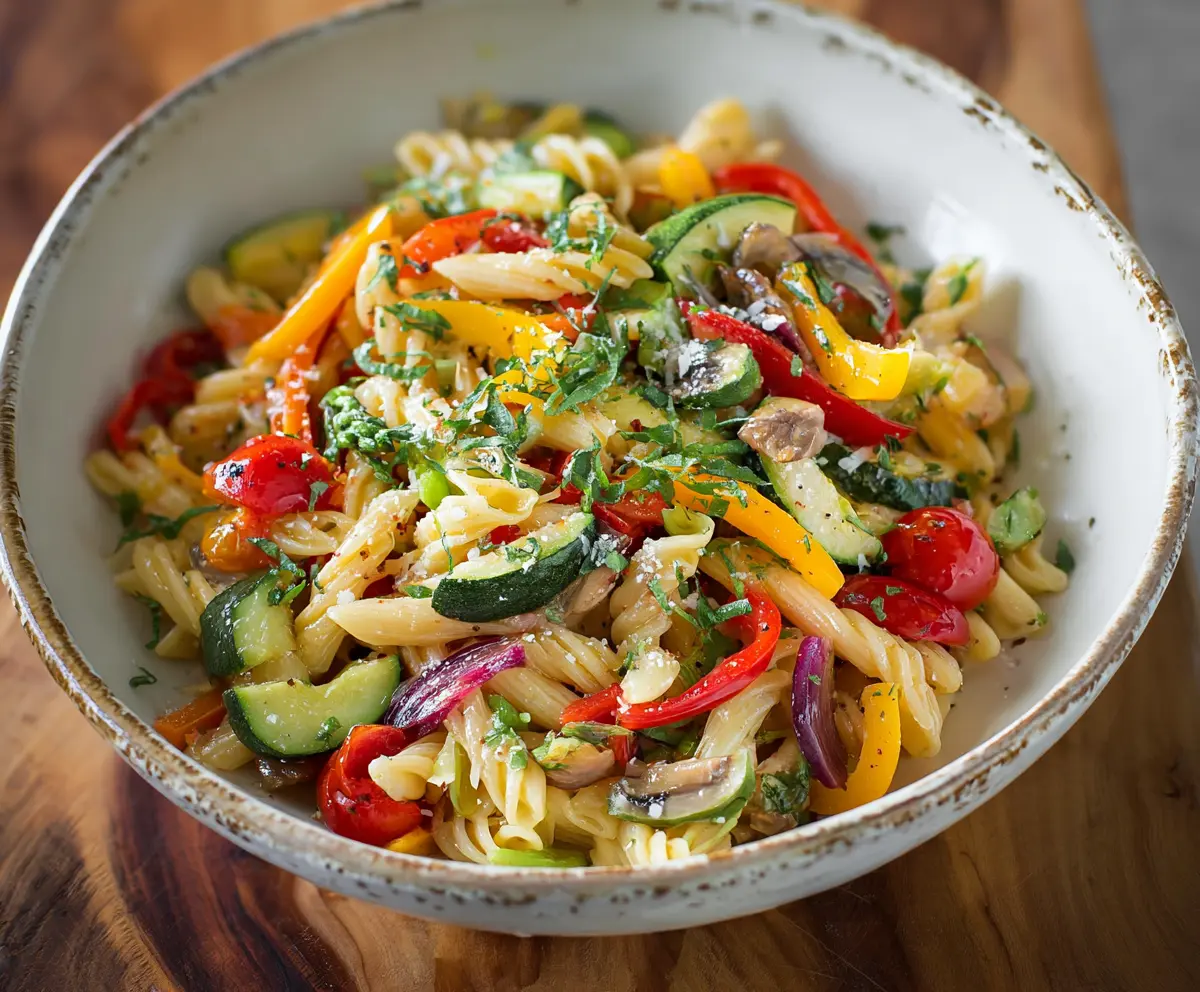
Pasta Primavera is a colorful dish loaded with fresh, crunchy veggies like bell peppers, zucchini, and broccoli. It’s light and tasty, perfect for any meal!
I love how easy it is to make—just cook your pasta, toss in the veggies, and sprinkle some cheese on top. It feels like spring on a plate! 🌼
Key Ingredients & Substitutions
Pasta: I like using penne or casarecce for this dish. They hold the sauce well. If you want a gluten-free option, try brown rice pasta or quinoa pasta instead; they’ll work just fine.
Vegetables: This recipe shines with fresh vegetables! If you’re missing any, feel free to swap them out. Snow peas, carrots, or even snap peas can give a nice crunch. Don’t hesitate to use frozen veggies if that’s what you have on hand.
Garlic: Fresh garlic is best for flavor, but garlic powder can be a quick substitute if needed. Just remember to use less, as powdered garlic is stronger!
Parmesan Cheese: While adding Parmesan is optional, it does enhance the dish. If you’re looking for a non-dairy option, try nutritional yeast or a vegan parmesan substitute.
Olive Oil: Extra virgin olive oil gives a rich flavor. If you’re out, grapeseed or avocado oil can also work in a pinch!
How Do You Cook Veggies So They Stay Crisp?
The secret to keeping your vegetables crisp is not to overcook them! Here’s how to ensure they stay colorful and crunchy:
- Start with high heat. This helps quickly cook the outside while keeping the inside crunchy.
- Add harder veggies first, like broccoli and asparagus, since they need a bit more time to soften. Cook them for about 3-4 minutes before adding the softer ones.
- Keep stirring! Move the veggies around to let them cook evenly without hanging around too long.
- Look for bright colors and a tender-crisp texture. If they look a bit vibrant—just like the spring season—you’re on track!
By following these steps, you’ll have a Pasta Primavera that’s bursting with flavor and texture!
How to Make Pasta Primavera
Ingredients You’ll Need:
Pasta and Vegetables:
- 8 oz penne or casarecce pasta
- 1 cup broccoli florets
- 1 cup asparagus spears, trimmed and cut into 2-inch pieces
- 1/2 cup yellow squash, sliced
- 1/2 cup zucchini, sliced
- 1/2 cup red bell pepper, sliced
- 1/2 cup orange bell pepper, sliced
- 1/2 cup cherry tomatoes, halved
- 1/4 cup red onion, thinly sliced
Flavorings and Garnish:
- 2 cloves garlic, minced
- 3 tbsp olive oil, divided
- 1/4 cup grated Parmesan cheese (optional)
- 1 tbsp chopped fresh parsley
- 1 tsp dried Italian seasoning or mixed herbs
- Salt and freshly ground black pepper to taste
- Red pepper flakes (optional, for a mild heat)
How Much Time Will You Need?
You’ll need about 20 minutes to make this delicious Pasta Primavera. This includes around 10 minutes for prep, and another 10 minutes to cook everything. Super quick and tasty!
Step-by-Step Instructions:
1. Cook the Pasta:
Start by bringing a large pot of salted water to a boil. Once boiling, add your pasta and cook it according to the package instructions until it’s al dente. This usually takes about 8-10 minutes. Once cooked, drain the pasta but save about 1/2 cup of the pasta water for later use, just in case you need to loosen your sauce.
2. Sauté the Garlic:
In a large skillet, heat 2 tablespoons of olive oil over medium heat. Add the minced garlic and sauté for about 30 seconds, or until it becomes fragrant. Be careful not to burn it!
3. Add the Broccoli and Asparagus:
Now it’s time to add the broccoli florets and asparagus pieces to the skillet. Cook these for about 3-4 minutes, stirring occasionally, until they start to soften but still hold some crunch.
4. Add More Veggies:
Next, add the sliced yellow squash, zucchini, and both types of bell peppers to the skillet. Cook everything together for another 3-4 minutes. You want the vegetables to be tender but still crisp – colorful is the way to go!
5. Toss in the Onions and Tomatoes:
Add the red onion and cherry tomatoes to the skillet. Cook for an additional 2 minutes until the tomatoes warm through and the onions soften slightly.
6. Season the Veggies:
Sprinkle the vegetables with salt, freshly ground black pepper, dried Italian seasoning, and red pepper flakes if you want a bit of heat. Stir everything together to mix the flavors.
7. Combine Pasta and Veggies:
Now, add the cooked pasta to the skillet with the veggies. Drizzle with the remaining 1 tablespoon of olive oil and gently toss everything together. If it looks a bit dry, use the reserved pasta water a little at a time until you reach your desired consistency.
8. Finishing Touches:
Remove the skillet from heat. Sprinkle the chopped parsley and grated Parmesan cheese over the top. Toss lightly again to combine everything well.
9. Serve and Enjoy:
Serve your Pasta Primavera immediately, garnished with extra parsley or cheese if you’d like. Dive in and enjoy your vibrant, fresh meal!
Enjoy your fresh and colorful Pasta Primavera!
Can I Use Different Vegetables in This Pasta Primavera?
Absolutely! This recipe is very flexible. Feel free to swap out any of the vegetables for your favorites or what you have on hand. Vegetables like snap peas, carrots, or even spinach can work wonderfully!
How Do I Store Leftovers?
Leftovers can be stored in an airtight container in the refrigerator for up to 3 days. To reheat, simply warm it on the stove over low heat or in the microwave, adding a splash of olive oil or pasta water to freshen it up.
Can I Make This Recipe Vegan?
Yes, you can easily make this Pasta Primavera vegan! Just omit the Parmesan cheese or substitute it with a vegan cheese or nutritional yeast for a cheesy flavor without the dairy.
What Pasta Works Best for Primavera?
Penne or casarecce are great choices as they hold the sauce well. However, feel free to use any type of pasta you like, including whole wheat or gluten-free options!