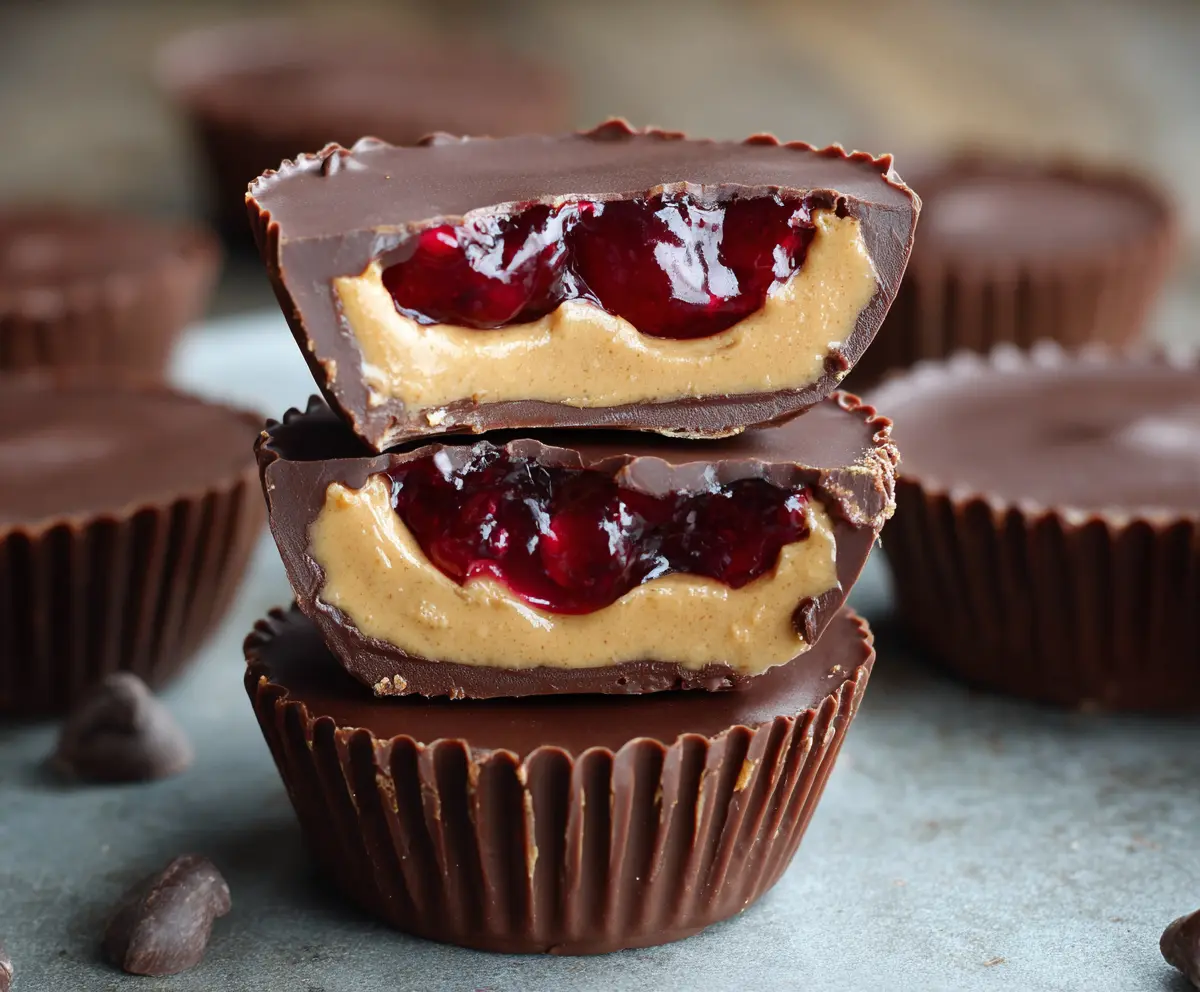
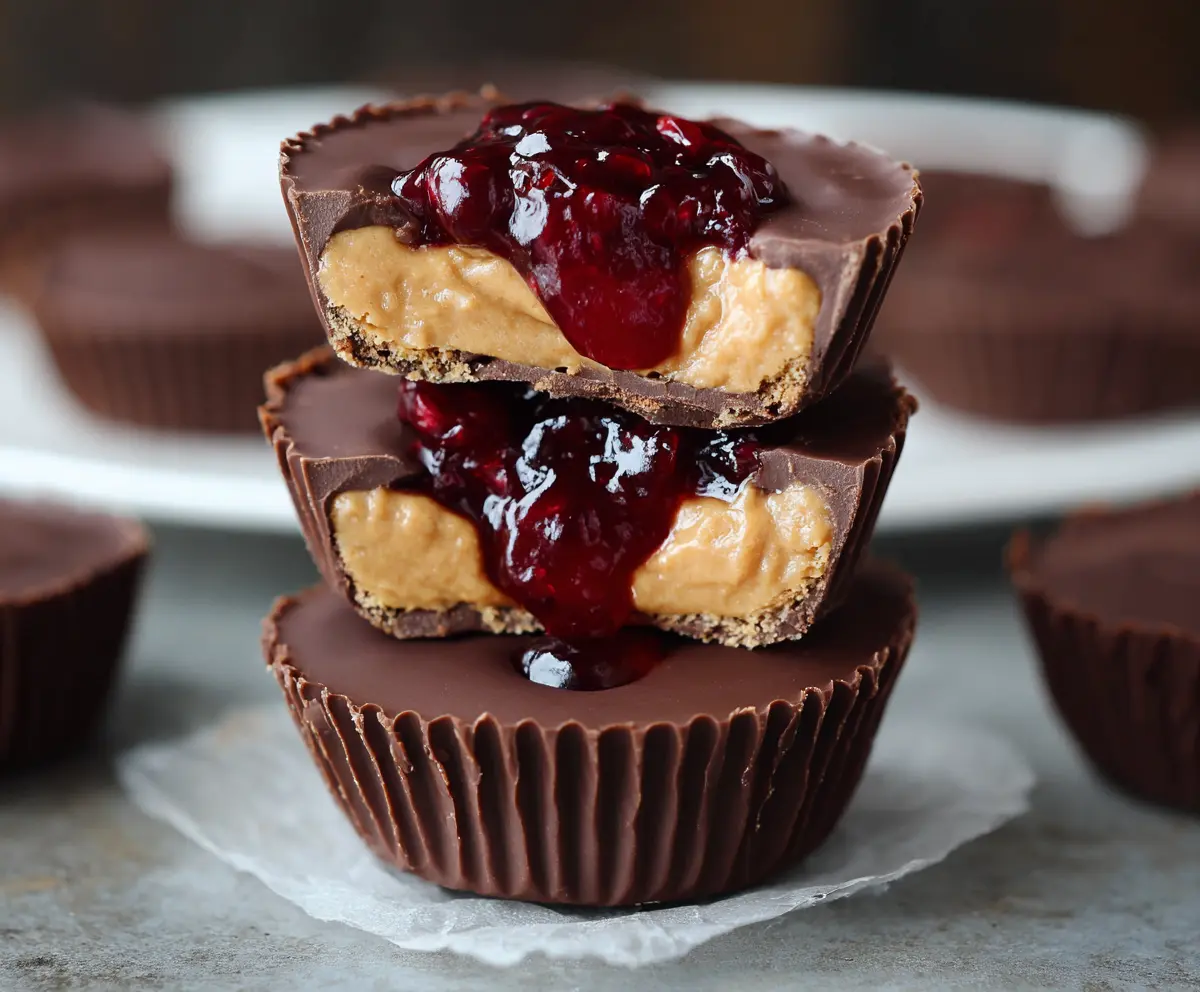
These Peanut Butter and Jelly Cups are a fun twist on a classic sandwich! They combine creamy peanut butter and sweet jelly in a delicious chocolate cup.
Making these cups is a breeze! I like to serve them at parties or snacks when friends come over. You can’t go wrong with chocolate and PB, right? 🍫🥜
Key Ingredients & Substitutions
Semi-Sweet Chocolate Chips: These provide a rich flavor and are perfect for the chocolate shell. If you prefer a darker taste, feel free to use dark chocolate chips instead. You can also use milk chocolate if you enjoy it sweeter!
Creamy Peanut Butter: I love using natural peanut butter without added sugar for a healthier option. If you have nut allergies, almond butter or sunflower seed butter can be great substitutes!
Powdered Sugar: This is optional, but it helps sweeten and smooth out the peanut butter. If you’re looking for a lower sugar option, consider using honey or agave syrup, but adjust the amounts to taste.
Berry Jelly or Jam: Classic grape jelly works wonderfully, but you can swap it with strawberry or raspberry for a unique twist. If you like something with less sugar, try a fruit preserve or make your own!
How Do I Get the Chocolate Cup to Hold Together?
Creating a sturdy chocolate shell for your cups is key! Here’s how to do it:
- Start by melting the chocolate slowly. If it’s too hot or microwaved too long, it might seize up. Stirring often helps achieve that smooth consistency.
- When spooning the chocolate, don’t be shy! Make sure to spread it up the sides evenly to form a solid base.
- Place the cups in the fridge or freezer, as this helps the chocolate harden faster and creates a firmer shell.
This technique will ensure your cups keep their shape and each bite is a delightful combination of flavors. Enjoy making your treats! 🌟
Peanut Butter And Jelly Cups
Ingredients You’ll Need:
For the Cups:
- 1 ½ cups semisweet chocolate chips (or dark chocolate chips)
- 1 teaspoon coconut oil or vegetable oil (optional, for smoother melted chocolate)
For the Filling:
- 1 cup creamy peanut butter (smooth, no sugar added preferred)
- 2 tablespoons powdered sugar (optional, for sweetness and texture)
- 1/2 cup berry jelly or jam (such as grape, strawberry, or raspberry)
Time Needed:
This quick and easy treat will take you about 30 minutes to prepare, plus a little time in the refrigerator to set. It’s a perfect way to satisfy your sweet cravings without much fuss!
Step-by-Step Instructions:
1. Prepare the Muffin Tin:
Start by lining a muffin tin with cupcake liners or use silicone molds, which make it much easier to pop out the cups later on.
2. Melt the Chocolate:
In a microwave-safe bowl, combine the chocolate chips and coconut oil if you’re using it. Microwave in 20-30 second intervals, stirring after each time until the chocolate is smooth and melted. This will help avoid burning the chocolate.
3. Form the Chocolate Shells:
Take about 1 tablespoon of the melted chocolate and spoon it into each cup. Make sure to spread it evenly and press the chocolate up the sides to create a shell. Once done, place the muffin tin in the refrigerator or freezer for about 5-10 minutes to firm up.
4. Mix the Peanut Butter Filling:
While the chocolate is hardening, prepare the peanut butter filling. In a small bowl, mix together the creamy peanut butter and powdered sugar until it’s smooth and creamy.
5. Add the Peanut Butter:
Once the chocolate shells are set, take them out of the fridge. Spoon about 1 tablespoon of the peanut butter mixture into each chocolate cup, spreading it evenly while leaving some space for the jelly.
6. Add the Jelly:
Now, add a teaspoon of your favorite jelly or jam right on top of the peanut butter layer. This adds that delightful fruity contrast to the creamy filling.
7. Seal the Filling:
Cover the jelly with more melted chocolate to fill each cup completely and seal the filling inside. Make sure to use enough chocolate to ensure there are no gaps.
8. Chill Again:
Return the filled cups to the refrigerator or freezer for at least 20 minutes, or until they are completely set and firm to the touch.
9. Serve and Enjoy:
Once they are hardened, gently remove the cups from the liners. You can serve them chilled or at room temperature. Enjoy your delicious homemade peanut butter and jelly cups!
These treats are perfect for parties, snacks, or just when you want a sweet homemade dessert. Have fun making and sharing them!
Can I Use Different Types of Nut Butters?
Absolutely! If you’re not a fan of peanut butter or have allergies, you can substitute it with almond butter, cashew butter, or sunflower seed butter. Just keep in mind that the flavor will change slightly!
How Should I Store Leftover Peanut Butter and Jelly Cups?
Store any leftovers in an airtight container in the refrigerator for up to a week. They can also be frozen for longer storage; just make sure to wrap them well. Thaw them in the fridge when you’re ready to enjoy them!
What If My Chocolate Isn’t Melting Smoothly?
If your chocolate is clumping or seizing up, it may be too hot or could have gotten moisture in it. Try adding a bit more coconut oil or vegetable oil to help it melt smoothly. Always melt your chocolate in short bursts to avoid overheating.
Can I Make These Cups Vegan?
Yes, you can make these cups vegan! Use dairy-free chocolate chips and make sure your peanut butter and jelly are free from any animal products. Enjoy your delightful treat without compromise!