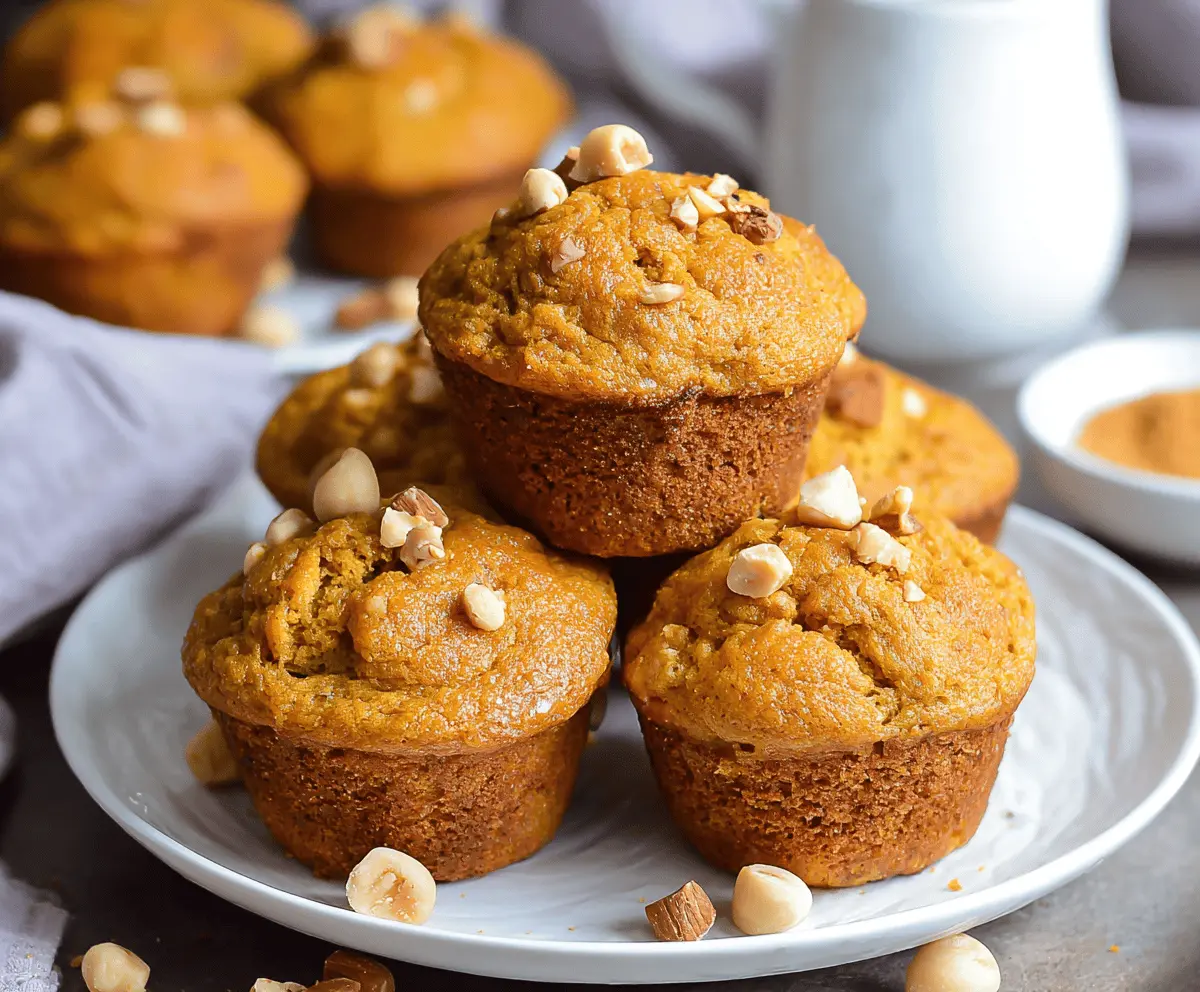
These Pumpkin Butterscotch Muffins are fluffy and delicious, perfect for fall! With a warm pumpkin flavor and sweet butterscotch chips, they’re a real treat for your taste buds.
Baking these muffins is so easy, even my cat could help if he had thumbs! I love enjoying them warm with a cup of tea. You won’t be able to stop at just one, trust me!
Key Ingredients & Substitutions
All-Purpose Flour: This is the base for your muffins. If you’re looking for gluten-free options, consider using a 1:1 gluten-free flour blend. I personally like using whole wheat flour for added nutrition!
Canned Pumpkin Puree: Make sure it’s plain pumpkin puree and not pie filling! You can also use homemade pumpkin puree if you roast and blend pumpkin. It’s a fun activity and adds a fresh flavor!
Butterscotch Chips: While butterscotch chips are sweet and creamy, you can switch them for chocolate chips if you prefer. For a nutty twist, try adding some peanut butter chips!
Spices: The combination of cinnamon, nutmeg, ginger, and cloves gives these muffins their warm flavor. If you’re missing a spice, feel free to adjust or use pumpkin pie spice as a substitute.
How Can I Ensure My Muffins Rise Properly?
To get fluffy muffins, it’s key to follow these steps:
- Make sure your baking powder and baking soda are fresh—expired leaveners can result in flat muffins.
- Mix wet and dry ingredients just until combined. Overmixing can make them dense. A few lumps are okay!
- Use room temperature ingredients. They mix better and help with even baking.
- Don’t skip the preheating step! Baking in a hot oven gives your muffins a good lift right away.
With these tips, you’ll be set for successful baking and those lovely cozy muffins! Enjoy your baking adventure!
How to Make Delicious Pumpkin Butterscotch Muffins
Ingredients You’ll Need:
Dry Ingredients:
- 1 3/4 cups all-purpose flour
- 1 teaspoon baking powder
- 1/2 teaspoon baking soda
- 1/2 teaspoon salt
- 1 teaspoon ground cinnamon
- 1/2 teaspoon ground nutmeg
- 1/4 teaspoon ground ginger
- 1/4 teaspoon ground cloves (optional)
Wet Ingredients:
- 1/2 cup unsalted butter, melted
- 1 cup granulated sugar
- 2 large eggs
- 1 cup canned pumpkin puree (not pumpkin pie filling)
- 1/4 cup milk
- 1 teaspoon vanilla extract
Mix-Ins:
- 1 cup butterscotch chips (plus extra for topping)
- Optional: chopped nuts for topping (e.g., walnuts or pecans)
How Much Time Will You Need?
Preparation time is about 15 minutes, with baking taking 18-22 minutes. Don’t forget the cooling time! You should allow your muffins to cool for at least 5 minutes in the pan before transferring them to a wire rack to cool completely. In total, expect about 40-45 minutes!
Step-by-Step Instructions:
1. Preheat the Oven:
Start by preheating your oven to 350°F (175°C). This is essential for evenly baked muffins. While your oven is heating, line a 12-cup muffin tin with paper liners or lightly grease it to prevent sticking.
2. Mix the Dry Ingredients:
In a medium bowl, whisk together the flour, baking powder, baking soda, salt, cinnamon, nutmeg, ginger, and optional cloves. Make sure everything is well combined to ensure consistent flavor throughout your muffins.
3. Combine the Wet Ingredients:
In a large bowl, whisk together the melted butter and granulated sugar until smooth. Add the eggs one at a time, whisking well after each addition until fully incorporated. Then stir in the pumpkin puree, milk, and vanilla extract, mixing until the batter is smooth.
4. Combine Wet and Dry Mixtures:
Carefully add the dry mixture to the wet ingredients, folding gently until just combined. Be careful not to overmix as this can make your muffins tough. A few lumps are perfectly fine!
5. Add the Butterscotch Chips:
Gently fold in 1 cup of butterscotch chips, making sure they are distributed evenly throughout the batter.
6. Fill the Muffin Tin:
Scoop the batter into your prepared muffin cups, filling each about 3/4 full. This gives them room to rise without overflowing. You can sprinkle some extra butterscotch chips and nuts on top for a lovely finish.
7. Bake:
Pop your muffin tin into the oven and bake for 18-22 minutes. You’ll know they’re done when a toothpick inserted into the center comes out clean. If you notice them browning too quickly, you can cover them loosely with foil.
8. Cool the Muffins:
Once baked, allow the muffins to cool in the pan for about 5 minutes. Then, transfer them to a wire rack to cool completely. This helps to maintain their fluffy texture.
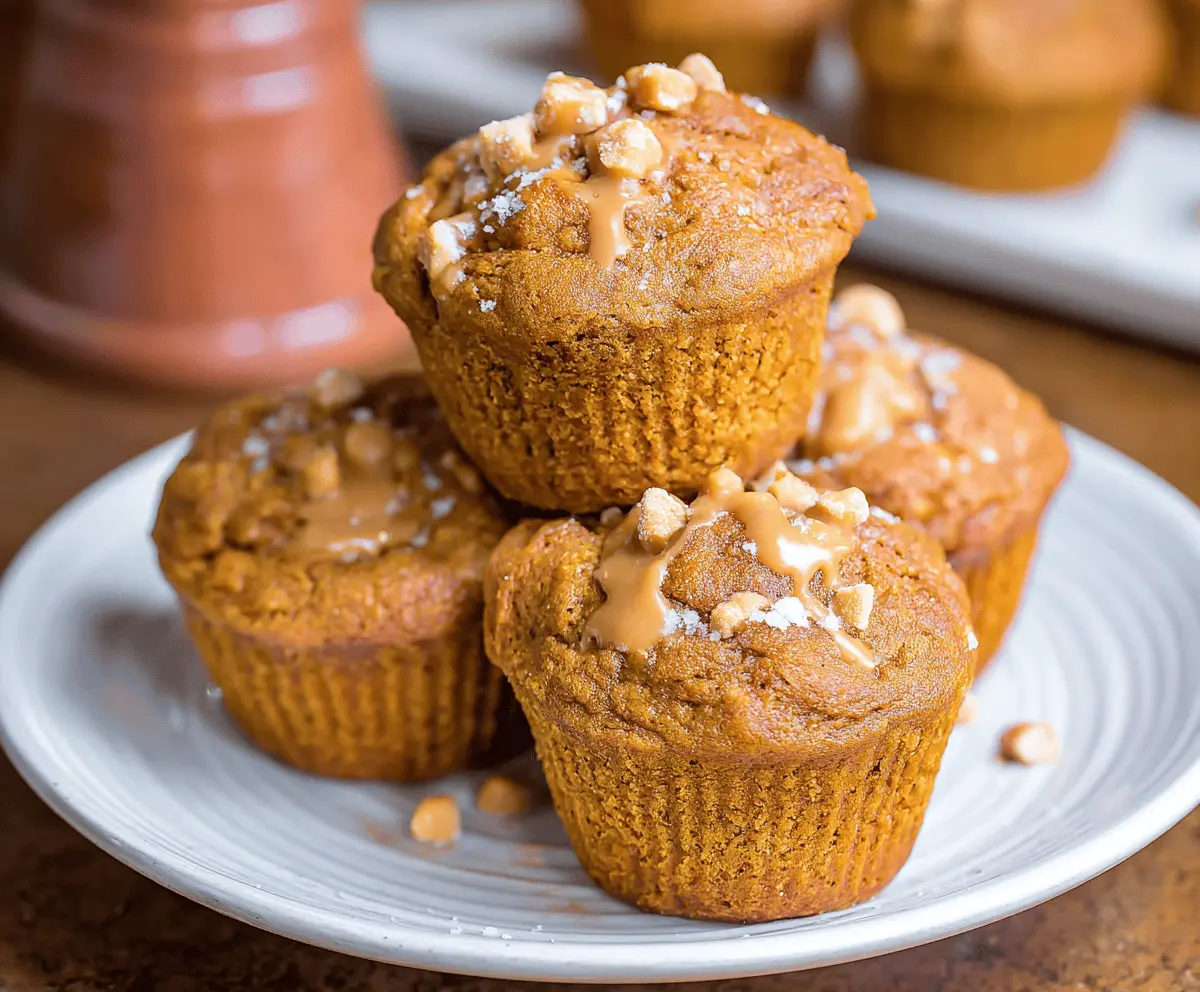
9. Optional Garnish:
If you like, drizzle the top with a little melted butterscotch sauce or sprinkle with powdered sugar just before serving.
Enjoy your warm Pumpkin Butterscotch Muffins with a cup of tea or coffee! These delightful treats are perfect for breakfast or as an afternoon snack and are sure to bring the cozy flavors of fall into your home!
Can I Use Fresh Pumpkin Instead of Canned?
Absolutely! You can use fresh pumpkin puree if you prefer. Simply roast a small sugar pumpkin, scoop out the flesh, and blend it until smooth. Make sure to drain excess moisture to keep your muffins from getting soggy.
Can I Reduce the Sugar in the Recipe?
Yes, you can reduce the sugar by about 1/4 cup without significantly affecting the flavor or texture. If you want to cut calories further, try using a sugar substitute that measures like sugar or swap in unsweetened applesauce for part of the sugar!
How to Store Leftover Muffins?
Store any leftover muffins in an airtight container at room temperature for up to 3 days. For longer storage, wrap them individually and freeze for up to 3 months. Just thaw at room temperature before enjoying!
Can I Add Other Mix-Ins?
Definitely! Feel free to include other ingredients like chopped nuts, chocolate chips, or dried fruit for extra flavor. Just be sure to keep the total mix-ins at about 1 to 1.5 cups to ensure they bake properly.