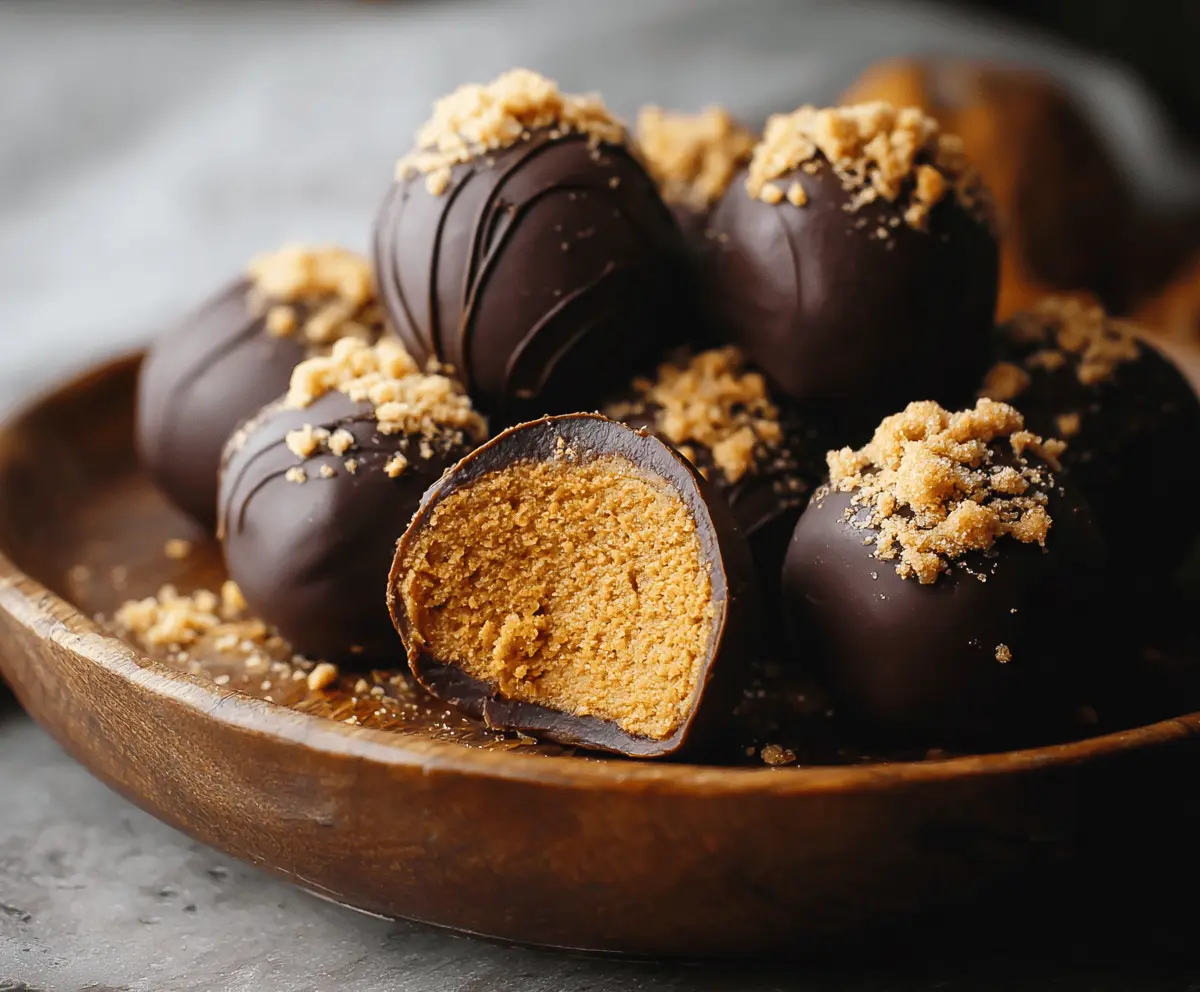
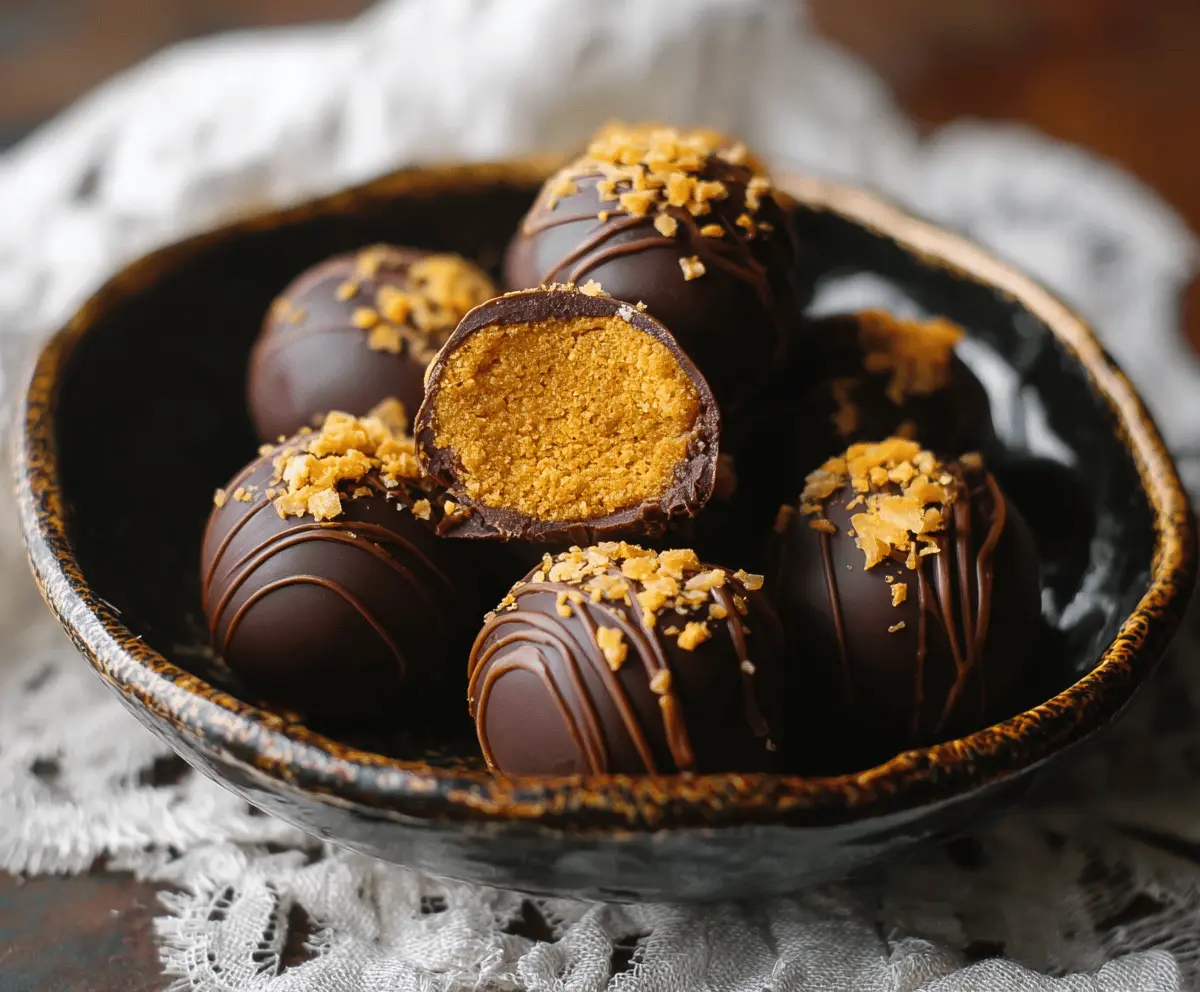
These pumpkin truffles are a sweet treat perfect for fall! Made with creamy pumpkin and a touch of chocolate, they’re both rich and comforting.
Trust me, you’ll be coming back for more! I love to share them with friends, but honestly, I hide a few just for myself. Who can resist that pumpkin goodness? 🎃
Key Ingredients & Substitutions
Pumpkin Puree: Make sure to use canned pumpkin puree, not pumpkin pie filling, which has added sugar and spices. If you’re feeling adventurous, you can roast and puree fresh pumpkins for a more intense flavor.
Powdered Sugar: I love using powdered sugar because it sweetens without adding grit. If you want a healthier option, you could use coconut sugar or a sugar alternative, but be careful with the quantities as they can vary in sweetness.
Spices: Ground cinnamon, nutmeg, and ginger give these truffles a warm flavor. You can adjust the amounts to your preference or use pumpkin pie spice as a blend instead!
Chocolate: I recommend semi-sweet chocolate for a nice balance of sweetness. If you prefer dark chocolate, go for it! You can also use white chocolate for a twist, but it will change the flavor profile of the truffle.
Graham Crackers: These add texture and sweetness. If you want a gluten-free option, crushed almonds or gluten-free graham crackers can work just as well.
How Do I Ensure My Chocolate Coating is Perfect?
Dipping the pumpkin balls in melted chocolate can be tricky but here are some tips for a smooth finish:
- Melt the chocolate slowly using a microwave or a double boiler. Stir well until it’s fully melted to avoid burning.
- Keep the chocolate warm while you dip. If it starts to thicken, just pop it back in the microwave for a few seconds.
- Use a fork or dipping tool to give your truffles a nice coating without leaving fingerprints.
- Let the excess chocolate drip off before placing them back on the parchment paper. This helps create a clean, thin layer.
Following these tips will ensure you have a beautiful, glossy finish on your pumpkin truffles!
How to Make Pumpkin Truffles
Ingredients You’ll Need:
- 1 cup canned pumpkin puree (not pumpkin pie filling)
- 2 cups powdered sugar, sifted
- 1/2 teaspoon ground cinnamon
- 1/4 teaspoon ground nutmeg
- 1/4 teaspoon ground ginger
- 1/2 teaspoon vanilla extract
- 1 1/2 cups crushed graham crackers (about 10 full sheets)
- 12 ounces semi-sweet or dark chocolate, chopped (for coating)
- Optional: additional melted chocolate for drizzling
- Optional: crushed toffee bits or finely chopped nuts, for garnish
How Much Time Will You Need?
This delightful recipe takes about 15 minutes of prep time, plus an hour to chill and another 30 minutes to set in the fridge. You’ll spend a bit of time mixing, rolling, and dipping, but the wait will be totally worth it!
Step-by-Step Instructions:
1. Mix the Pumpkin Filling:
In a large mixing bowl, combine the pumpkin puree, powdered sugar, ground cinnamon, nutmeg, ground ginger, and vanilla extract. Stir until everything is smooth and well combined. Get ready for that delicious pumpkin smell!
2. Add Graham Crackers:
Gradually add the crushed graham crackers to the pumpkin mixture. Mix well until the texture is thick and dough-like, perfect for shaping into balls.
3. Chill the Mixture:
Cover the bowl with plastic wrap and pop it in the fridge for about 30 minutes. This helps the mixture firm up and makes rolling the truffles easier.
4. Prepare for Rolling:
Line a baking sheet with parchment paper to keep your truffles from sticking. You’ll want a smooth surface for the next step!
5. Shape the Truffles:
Using a small cookie scoop or spoon, scoop out portions of the pumpkin mixture and roll them between your palms to form smooth balls—about 1 inch in diameter. Place them on the lined baking sheet.
6. Freeze the Pumpkin Balls:
Pop the baking sheet in the freezer for about 1 hour, until the balls are firm. This makes them easier to coat in chocolate.
7. Melt the Chocolate:
While the pumpkin balls are freezing, melt your chocolate in a microwave-safe bowl. Heat it in 30-second increments, stirring in between until it’s smooth and completely melted. Watch out for burns!
8. Dip the Truffles:
Using a fork or dipping tool, carefully dip each chilled pumpkin ball into the melted chocolate, making sure they are fully coated. Let any excess chocolate drip off before placing them back on the parchment paper.
9. Add Toppings:
As soon as you coat the truffles, sprinkle with crushed toffee bits or chopped nuts if you wish! You can also drizzle some additional melted chocolate over the top for a decorative touch.
10. Set the Chocolate:
Once all truffles are coated, return them to the freezer for another 10-15 minutes, so the chocolate hardens nicely.
11. Store and Serve:
Store your pumpkin truffles in an airtight container in the fridge. Let them sit at room temperature for a few minutes before serving to enjoy the best texture and flavor. Yum!
Enjoy this luscious fall treat with the perfect balance of pumpkin spice and rich chocolate! Happy snacking! 🎃
Can I Use Fresh Pumpkin Instead of Canned?
Absolutely! If you prefer fresh pumpkin, just roast it, scoop out the flesh, and puree it until smooth. Make sure to drain any excess moisture for the best texture.
Can I Make These Truffles Vegan?
Yes! You can easily make these truffles vegan by using a dairy-free chocolate alternative for coating and ensuring your graham crackers are also vegan-friendly. Check the label for any non-dairy options!
How Should I Store Leftover Truffles?
Keep any leftover truffles in an airtight container in the refrigerator for up to a week. They also freeze well! Just thaw them in the fridge before enjoying for the best taste and texture.
Can I Add Other Flavors or Mix-ins?
Of course! Feel free to get creative! You can add chopped nuts, dried fruits, or even a splash of maple syrup for extra sweetness. Adjust the powdered sugar accordingly if you add wet ingredients!