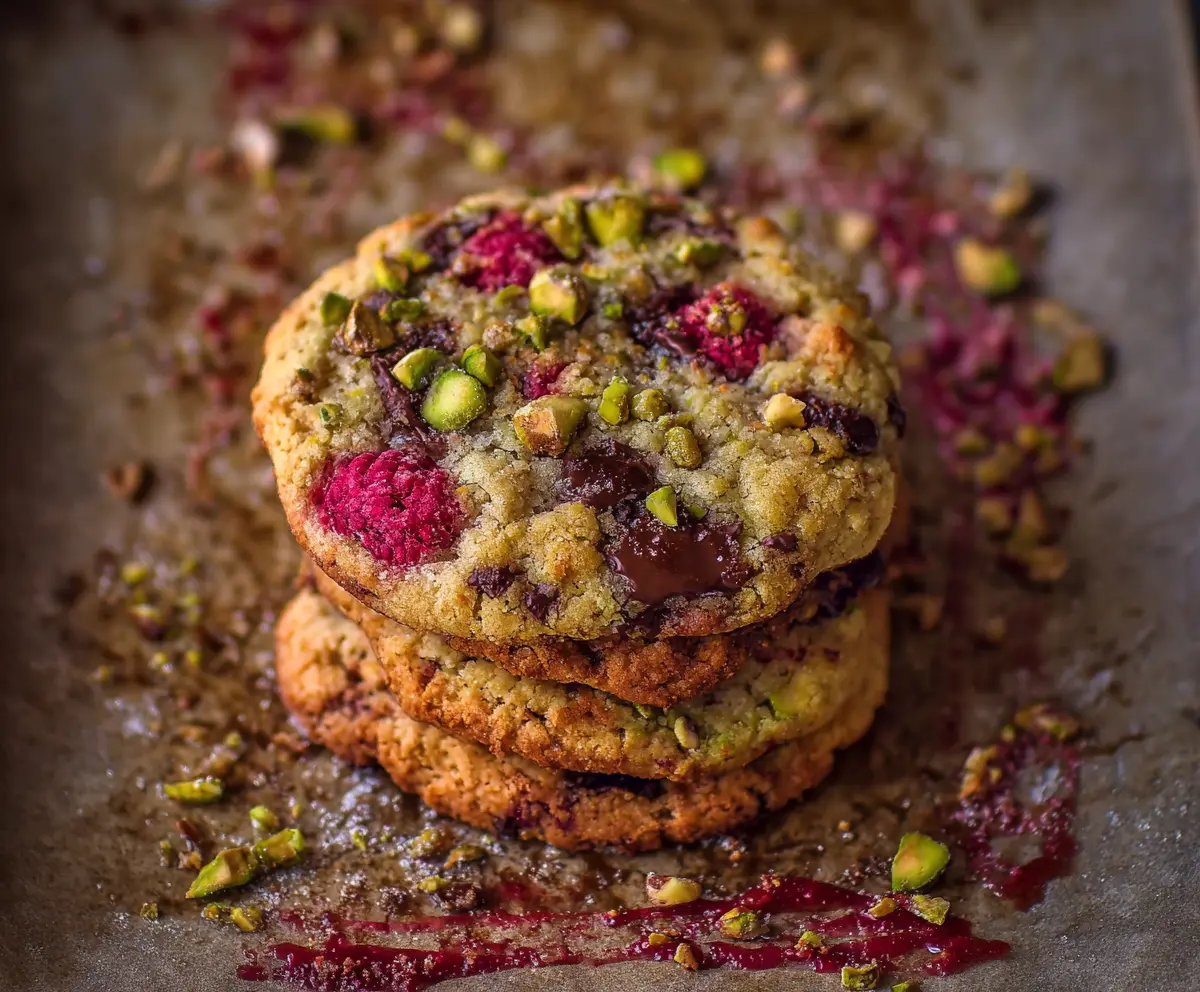
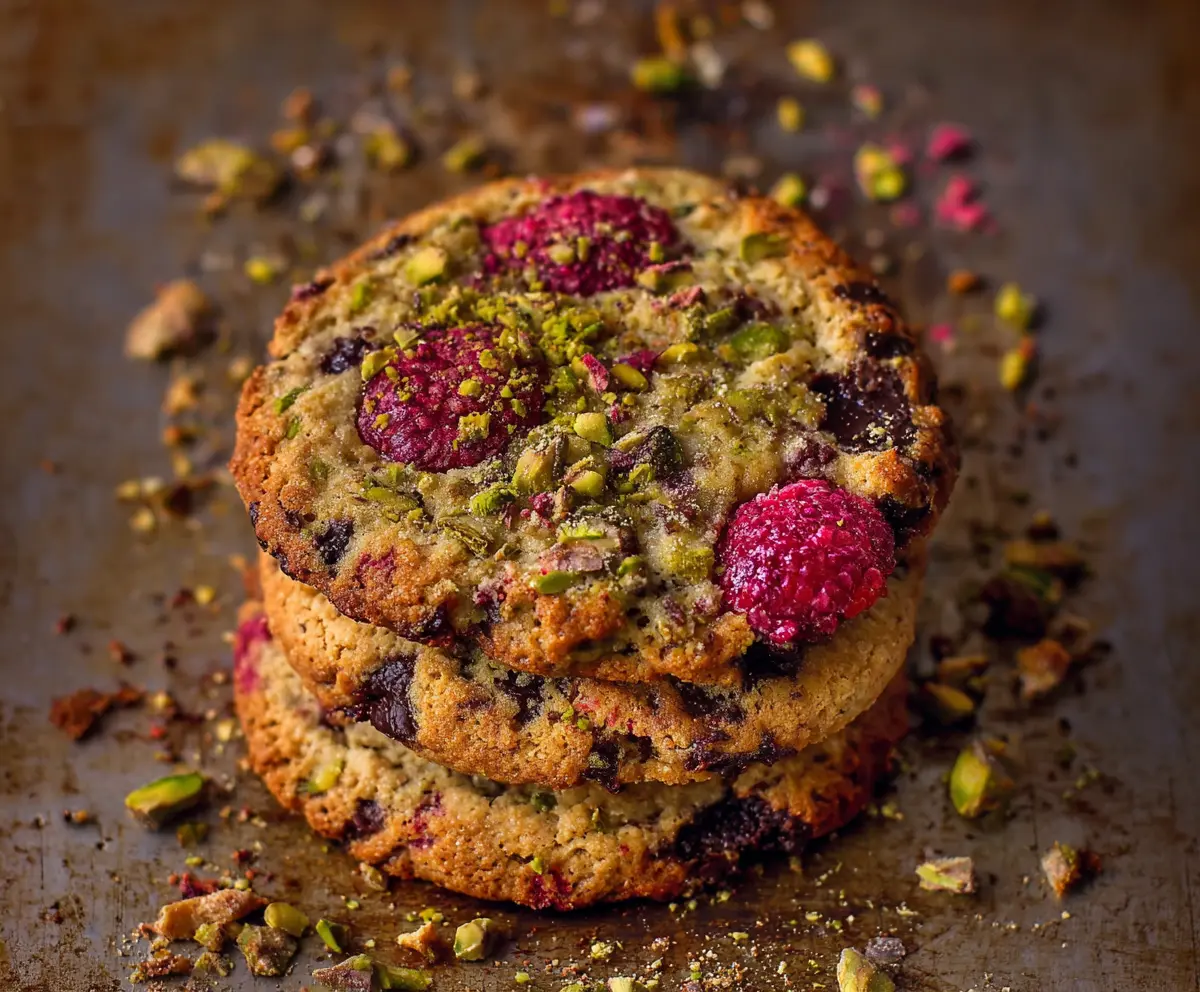
These Raspberry and Pistachio Cookies are a sweet treat bursting with fruity flavor and a delightful crunch. The bright red berries and green nuts make them look as good as they taste!
Every bite is like a little party in your mouth! I love how easy these cookies are to whip up. Perfect for sharing or simply enjoying with a cup of tea. Yum! 🍪💚
Key Ingredients & Substitutions
Butter: Unsalted butter gives you full control over the saltiness of your cookies. If you’re in a pinch, you can use margarine or coconut oil, but they might alter the texture slightly.
Granulated & Brown Sugar: The mix of these sugars adds depth. For a healthier option, try coconut sugar! Just know it may change the flavor a bit.
Pistachios: They add crunch and a unique flavor. If you’re allergic, try chopped almonds or walnuts instead. You could also skip the nuts altogether for nut-free cookies.
Raspberries: Fresh raspberries are best, but if they’re not in season, frozen berries work too! Just be gentle when folding them in.
Chocolate Chunks: Semi-sweet is a classic choice, but dark chocolate can add a rich flavor. If you want a lighter option, consider white chocolate chips.
What’s the Best Way to Ensure Soft and Chewy Cookies?
Getting that soft, chewy texture is all about the baking process and not over-mixing! Here are my top tips:
- Cream the butter and sugars well, but don’t overbeat once you add the flour. This can toughen the cookies.
- When folding in the raspberries, do it gently to maintain their shape.
- Keep an eye on the baking time; under-baking by a minute or two will keep them soft in the center.
- Allow a few minutes on the baking sheet before transferring to a wire rack to prevent them from breaking.
Using these tips will help you achieve your desired cookie texture. Enjoy baking these Raspberry and Pistachio Cookies!
Raspberry And Pistachio Cookies
Ingredients You’ll Need:
For the Cookie Dough:
- 1 cup (2 sticks) unsalted butter, softened
- 3/4 cup granulated sugar
- 3/4 cup light brown sugar, packed
- 2 large eggs
- 2 teaspoons vanilla extract
Dry Ingredients:
- 2 1/4 cups all-purpose flour
- 1 teaspoon baking soda
- 1/2 teaspoon salt
- Optional: 1 tablespoon cornstarch (to help keep raspberries intact)
Add-Ins:
- 1 cup chopped pistachios, plus extra for garnish
- 1/2 cup semi-sweet or dark chocolate chunks
- 3/4 cup fresh raspberries (or frozen, gently thawed)
How Much Time Will You Need?
This recipe will take about 15-20 minutes for preparation and 12-15 minutes for baking. Plan for about 5 minutes of cooling time after baking before moving to a wire rack. In total, you’re looking at around 40 minutes from start to finish!
Step-by-Step Instructions:
1. Preheat the Oven:
Start by preheating your oven to 350°F (175°C). While it’s warming up, line two baking sheets with parchment paper or silicone baking mats to make cleanup easy!
2. Cream the Butters and Sugars:
In a large mixing bowl, cream together the softened unsalted butter, granulated sugar, and light brown sugar. Use a hand mixer or a sturdy spatula to beat them until the mixture is light and fluffy—about 3-4 minutes should do the trick!
3. Add Eggs and Vanilla:
Next, beat in the eggs one at a time. Make sure each egg is fully incorporated before adding the next. Stir in the vanilla extract and mix until combined.
4. Mix the Dry Ingredients:
In a separate bowl, whisk together the all-purpose flour, baking soda, salt, and cornstarch (if using). This helps evenly distribute the leavening agents throughout the dough.
5. Combine Wet and Dry Ingredients:
Slowly add the dry mixture to the wet mixture. Stir gently until everything is just combined—don’t over-mix it, or your cookies may be tough!
6. Fold in Add-Ins:
Now it’s time to fold in the chopped pistachios and chocolate chunks. Use a spatula to mix them in well. Then, carefully fold in the fresh or gently thawed raspberries, taking care not to crush them too much.
7. Scoop and Shape the Cookies:
Using a cookie scoop or a tablespoon, drop rounded portions of dough onto the prepared baking sheets. Be sure to leave about 2 inches of space between each cookie, as they will spread a little while baking.
8. Garnish the Cookies:
Add a few extra pistachio pieces and a raspberry half on top of each cookie for that beautiful garnishing touch!
9. Bake:
Bake in the preheated oven for 12-15 minutes, or until the cookies are golden around the edges but still soft in the center. Keep an eye on them to avoid overbaking!
10. Cool and Enjoy:
Once baked, remove the cookies from the oven and let them cool on the baking sheet for about 5 minutes. Then, transfer them to a wire rack to cool completely. Serve warm or at room temperature, and enjoy the delicious blend of sweet raspberries, crunchy pistachios, and rich chocolate!
These delightful cookies are perfect with a cup of tea or coffee and make for a lovely treat for gatherings, picnics, or just a cozy evening at home.
Can I Use Frozen Raspberries Instead of Fresh?
Absolutely! Frozen raspberries can be a great substitute. Just make sure to gently thaw them before using to avoid excess moisture in the dough. Pat them dry with paper towels if needed.
Can I Make These Cookies Gluten-Free?
Yes! You can substitute all-purpose flour with a gluten-free flour blend. Look for one that includes xanthan gum to help maintain the cookie’s structure.
How Should I Store Leftover Cookies?
Store any leftover cookies in an airtight container at room temperature for up to 3 days. For longer storage, you can freeze the cookies for up to 3 months. Just place them in a single layer in a freezer-safe bag or container.
Can I Substitute the Pistachios with Another Nut?
Definitely! If you’re allergic to pistachios or prefer a different flavor, you can use chopped almonds, walnuts, or pecans as an alternative. Just make sure to chop them roughly for an even texture.