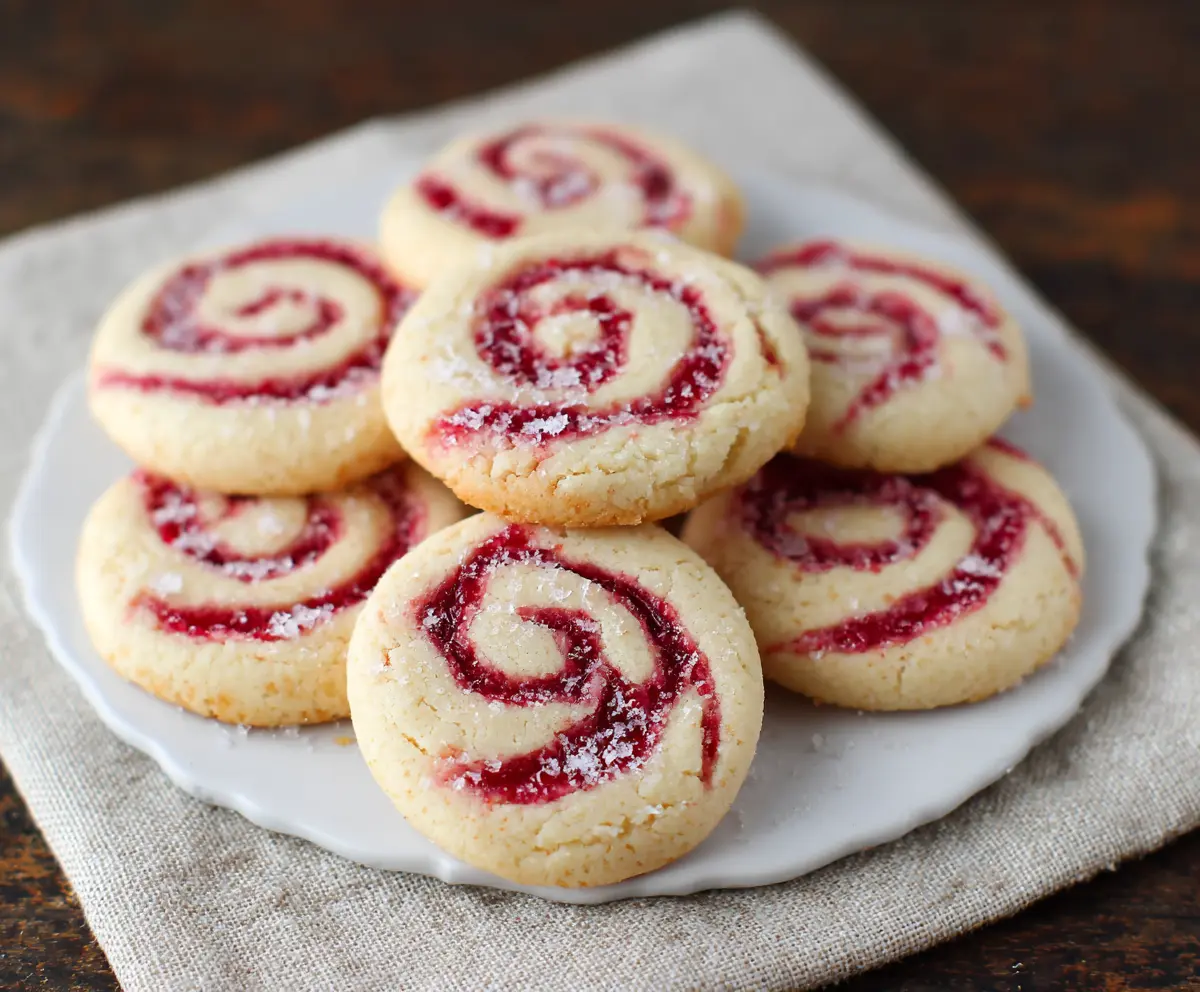
Raspberry Swirl Cookies are soft and sweet, with a lovely twist of fruity raspberry filling. They are perfect for a tasty snack or a delightful treat for friends!
Making these cookies is a fun adventure! I love how easy they are to roll and swirl. Plus, the bright raspberry color makes them so pretty—you’ll want to share with everyone. 🍪
Key Ingredients & Substitutions
Unsalted Butter: The base of the cookie, unsalted butter gives richness. If you’re out, you can use margarine, but the flavor might be a bit different. Personally, I always go for high-quality butter for the best taste!
Granulated Sugar: This sweetener adds the perfect touch of sweetness. If you prefer less sugar, look into using coconut sugar or a sugar substitute. Just keep in mind that it may change the texture a bit.
Raspberry Jam: This ingredient creates the beautiful swirl. Feel free to switch it for other fruit jams like strawberry or apricot. It’s fun to mix flavors! I love using homemade jam for a fresh taste.
Coarse Sugar: Optional but gives a nice finish. If you don’t have it, regular granulated sugar works too. I like to sprinkle a bit of sugar for that extra crunch!
How Do I Roll and Swirl the Dough Without It Falling Apart?
Rolling and swirling the dough correctly is key for those beautiful raspberry swirls! Following these steps will help keep your dough together:
- Make sure the dough is well-chilled before rolling. A firmer dough is easier to manage.
- Use a lightly floured surface to prevent sticking. Don’t use too much flour—as it can make the dough dry!
- When rolling, start from the longer side and gently but firmly roll it up to keep the layers intact.
- Seal the edge well by pressing it with your fingers. This helps prevent the filling from leaking out.
With a little patience, you’ll get those stunning and delicious cookie swirls! Enjoy the baking process!
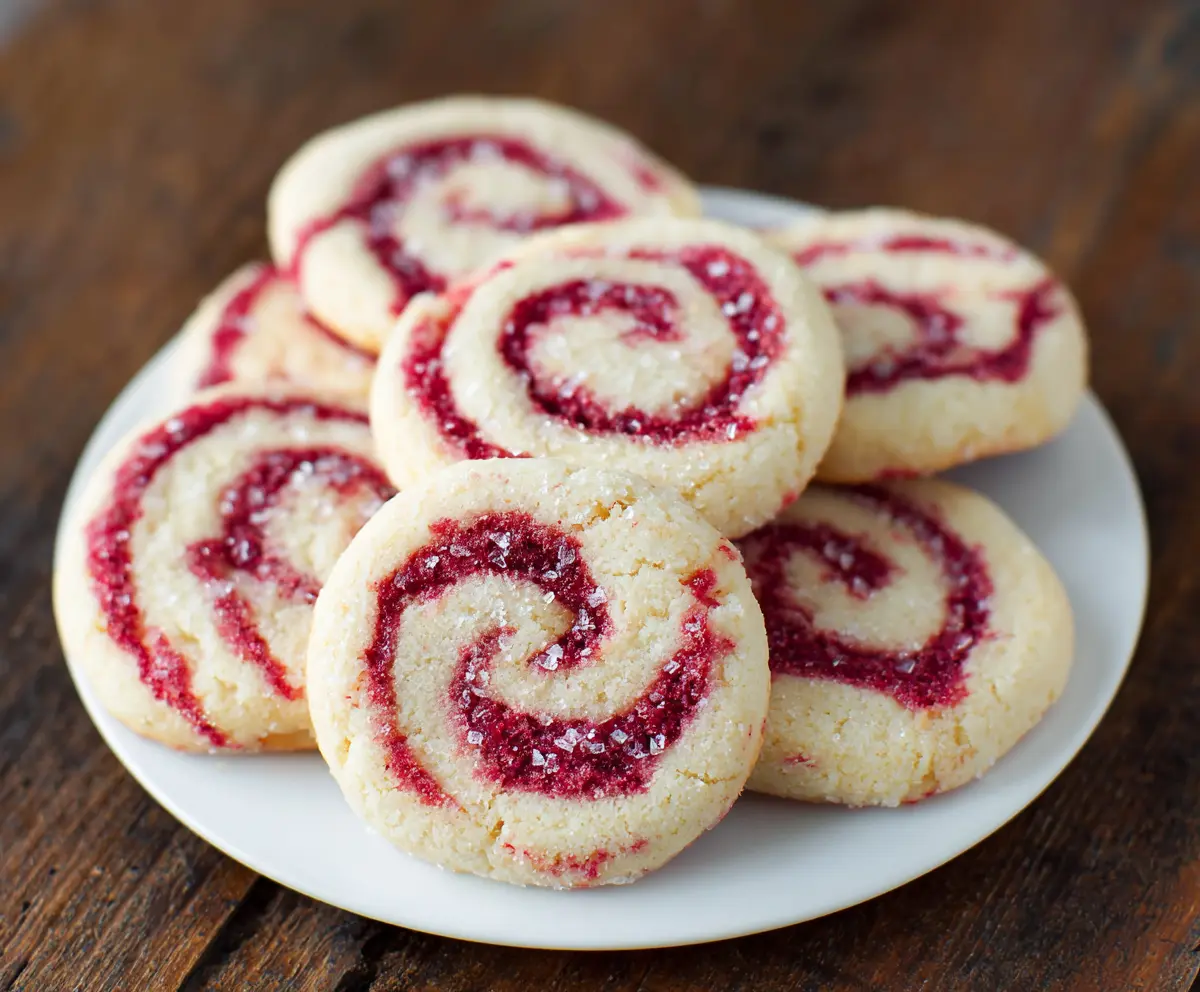
Raspberry Swirl Cookies
Ingredients You’ll Need:
For the Cookie Dough:
- 1 cup (2 sticks) unsalted butter, softened
- 3/4 cup granulated sugar
- 1 large egg
- 1 teaspoon vanilla extract
- 2 1/4 cups all-purpose flour
- 1/2 teaspoon baking powder
- 1/4 teaspoon salt
For the Raspberry Swirl:
- 1/2 cup raspberry jam or preserves
Optional Topping:
- Coarse sugar for sprinkling
How Much Time Will You Need?
This delightful recipe will take about 20 minutes of prep time and an additional 1 hour for chilling. After that, you’ll spend about 15 minutes baking. So, in total, plan for about 1 hour and 35 minutes from start to finish. Perfect for a cozy afternoon!
Step-by-Step Instructions:
1. Prepare the Oven and Baking Sheet:
Start by preheating your oven to 350°F (175°C). While the oven is heating, line a baking sheet with parchment paper or a silicone baking mat. This will prevent the cookies from sticking and make cleanup a breeze!
2. Cream the Butter and Sugar:
In a large bowl, use a hand mixer to cream together the softened butter and granulated sugar. Beat them until the mixture is light and fluffy—this should take about 2-3 minutes. It’s the perfect base for rich cookies!
3. Add Egg and Vanilla:
Next, add the egg and vanilla extract to the creamy butter-sugar mixture. Beat until everything is well combined, making sure you’re scraping down the sides of the bowl to mix everything in!
4. Combine the Dry Ingredients:
In a separate bowl, whisk together the flour, baking powder, and salt. This helps to distribute the leavening agents evenly through the flour, which is important for fluffy cookies!
5. Mix It All Together:
Gradually add the dry flour mixture to the butter mixture. Mix until the dough starts to come together—it may be a bit crumbly but that’s okay! Just bring it together with your hands if needed.
6. Roll Out the Dough:
Divide the dough in half. On a lightly floured surface, roll each half into a rectangle that’s roughly 8×6 inches. Try to keep it even so the cookies bake uniformly!
7. Spread the Raspberry Jam:
Spread the raspberry jam evenly over one of the dough rectangles. The fruitiness will be the star of the show once baked!
8. Create the Swirl:
Gently place the second dough rectangle on top of the jam-covered layer. Press down lightly to seal it. Starting from the longer side, roll the dough into a tight log. Make sure to seal the edge so your jam stays inside!
9. Chill the Log:
Wrap the log tightly in plastic wrap and refrigerate it for at least 1 hour. Chilling the dough will make slicing easier and keep the cookies from spreading too much while baking.
10. Slice and Bake:
Once chilled, preheat the oven if you haven’t yet. Slice the log into 1/4 to 1/3 inch thick rounds. Place the slices on your prepared baking sheet, spacing them about 2 inches apart. If you’d like, sprinkle some coarse sugar on top of each cookie for a little sparkle!
11. Enjoy Freshly Baked Cookies:
Bake the cookies for 12-15 minutes, or until the edges are slightly golden. Once they’re out of the oven, let them cool on the baking sheet for about 5 minutes before transferring them to a wire rack. Enjoy these delightful buttery cookies with a gorgeous raspberry swirl!
Can I Use Fresh Raspberries Instead of Jam?
While fresh raspberries can add a lovely tartness, they might not create the same swirled effect. If you’d like to use fresh raspberries, mash them gently and mix with a bit of sugar to sweeten. Spread a thin layer on the dough, but be careful not to overfill to prevent leaks!
How to Store Leftover Cookies?
Store any leftover cookies in an airtight container at room temperature for up to 3 days. If you’d like them to last longer, you can refrigerate them for up to a week. Just make sure to let them come to room temperature before enjoying for the best texture!
Can I Freeze the Cookie Dough?
Yes! You can freeze the wrapped log of dough for up to 3 months. To bake, just let the dough thaw in the fridge overnight. Then slice and bake as usual. It’s a great way to have fresh cookies on hand whenever you crave a treat!
What Should I Do If the Dough Is Too Sticky?
If your dough feels too sticky to handle, try chilling it for a bit. If it still feels sticky after chilling, lightly sprinkle some flour on your work surface and your rolling pin to help manage it. Just be cautious not to add too much flour, as it can alter the texture of the cookies!