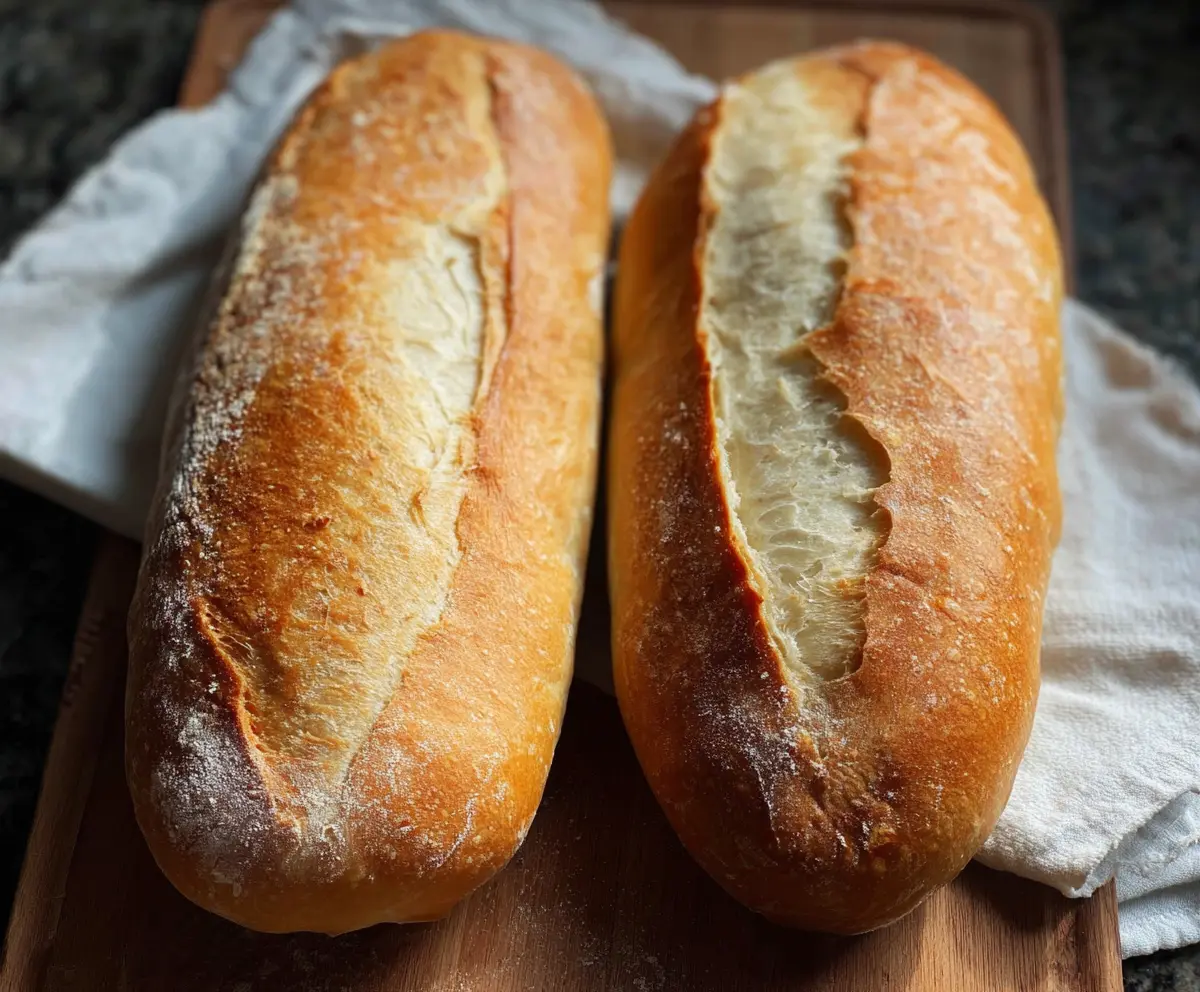
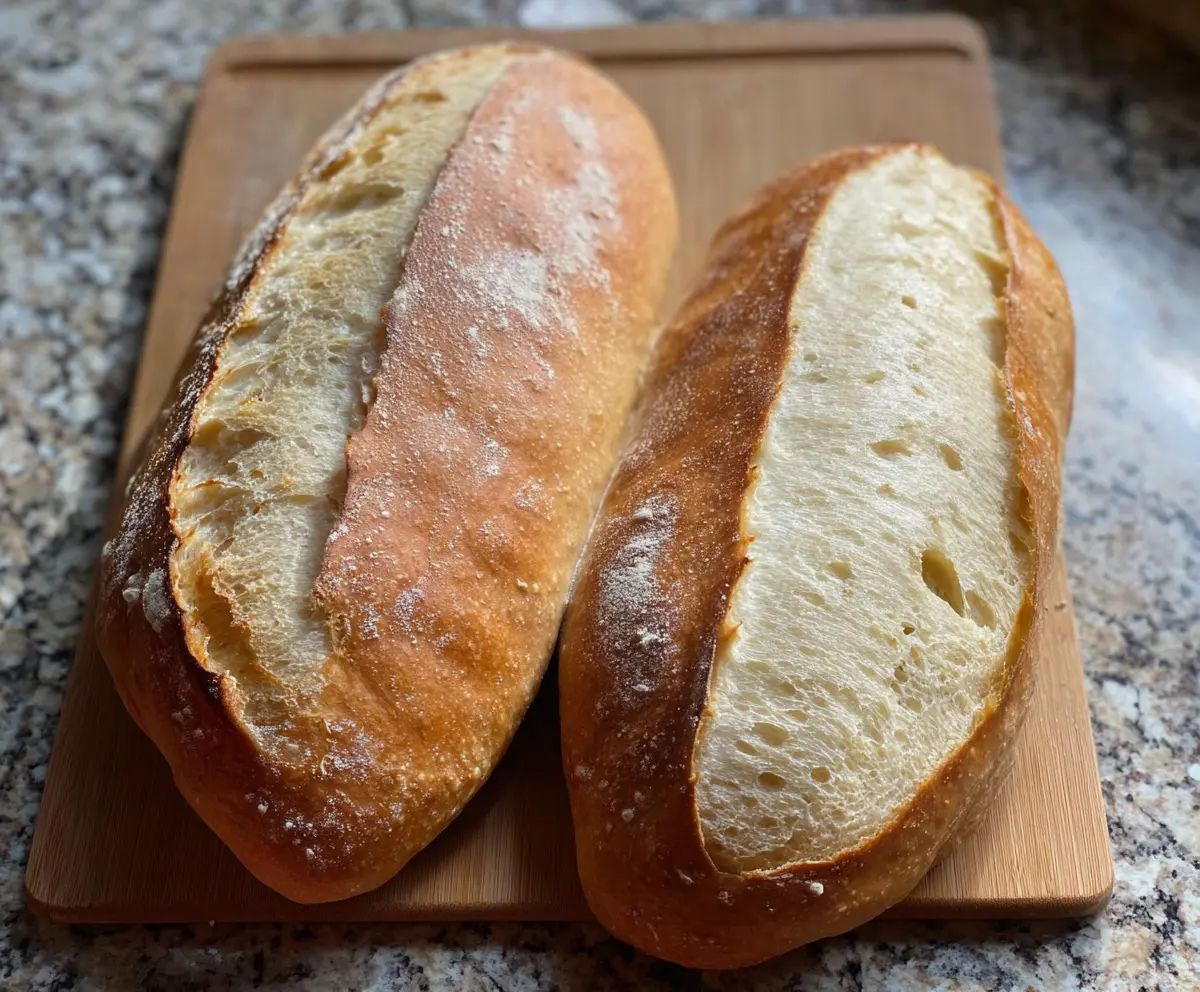
This Sourdough Discard French Bread is a wonderful way to use up extra sourdough starter! It’s crispy on the outside and soft inside, perfect for sandwiches or toast.
Making bread is easier than you think, and this recipe doesn’t waste any delicious sourdough. I love slathering butter on warm slices—so good, you might want to share it! 😄
Key Ingredients & Substitutions
Sourdough Starter Discard: Using unfed sourdough is a great way to prevent waste. If you don’t have any, you can use a store-bought sourdough starter instead, or simply replace it with an additional cup of flour and 1/2 cup of water.
Flour: All-purpose flour works well here for a nice texture. If you’re looking for a healthier option, whole wheat flour can be substituted, but keep in mind the dough might be denser.
Yeast: Instant yeast helps the bread rise quickly. If you only have active dry yeast, just proof it in warm water for about 5-10 minutes before mixing into the dough.
Olive Oil: The oil adds softness to the bread. Feel free to skip it if you want a crustier loaf. You can also use melted butter for a different flavor.
How Do I Knead Bread Dough Effectively?
Kneading is essential for developing gluten, which gives bread its structure. Here’s an easy way to knead:
- Start by turning the dough onto a lightly floured surface.
- With your palms, push the dough away from you, then fold it back over itself.
- Rotate it a quarter turn and repeat. Knead for about 8-10 minutes until the dough is smooth.
If using a stand mixer, let the dough mix on low speed with a dough hook for about 6-7 minutes. It should be slightly sticky but not too wet.
Sourdough Discard French Bread Recipe
Ingredients You’ll Need:
- 1 cup (240g) active sourdough starter discard (unfed)
- 3 1/2 cups (420g) all-purpose flour, plus extra for dusting
- 1 cup (240ml) lukewarm water
- 1 1/2 teaspoons salt
- 1 tablespoon sugar
- 1 tablespoon olive oil (optional, for a softer crust)
- 2 teaspoons instant yeast or active dry yeast
How Much Time Will You Need?
This recipe requires about 15 minutes of active preparation time, followed by 2 to 2.5 hours for rising and baking. You’ll spend about 20-25 minutes baking the bread, making it perfect for your afternoon baking project!
Step-by-Step Instructions:
1. Mixing the Dough:
Start by grabbing a large mixing bowl. Combine the sourdough starter discard, lukewarm water, and yeast. Stir everything together until the yeast dissolves. Once mixed, add the flour, salt, and sugar. Use a wooden spoon or your hands to combine the ingredients until a shaggy dough forms.
2. Kneading the Dough:
Now it’s time to knead the dough! Turn it out onto a lightly floured surface. Knead for about 8-10 minutes until the dough becomes smooth and elastic. If you have a stand mixer with a dough hook, you can also knead it on low speed for about 6-7 minutes.
3. First Rise:
Transfer the dough into a lightly oiled bowl. Cover it with a damp cloth or plastic wrap, and let it rise in a warm spot for about 1 to 1.5 hours, or until it has doubled in size. This is where the magic happens!
4. Shaping the Loaves:
Once risen, gently punch down the dough to release the air. Divide it into two equal pieces. To shape each piece into a French loaf, flatten it into a rectangle, fold it lengthwise into thirds, and roll it tightly to form a cylinder. Taper the ends slightly for that signature French bread look!
5. Second Rise:
Place your shaped loaves seam side down on a parchment-lined baking sheet or baking stone. Cover them with a kitchen towel and let them rise again for about 45 minutes to 1 hour, until they are nicely puffy.
6. Preheating the Oven:
While your loaves rise, preheat your oven to 450°F (230°C). Don’t forget to place a shallow pan at the bottom of the oven that will be used to create steam while the bread bakes!
7. Scoring the Loaves:
Using a sharp knife or lame, carefully score a long slash along the top of each loaf. This step allows the bread to expand while it bakes and gives it that beautiful French loaf appearance.
8. Adding Steam and Baking:
Just before placing your loaves in the oven, pour about 1 cup of hot water into the shallow pan to create steam. Quickly shut the oven door to trap the steam inside. This will help create a crispy crust!
9. Baking:
Bake the bread for 20-25 minutes, or until the crust is a deep golden brown and the loaves sound hollow when tapped on the bottom. Your kitchen will smell amazing!
10. Cooling:
Transfer your freshly baked loaves to a wire rack. Let them cool completely before slicing. This step is essential to ensure the inside has set properly.
Enjoy your Sourdough Discard French Bread fresh with your favorite toppings or toasted with butter! 🍞✨
Can I Use All-Purpose Flour Instead of Bread Flour?
Yes, all-purpose flour works perfectly for this recipe! It will yield a slightly softer loaf compared to bread flour, which can give a chewier texture due to its higher protein content. Either option will result in delicious bread!
How Can I Adjust This Recipe for a Whole Wheat Sourdough Bread?
You can substitute up to 50% of the all-purpose flour with whole wheat flour for a nuttier flavor and healthier option. Just note that whole wheat flour absorbs more water, so you may need to add a little more water to achieve the desired dough consistency.
What Should I Do If My Dough Is Too Sticky?
If your dough feels too sticky, sprinkle a little more flour onto the surface and lightly knead it in. Be careful not to add too much flour, as it can lead to a denser bread. A slightly tacky dough is ideal for good texture!
How Should I Store Leftovers?
Store any leftover bread in an airtight container at room temperature for up to 3 days, or you can freeze slices in a freezer bag for up to 3 months. Just toast or warm up the slices in the oven for the best texture when ready to enjoy!