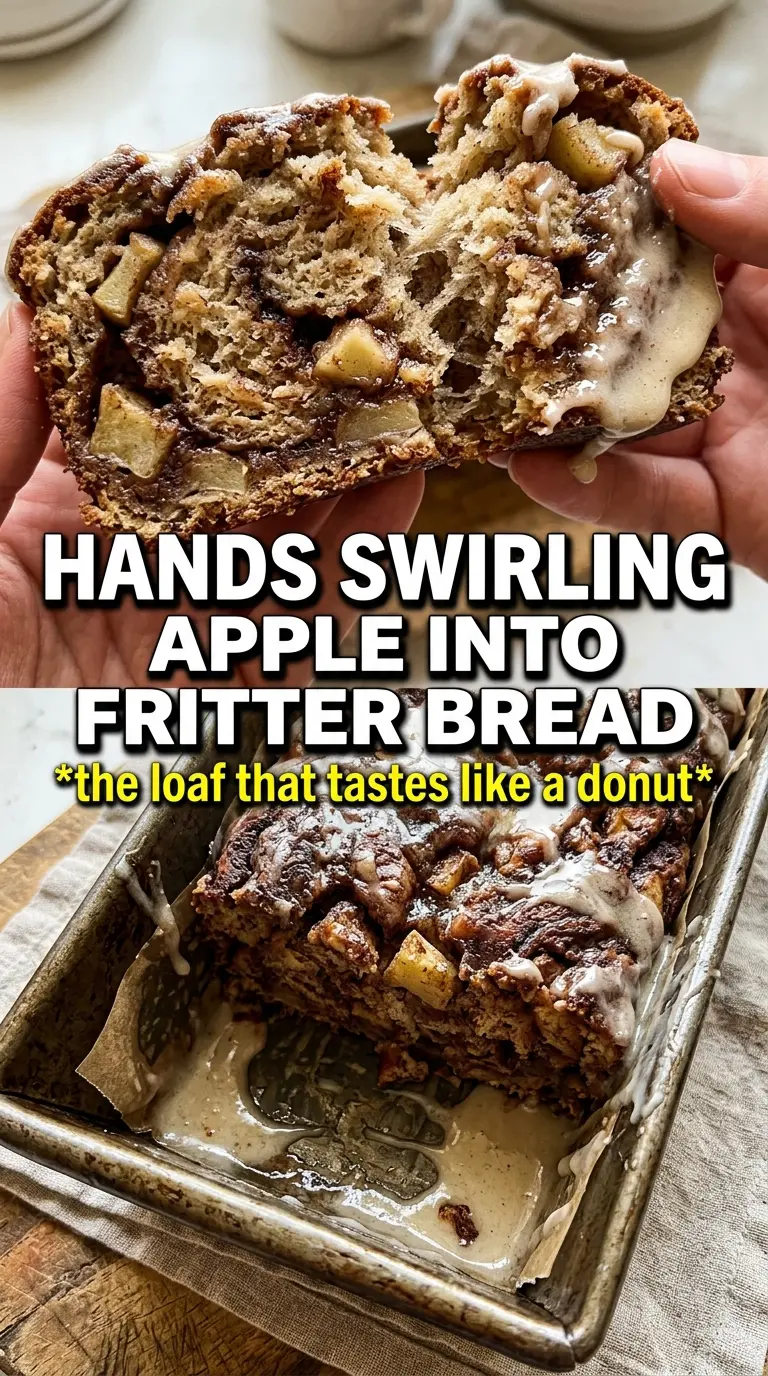
Amish apple fritter bread bakes up with a tender crumb, a ribbon of cinnamon-sugar apples, and a crackly top that picks up just enough glaze to taste like a bakery treat without going overboard. The loaf slices cleanly once it cools, but the middle stays soft and plush, which is exactly what makes it dangerous to leave on the counter. It smells like toasted cinnamon, caramelized apples, and butter the second it comes out of the oven.
What makes this version work is the way the apples are divided. Tossing part of them with cinnamon sugar before they go into the batter helps them soften and release flavor, while the rest stay scattered through the top so you get little pockets of fruit in every slice. The batter itself is simple, but the order matters: creaming the butter and sugar first gives the loaf structure, and alternating the dry ingredients with milk keeps it from turning heavy.
If you’ve ever had quick bread sink in the middle or bake up gummy around the fruit, the details below will help. The loaf pan size, the apple dice, and the glaze timing all matter here, and a few small changes make the difference between okay and memorable.
The apples stayed in little pockets instead of sinking, and the glaze set up just enough that the top had that apple fritter look without getting soggy. I baked it for 58 minutes and it came out with a soft center and a nice browned edge.
Save this Amish Apple Fritter Bread for a cinnamon-sugar loaf with soft apple pockets and a warm glaze finish.
The Crumb Stays Tender Because the Apples Never Get a Head Start
Quick breads go wrong when the fruit is too wet, too big, or added all at once. Here, the apples are diced small enough to soften inside the loaf instead of punching holes through the crumb, and they’re split between the filling and the top so the batter can hold them in place. That’s what keeps the loaf from collapsing into a dense strip of apple-heavy cake.
The other thing that matters is not overmixing once the flour goes in. The batter should look thick and smooth, but once the dry ingredients are incorporated you want to stop as soon as the last streak disappears. Overworking the batter develops too much gluten, and with the apples and sugar already bringing extra moisture, that’s the fastest way to lose the soft, fritter-like texture.
- Apples — A firm baking apple holds its shape better than a soft snacking apple. Peel them and dice them finely so they bake into the loaf instead of creating wet pockets.
- Brown sugar and cinnamon — This is the fritter part of the bread. Brown sugar melts into the apples and gives you that caramel edge that plain sugar can’t match.
- Butter — Softened butter creams with the sugar to trap air, which helps the loaf rise. Cold butter won’t whip properly, and melted butter changes the texture completely.
- Whole milk — The extra fat keeps the crumb tender. Lower-fat milk works in a pinch, but the loaf won’t taste as rich.
What Each Ingredient Is Actually Doing in This Recipe
- Primary ingredient (the star) — Quality matters most. Choose the best you can find.
- Cooking medium (oil, butter, or broth) — This carries flavors and prevents dryness.
- Seasonings (salt, pepper, spices, herbs) — Layer flavors so nothing overpowers. Build depth gradually.
- Aromatics (garlic, onion, herbs) — Cook with fat to bloom flavors. Become the foundation.
- Supporting ingredients — Complement the main ingredient without overpowering it.
- Sauce or liquid (if applicable) — Brings flavors together. Balance richness with acid.
- Acid (lemon, vinegar, wine, or other) — Brightens and prevents flat-tasting results.
- Final finish (garnish, glaze, or sauce) — Prevents one-dimensional taste and adds visual appeal.
Building the Loaf So the Swirl and the Center Bake Evenly
Start with the Cinnamon Apples
Mix the brown sugar and cinnamon first, then toss about half of it with the diced apples. That coating draws out a little juice and helps the apples flavor the batter as they bake. Don’t let the apples sit so long that they turn soupy; you want them glossy, not swimming in syrup.
Cream the Butter Until It Looks Pale
Beat the butter and granulated sugar until the mixture turns lighter in color and looks fluffy around the edges. That step builds the base of the loaf, so stop only when it looks airy and the grainy sugar texture has softened. If the butter is too firm, it will stay lumpy and the loaf bakes up tight.
Alternate Dry Ingredients and Milk
Add the flour mixture in batches, alternating with the milk so the batter stays smooth and doesn’t curdle or clump. This keeps the batter from tightening up all at once, which is especially important in a loaf packed with fruit. Stop mixing the moment the batter comes together; if it starts looking stretchy, you’ve gone too far.
Layer, Top, and Bake Through the Middle
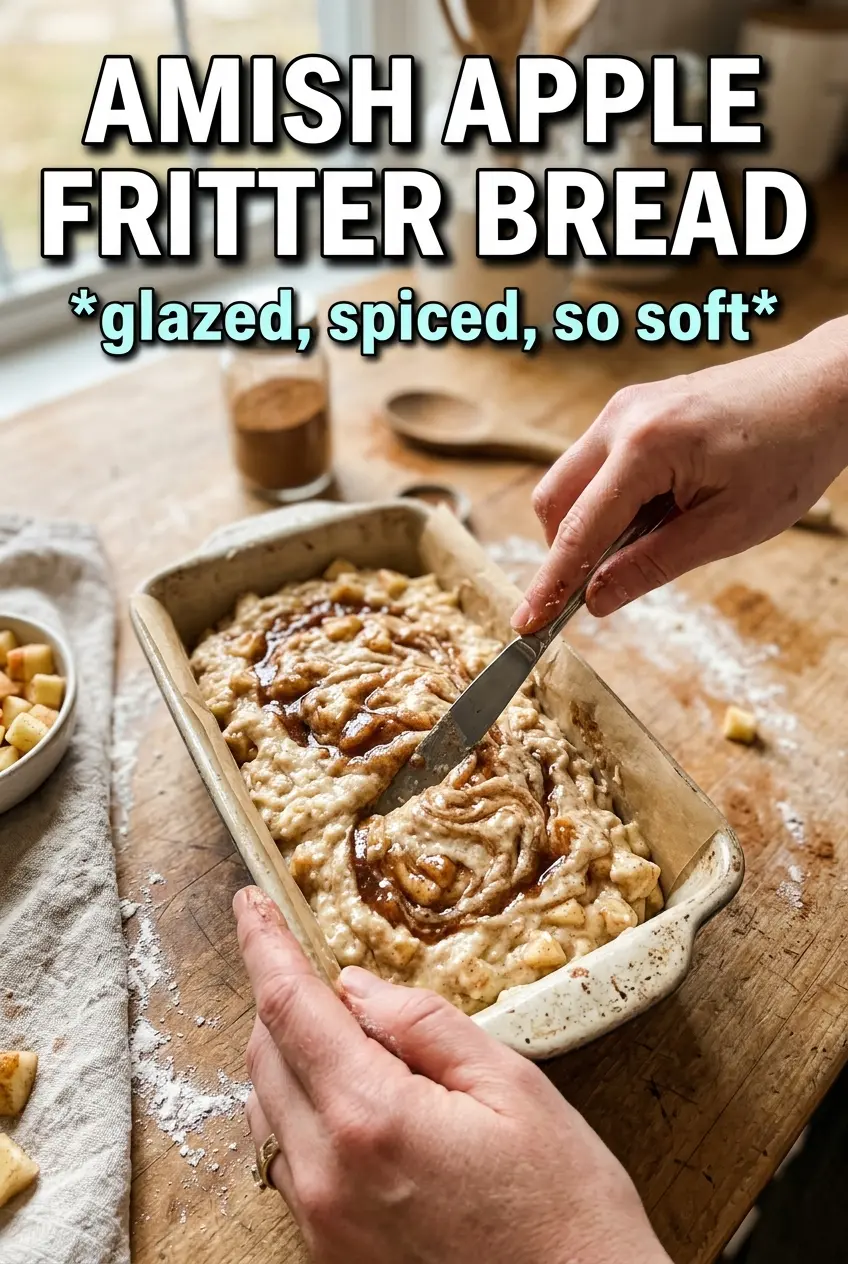
Spread half the batter into the pan, add half the apples, then sprinkle on the remaining cinnamon-sugar before topping with the rest of the batter and apples. That layering gives you pockets of apple on the top and in the center instead of a fruit pile sinking to the bottom. Bake until a tester comes out clean from the center and the top springs back when pressed lightly.
Use Pears Instead of Apples
Firm pears work if that’s what you have, but they soften faster and give the loaf a gentler, less tart flavor. Keep the dice small and watch the bake time closely, because ripe pears can make the center feel wet if they’re too juicy.
Make It Dairy-Free
Use a plant-based butter that bakes well and swap in an unsweetened non-dairy milk. The loaf still rises and browns nicely, but you’ll lose a little of the rich dairy flavor, so don’t skip the vanilla.
Turn It Into Muffins
This batter bakes well in muffin cups, which gives you more of the sticky top and less wait time. Fill the cups about two-thirds full and start checking a lot earlier, since the fruit makes the centers finish faster than a full loaf.
Storage and Reheating
- Refrigerator: Store tightly wrapped for up to 4 days. The crumb firms up a little in the fridge, but the flavor stays strong.
- Freezer: Freeze slices or the whole loaf, wrapped well and sealed in a bag, for up to 2 months. Thaw at room temperature so the glaze doesn’t weep.
- Reheating: Warm slices in the microwave for 10 to 15 seconds or in a low oven until just heated through. Too much heat dries out the crumb and makes the glaze sticky instead of set.
Questions I Get Asked About This Recipe
Amish Apple Fritter Bread
Ingredients
Equipment
Method
- Preheat oven to 350F, then grease a 9x5 loaf pan.
- Mix brown sugar and cinnamon together, then toss half with diced apples and set both aside.
- Beat softened butter and granulated sugar until light and fluffy, then beat in eggs and vanilla.
- Whisk together all-purpose flour, baking powder, baking soda, and salt, then alternate adding dry mix and whole milk into the butter mixture until just combined.
- Pour half the batter into the prepared pan, then layer half the apple mixture over it.
- Sprinkle the remaining cinnamon-brown sugar over the apples, then pour in the remaining batter and top with the remaining apples.
- Bake for 55-60 minutes at 350F, until a toothpick comes out clean.
- Stir powdered sugar with 2 tablespoons milk to make a glaze, then drizzle it over the loaf while still warm.