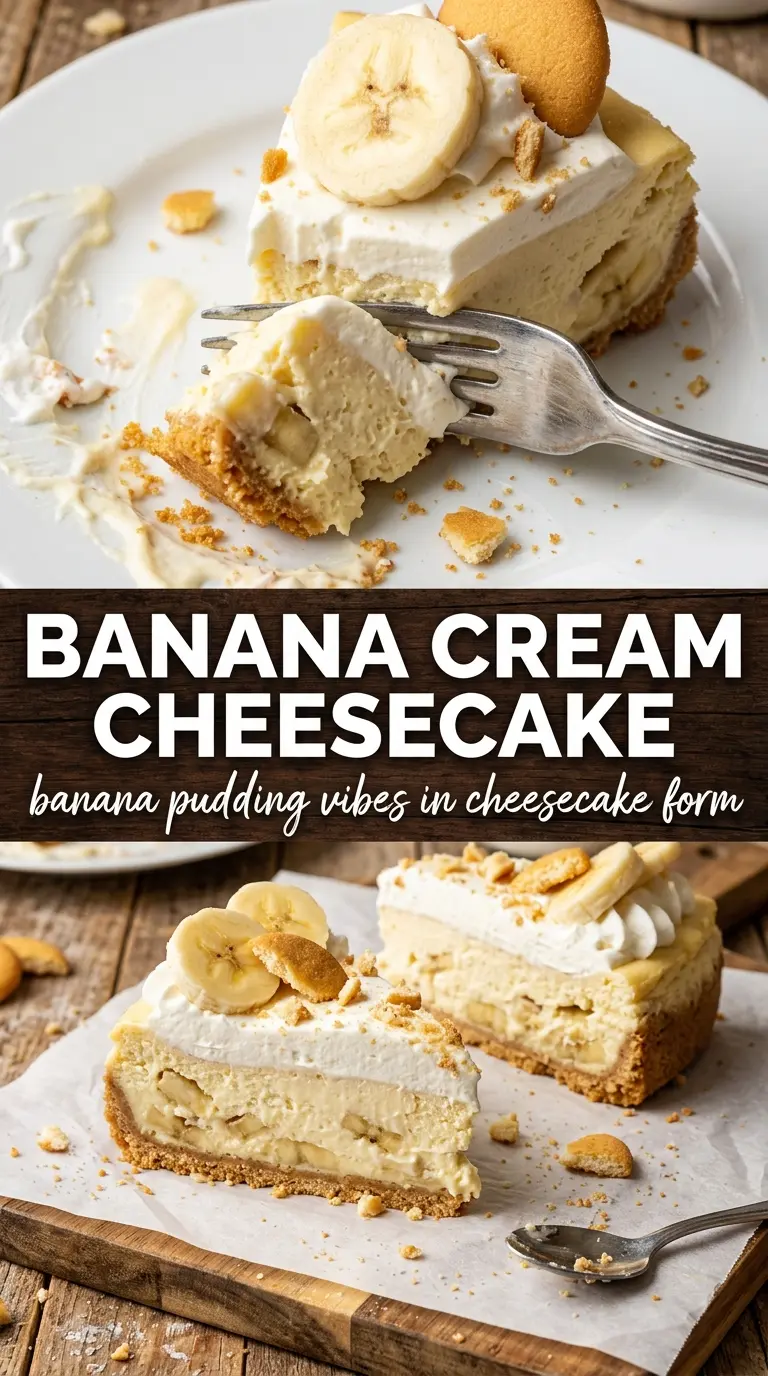
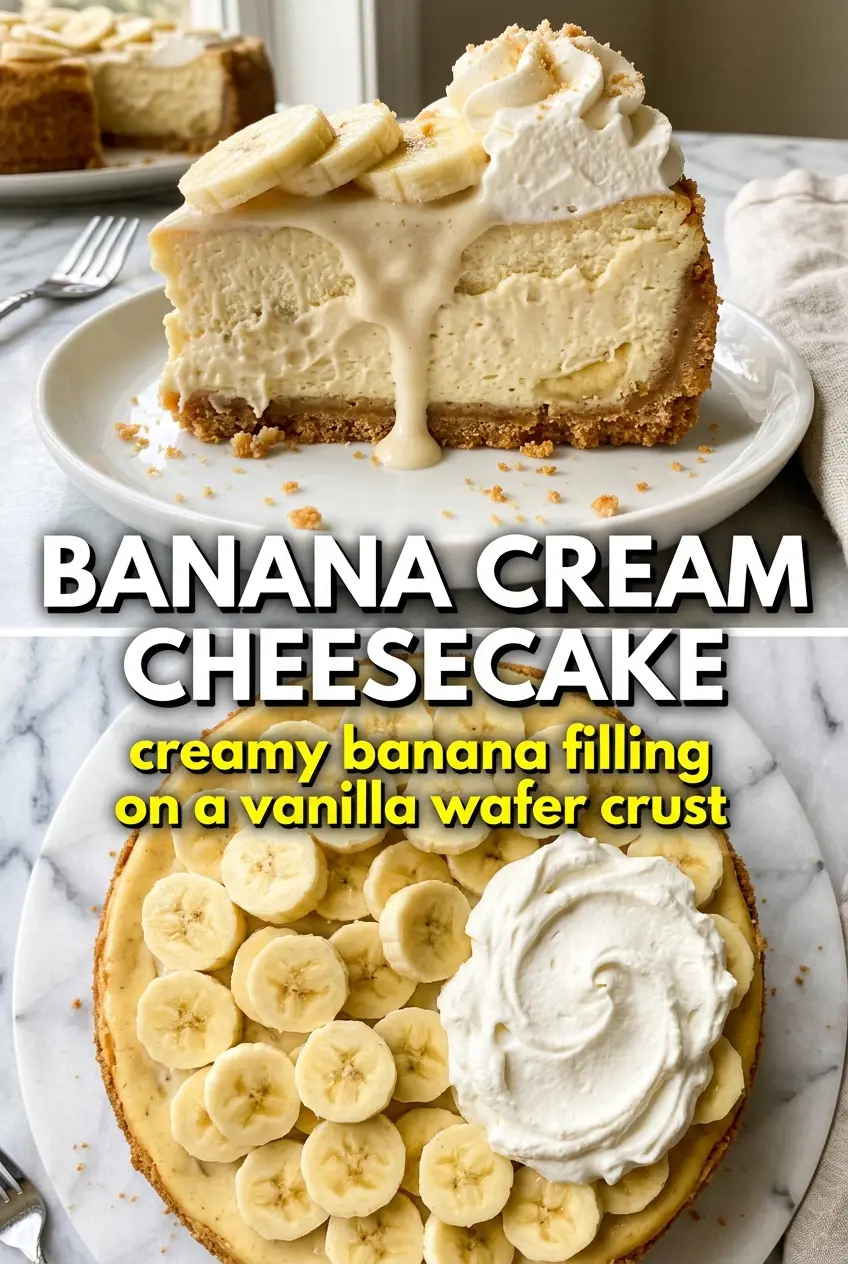
Lush, silky banana cream cheesecake lands somewhere between banana pudding and a classic no-bake cheesecake, and that’s exactly why it keeps disappearing fast from the dessert table. The crust stays crisp enough to give you that vanilla wafer snap, while the filling sets into a cool, creamy slice that holds together without baking or water baths.
The key is building enough structure without making the filling heavy. Softened cream cheese beats smooth before anything else goes in, which keeps the final texture from turning grainy. The instant banana pudding mix does more than add flavor; it helps the cheesecake firm up while still tasting light and spoonable. Layering sliced bananas through the center keeps the banana flavor fresh and gives each bite a little real fruit instead of relying on pudding alone.
Below, I’ve included the timing that matters most, the trick for keeping the crust from crumbling, and a few smart swaps if you need to adjust for what’s in your kitchen.
The filling set up beautifully after chilling overnight, and the banana slices in the middle kept every bite tasting fresh instead of just sweet. My crust stayed firm even after slicing, which never happens with my no-bake desserts.
Banana Cream Cheesecake is worth keeping on hand for the smooth filling, vanilla wafer crust, and those fresh banana layers in the middle.
The Reason This No-Bake Cheesecake Holds Its Shape
The filling has two jobs here: stay airy and slice cleanly. That’s why the cream cheese gets beaten until perfectly smooth before anything else goes in. If you rush that part, tiny lumps stay hidden at first and show up later as a grainy texture once the pudding mix and whipped topping are folded in.
The second thing that matters is the balance between moisture and structure. The instant pudding mix thickens the base without cooking, and the cold milk hydrates it just enough to help the filling set. Go easy on the milk, though. Too much and the cheesecake stays soft in the center long after the chilling time is up.
- Cream cheese — Full-fat cream cheese gives this dessert its body and tang. Let it soften fully at room temperature so it beats smooth without overmixing.
- Instant banana pudding mix — This is the shortcut that gives both banana flavor and setting power. Cook-and-serve pudding won’t work the same way, because it needs heat to thicken.
- Whipped topping — Fold it in at the end to lighten the filling. If you use freshly whipped cream instead, whip it to medium peaks so it still holds the slice.
- Vanilla wafers — They bring the right buttery, nostalgic flavor and a crust that doesn’t fight the filling. Graham crackers can work, but they change the whole character of the cheesecake.
Building the Layers So the Filling Stays Creamy, Not Watery
- Vanilla wafer crumbs — Crush them fine enough that the crust packs tightly, but don’t turn them into dust. A little texture helps the crust cling together once the butter sets.
- Butter and sugar — The butter binds the crumbs, and the sugar adds a little crunch after chilling. Press the mixture firmly into the pan so it doesn’t crumble when sliced.
- Bananas — Use ripe bananas with plenty of spots. They’re sweeter and more aromatic, but not so soft that they melt into the filling during chilling.
- Cold milk — Cold milk helps the pudding mix thicken properly. Warm milk can thin the mixture out and slow down the set.
Pressing, Layering, and Chilling the Cheesecake the Right Way
Forming a Crust That Slices Cleanly
Mix the crushed vanilla wafers, melted butter, and sugar until the crumbs look evenly moistened, like damp sand. Press them firmly into the bottom of a 9-inch springform pan, using the bottom of a measuring cup to pack the surface flat. If the crust feels loose now, it will fall apart later. A quick 20-minute chill firms the butter so the filling can go on top without dragging the crumbs around.
Beating the Filling Until It’s Smooth
Beat the softened cream cheese on its own first until it looks glossy and no lumps remain. Then add the sweetened condensed milk, dry pudding mix, and cold milk, and keep mixing just until the mixture thickens. If the filling looks loose at this stage, don’t panic — the pudding needs a minute to hydrate before it tightens up. Stop once it’s smooth and thick; overbeating after the whipped topping goes in can knock the air right back out.
Layering the Bananas Without Sinking Them
Spread half the filling over the crust, then arrange the banana slices in a single layer. That layer does best when the bananas are tucked close together but not stacked, since piled fruit can create gaps and make the middle uneven. Add the remaining filling over the top and smooth it gently so the bananas stay buried. The goal is a clean cross-section, not a fruit salad in the center.
Giving It Enough Time to Set
Refrigerate the cheesecake for at least 6 hours, but overnight is better if you want neat slices. The center should feel firm when you tap the pan lightly, not wobbly like pudding. If you cut too soon, the filling smears and the crust can buckle under the weight. Add the whipped topping, extra banana slices, and caramel drizzle right before serving so the top stays fresh and the bananas don’t brown as quickly.
How to Adjust This Banana Cream Cheesecake for Different Kitchens
Dairy-Free Version with a Different Finish
Use dairy-free cream cheese, dairy-free whipped topping, and plant milk in place of the milk. The texture will still set, but it will taste a little less tangy and the filling will be softer, so give it the full chill time. Check the pudding mix label too, since some instant mixes contain dairy.
Make It a Little More Bananas-and-Cream
Add a few extra banana slices on the filling layers and garnish generously at the end. That gives you a fresher banana bite, but it also shortens the window before the bananas start to brown, so serve it the day you add the topping.
Gluten-Free Crust Swap
Use gluten-free vanilla sandwich cookies or gluten-free vanilla wafers in the crust. You’ll still get that sweet, cookie-forward base, though the crumbs may need a touch more butter if they seem dry.
Storage and Reheating
- Refrigerator: Store covered for up to 4 days. The bananas soften after the first day, but the cheesecake still slices well.
- Freezer: It freezes better without the whipped topping and garnish. Wrap the chilled cheesecake tightly, freeze for up to 1 month, and thaw in the refrigerator overnight.
- Reheating: No reheating needed. Serve it cold straight from the refrigerator, and add toppings after thawing or chilling so the surface stays neat.
Questions I Get Asked About This Recipe
Banana Cream Cheesecake
Ingredients
Equipment
Method
- Mix the crushed vanilla wafers, melted butter, and sugar until the crumbs look evenly coated. Press the mixture firmly into the bottom of a 9-inch springform pan, then refrigerate for 20 minutes until set.
- Beat the cream cheese until completely smooth, scraping the bowl as needed for a silky texture. Add the sweetened condensed milk, dry instant banana pudding mix, and cold whole milk, then beat until smooth and thick.
- Fold in the whipped topping until airy and combined, with no streaks remaining. Pour half the filling over the chilled crust.
- Arrange the banana slices in a single layer over the first layer of filling. Pour the remaining filling on top and smooth the surface so it’s level.
- Refrigerate the cheesecake for at least 6 hours or overnight until firm to the touch. Spread whipped topping over the top just before serving for a fresh, fluffy look.
- Garnish with extra banana slices and caramel drizzle right before serving. Slice with a clean cut so the banana cream filling holds its shape.