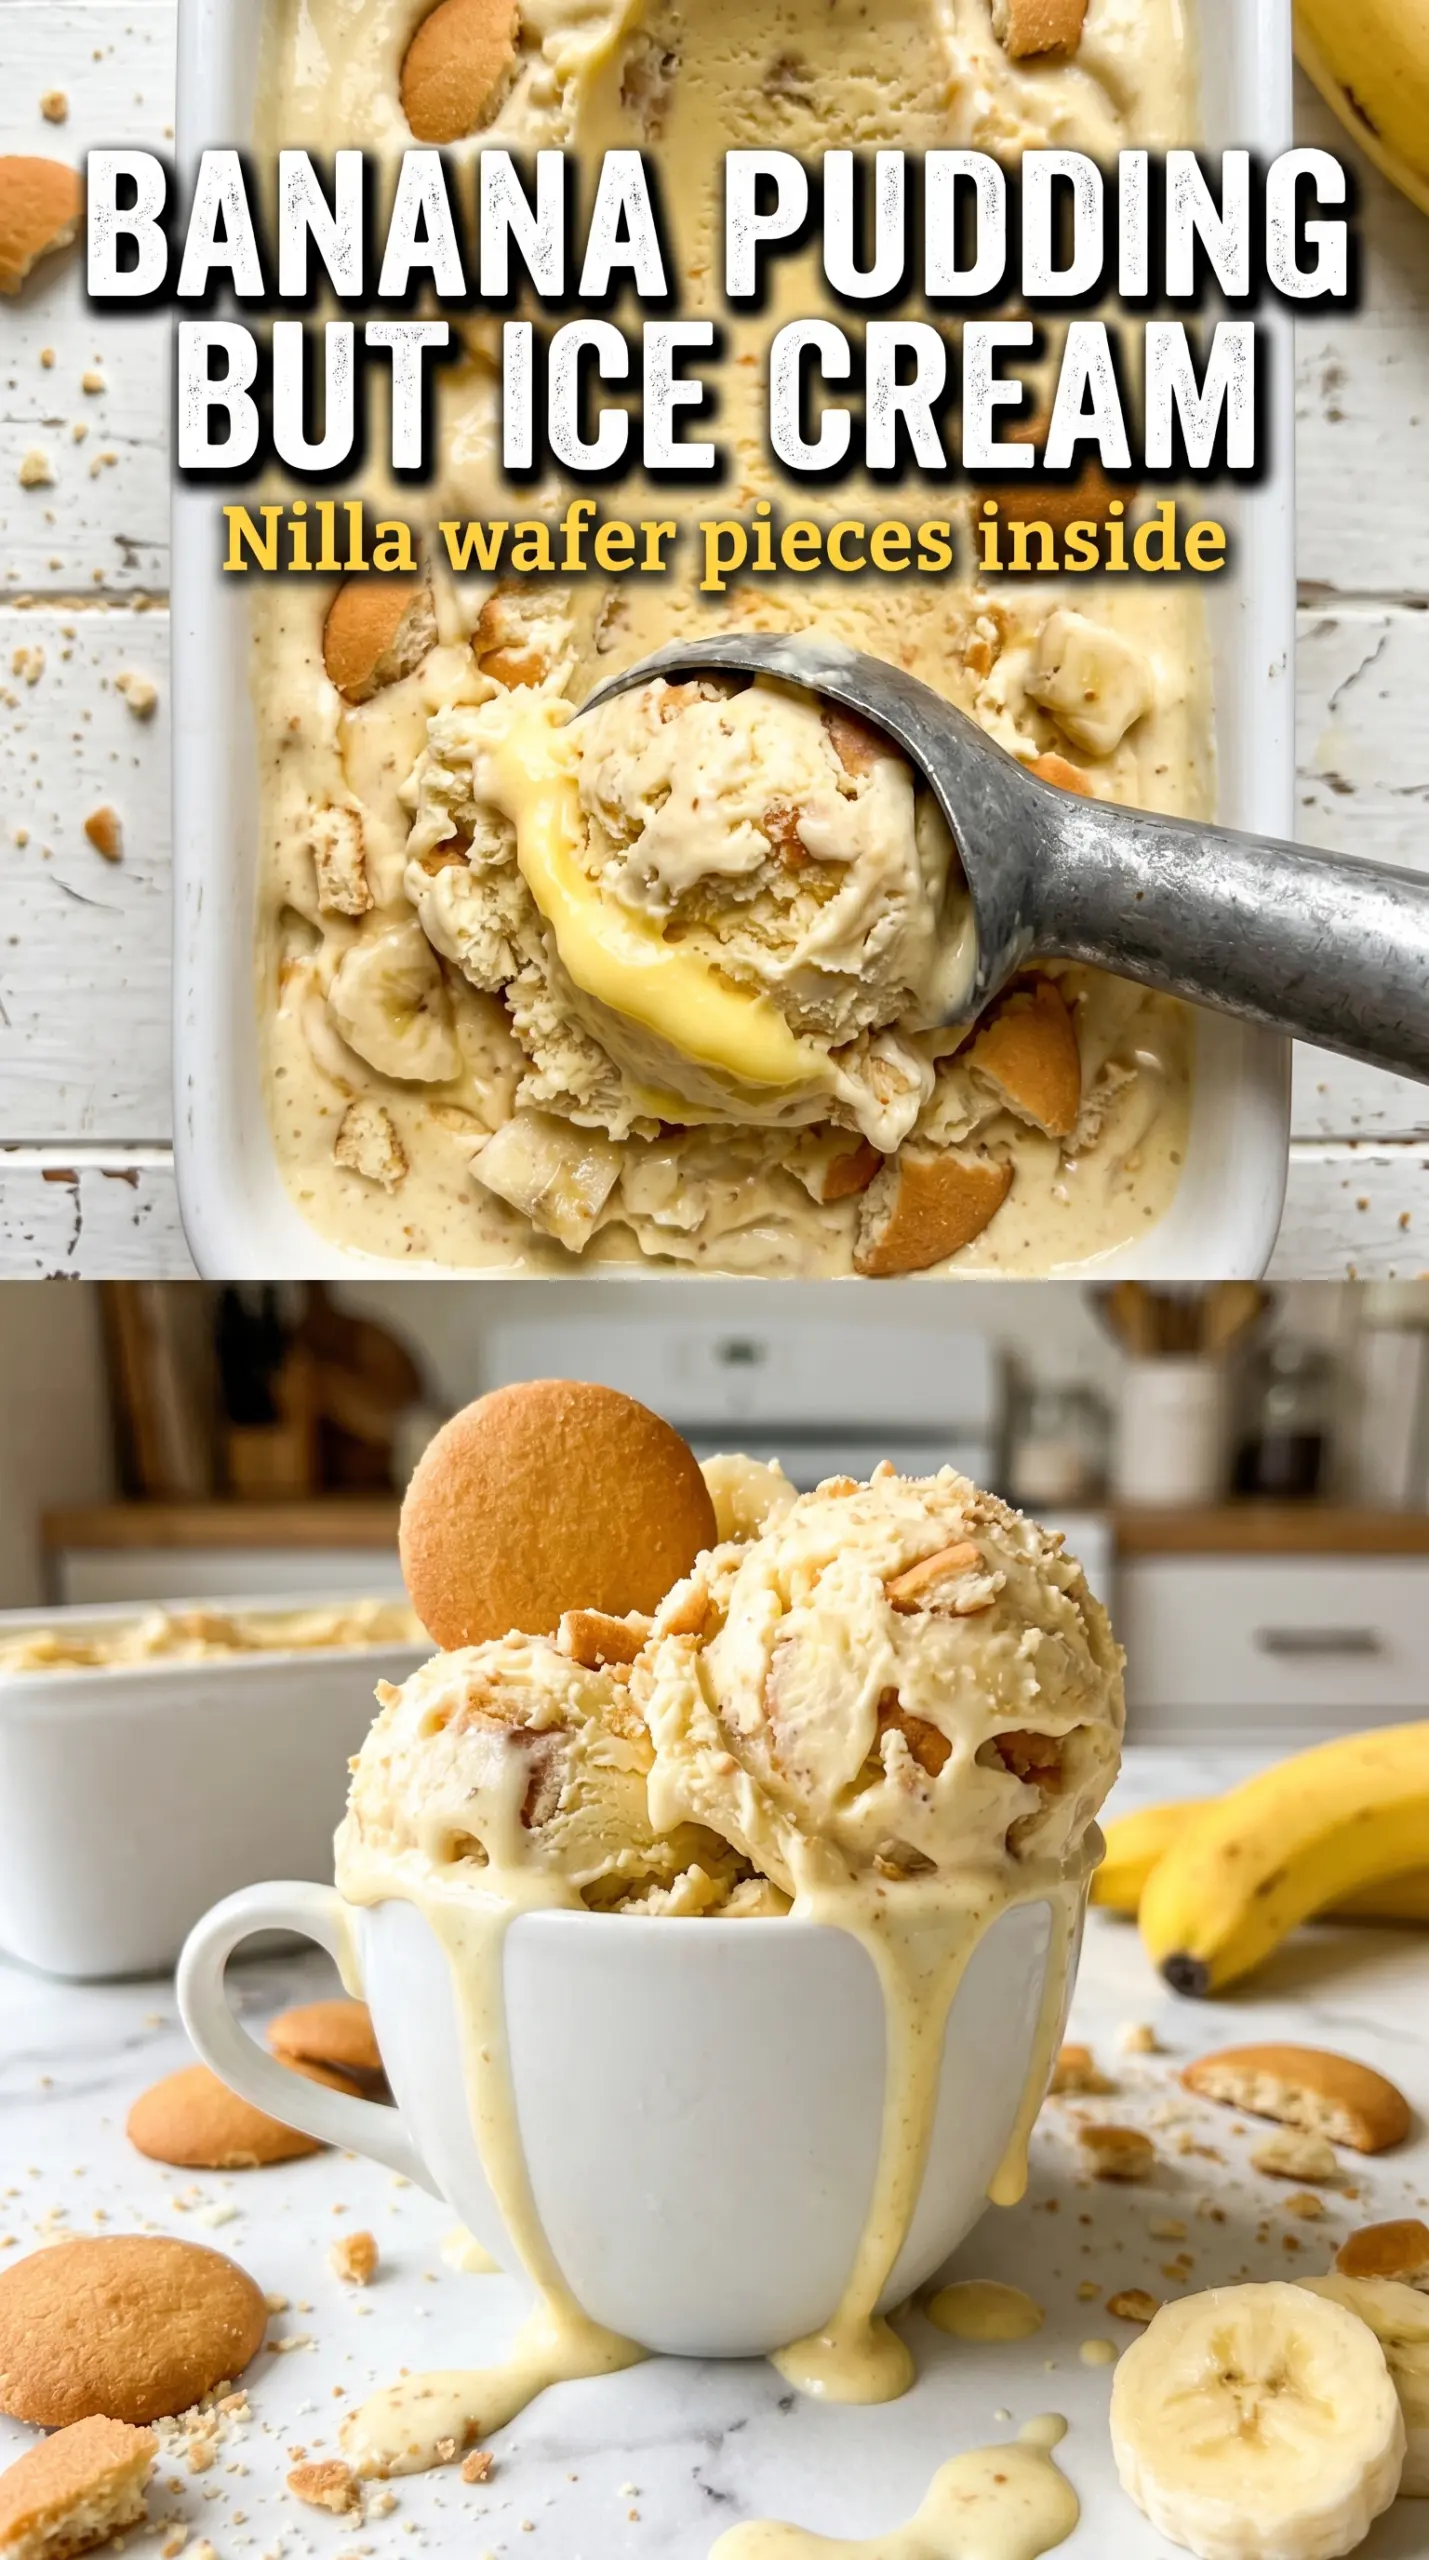
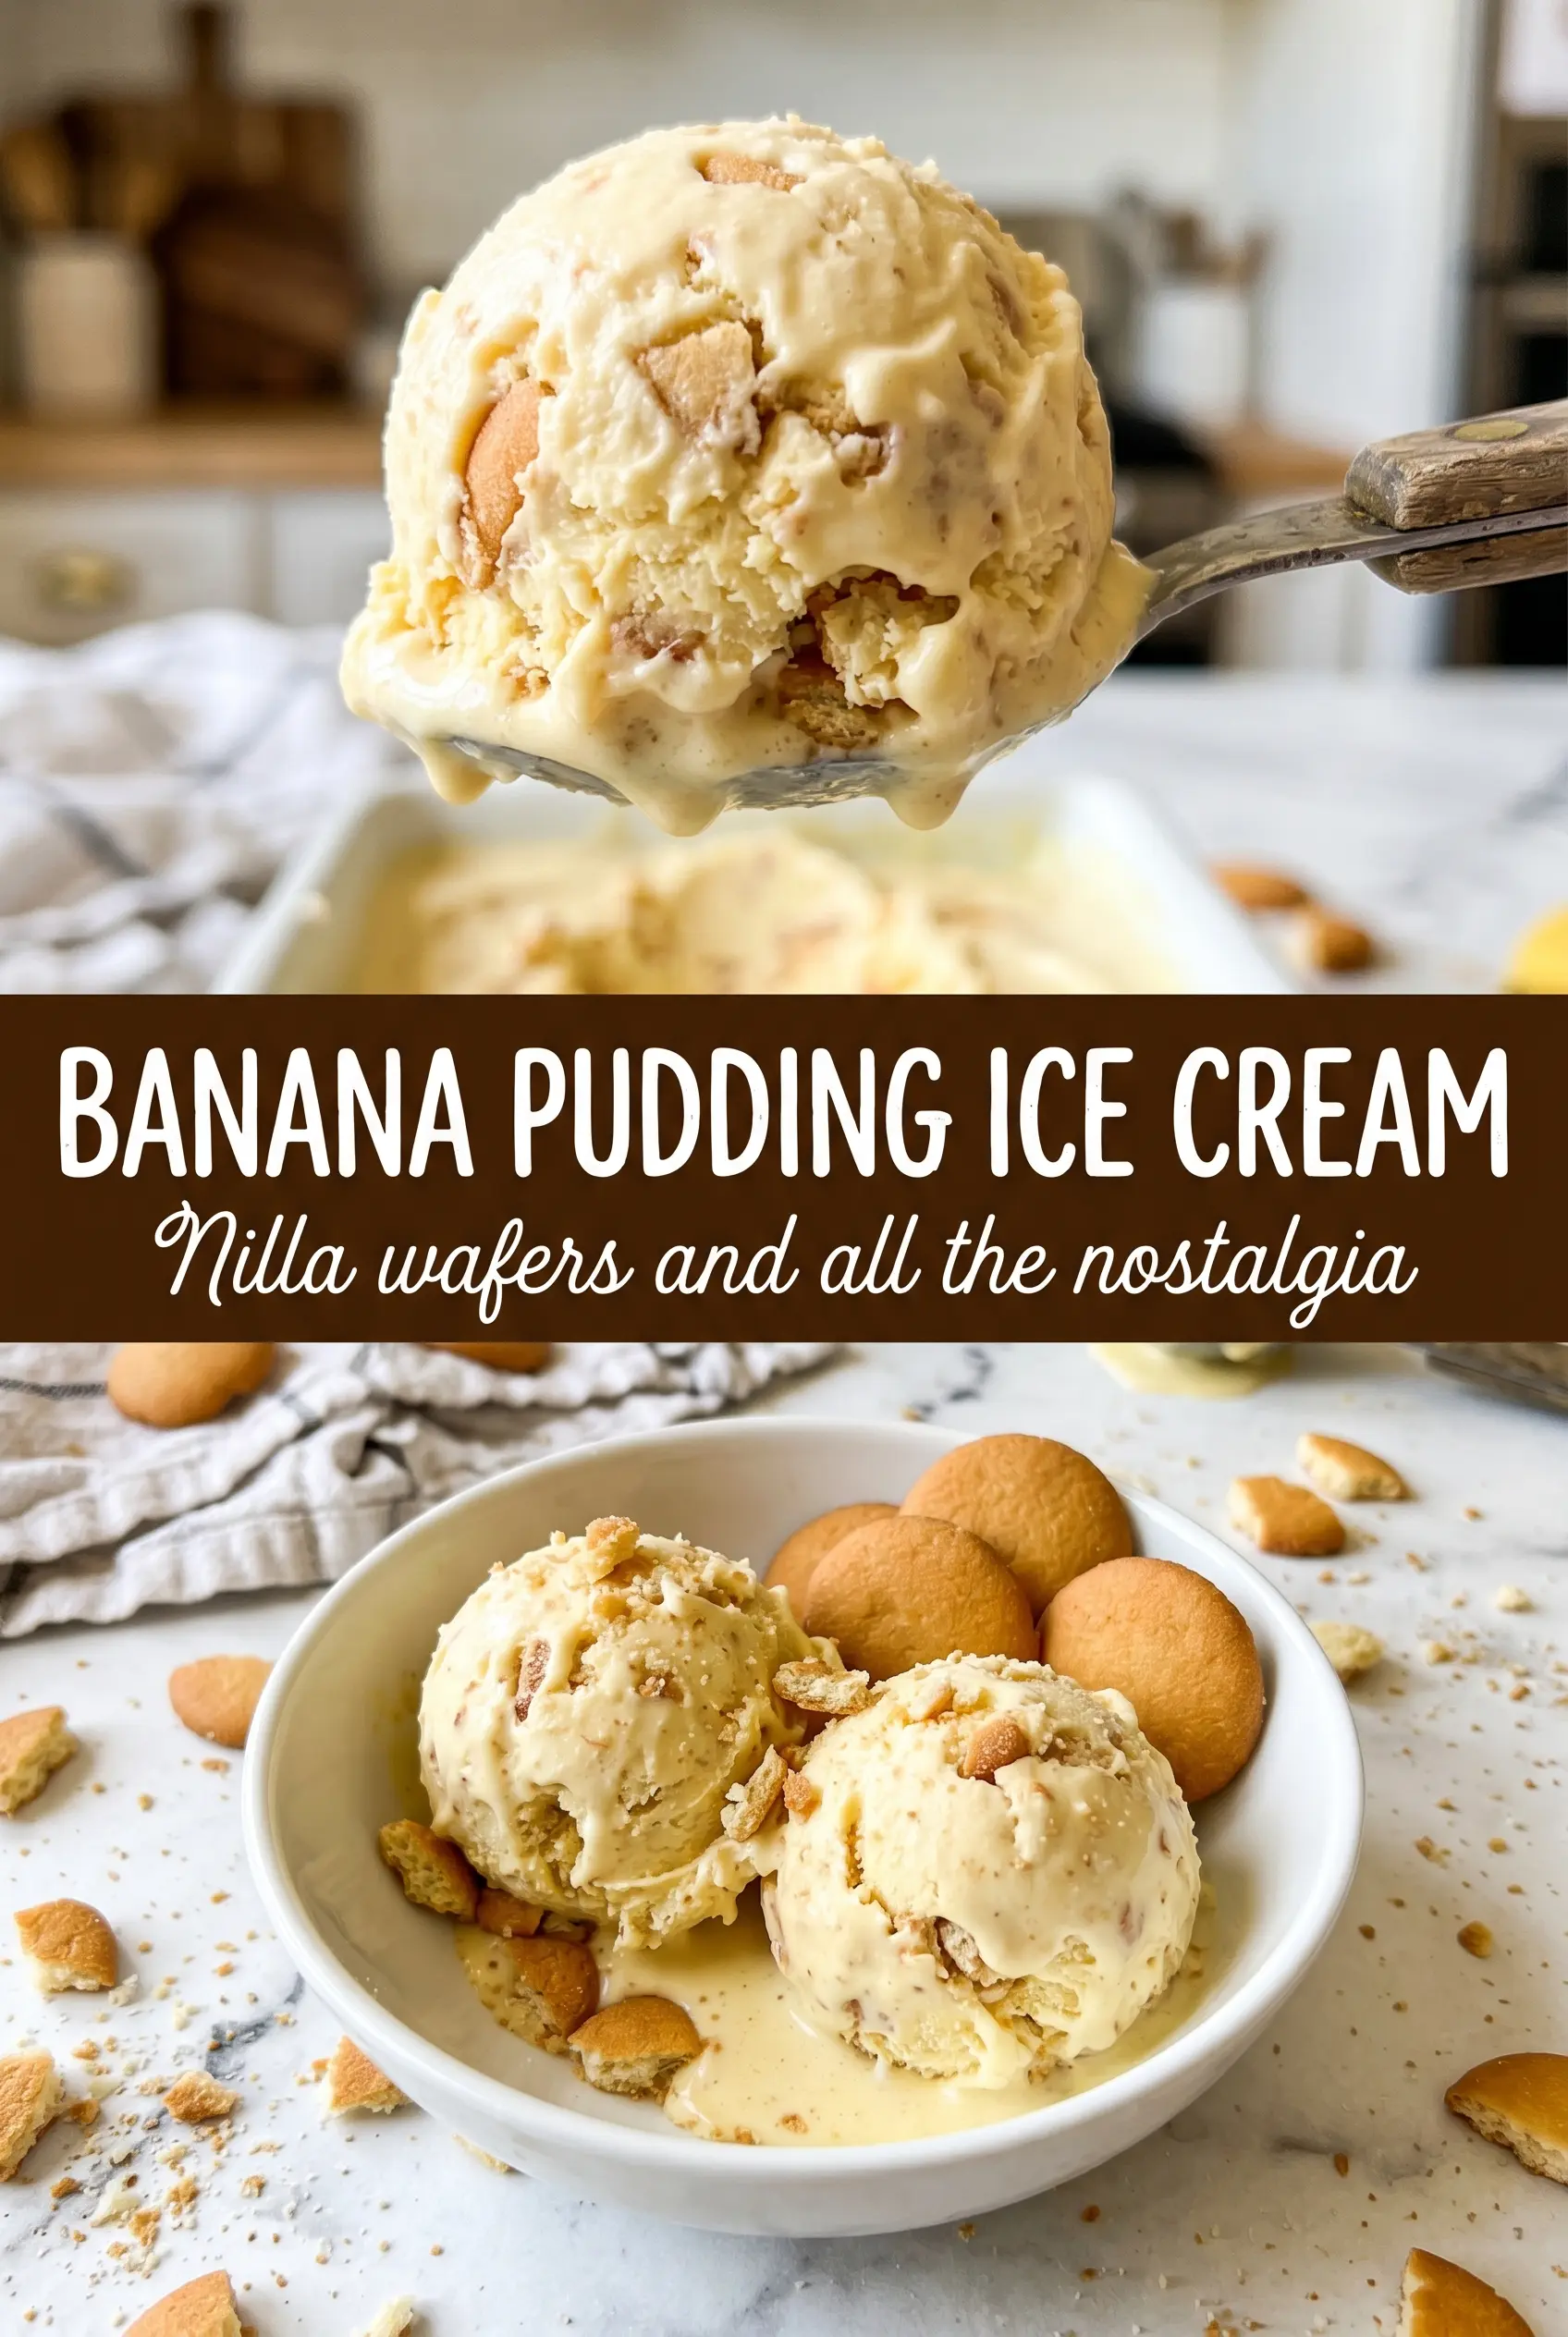
Creamy banana pudding ice cream tastes like the best parts of the classic dessert pulled into a cold, scoopable custard. The banana flavor runs all the way through the base instead of sitting on top as a garnish, and the crushed Nilla wafers keep their presence in every bite without turning the whole thing mushy. Frozen banana slices add little pockets of soft fruit that make the texture feel like banana pudding after a trip through the ice cream maker.
The trick here is building a real custard first, then adding the banana puree after the heat is off so the flavor stays bright and the dairy doesn’t pick up that cooked-banana taste. I also like to chill the base completely before churning. That extra rest gives the custard time to thicken and the banana flavor time to settle in, which makes the final ice cream taste more finished and less like a rushed mix.
Below, I’ve laid out the part that matters most: how to keep the custard smooth, when to add the wafers so they stay distinct, and what to do if you want a stronger banana flavor or a dairy-free version.
The custard came out silky and the wafers stayed crunchy enough to taste like banana pudding instead of just plain banana ice cream. I chilled it overnight and the texture was perfect after churning.
Save this banana pudding ice cream for the day you want frozen custard, crushed Nilla wafers, and real banana flavor in one bowl.
The Custard Has to Reach the Right Point Before the Banana Goes In
Ice cream base can look fine long before it’s actually ready. For this recipe, the egg yolks and dairy need to cook to a light custard at 175F so the mixture thickens enough to churn into a scoopable base later. If you pull it too early, the ice cream can freeze thin and icy; if you push it too hot, the yolks tighten and you get a grainy texture.
The other key move is adding the banana puree after the custard comes off the heat. Bananas lose a lot of their fresh flavor when they cook hard, and they can turn flat and starchy if they sit at a simmer. Stir them in once the custard is done, and the final ice cream tastes more like banana pudding than baked banana cream.
What the Bananas, Wafers, and Custard Are Each Doing Here
- Very ripe bananas — These carry the whole banana flavor, so use bananas with plenty of brown spotting. The riper they are, the sweeter and more aromatic the ice cream gets. If your bananas are only yellow, the finished ice cream will taste dull even if you add extra sugar.
- Heavy cream and whole milk — This ratio keeps the base rich without turning it buttery-heavy. Cream alone can make ice cream taste waxy and slow to melt; the milk keeps it lighter and easier to scoop. Don’t swap in low-fat milk here unless you want a icier result.
- Egg yolks — These give the custard body and that smooth, classic frozen pudding texture. They also help the ice cream hold up better in the freezer. Temper them slowly with the hot dairy so they don’t scramble.
- Nilla wafers — These bring the banana pudding part of the recipe home. Crush them roughly, not into dust, or they disappear into the base. Add them near the end of churning so they stay recognizable.
- Frozen banana slices — These add little cold bites of fruit without watering down the base. Freezing them first helps them fold in cleanly and keeps them from turning brown too fast. Fresh slices can go mushy in the churn.
Building the Base Without Scrambling the Yolks
Blend the Banana Smooth
Start by blending the ripe bananas until completely smooth. Any chunks left now will show up later as icy bits, and they won’t break down nicely once the custard is chilled. Set the puree aside while you make the base so it can be stirred in at the right moment.
Temper the Eggs Slowly
Heat the cream and milk until they’re steaming, not boiling, then whisk a little of that hot dairy into the sugar and yolks before adding the rest. This keeps the yolks from shocking and turning grainy. If you dump everything together at once, the eggs can curdle before the custard even starts to thicken.
Cook Until the Spoon Coats
Return the mixture to medium-low heat and stir constantly until it reaches 175F. It should coat the back of a spoon and leave a clean path when you run a finger through it. If you see little bits on the bottom of the pan, the heat is too high, so pull it down immediately and keep stirring.
Chill Before Churning
Strain the custard, stir in the vanilla, salt, and banana puree, then cool it completely before refrigerating for at least 4 hours. Cold base churns faster and freezes with a finer texture. If you rush this stage, the ice cream maker has to work harder and the final texture turns slushy instead of creamy.
Fold in the Mix-Ins at the End
Churn the ice cream until it’s thick and soft-serve like, then add the crushed wafers and frozen banana slices during the last 2 minutes. That timing keeps the wafers from dissolving and the banana pieces from sinking straight to the bottom. Freeze just until scoopable; if you leave it too long in the freezer, it hardens around the mix-ins and gets difficult to serve.
How to Adapt Banana Pudding Ice Cream Without Losing the Character of the Dessert
Dairy-Free Version
Use full-fat coconut milk in place of the cream and whole milk, then expect a light coconut note alongside the banana. The texture will still be creamy, but it won’t taste as close to classic banana pudding because the dairy is part of that signature custardy flavor.
Gluten-Free Swap
Replace the Nilla wafers with your favorite gluten-free vanilla cookie or crisp butter-style cookie. You still want something that crumbles into soft little bits, not a chewy cookie, or the texture won’t echo banana pudding the way it should.
Extra Banana Flavor
If you want the banana flavor louder, roast the bananas first and let them cool before blending, or add an extra half banana if yours are small. Roasting deepens the flavor, while extra raw banana keeps it brighter. Don’t add more than that without adjusting the sugar, or the base can start to taste muddy.
Storage and Reheating
- Refrigerator: Not applicable once churned. This is an ice cream, so keep it in the freezer.
- Freezer: Store in an airtight container with parchment pressed against the surface for up to 2 weeks. After that, the banana flavor starts to flatten and the wafers soften too much.
- Reheating: Let it sit at room temperature for 5 to 10 minutes before scooping. If it’s rock hard, people usually try to force the scoop straight in and end up cracking the surface instead of letting the ice cream loosen naturally.
Answers to the Questions Worth Asking
Banana Pudding Ice Cream
Ingredients
Equipment
Method
- Blend ripe bananas until completely smooth, then set aside. The puree should be silky with no visible chunks.
- Heat heavy cream and whole milk until steaming. You want small steam wisps, not a rolling boil.
- Slowly whisk the steaming cream mixture into egg yolks beaten with granulated sugar. Keep whisking until the mixture looks smooth and slightly lighter.
- Cook the custard over medium-low heat, stirring constantly, until it reaches 175F. It should thicken enough to coat the back of a spoon.
- Strain the custard, then stir in vanilla extract, salt, and banana puree. The finished base should look uniform and creamy with a banana color.
- Cool completely before chilling. Move to the refrigerator so it firms up evenly for churning.
- Refrigerate the custard for 4 hours, then churn in an ice cream maker. Stop when it has the texture of soft-serve.
- Fold in crushed Nilla wafers and frozen banana slices in the last 2 minutes of churning. Stop and look for evenly distributed wafers and visible banana pieces.
- Freeze until scoopable. The ice cream should hold shape in the scoop with a creamy finish.