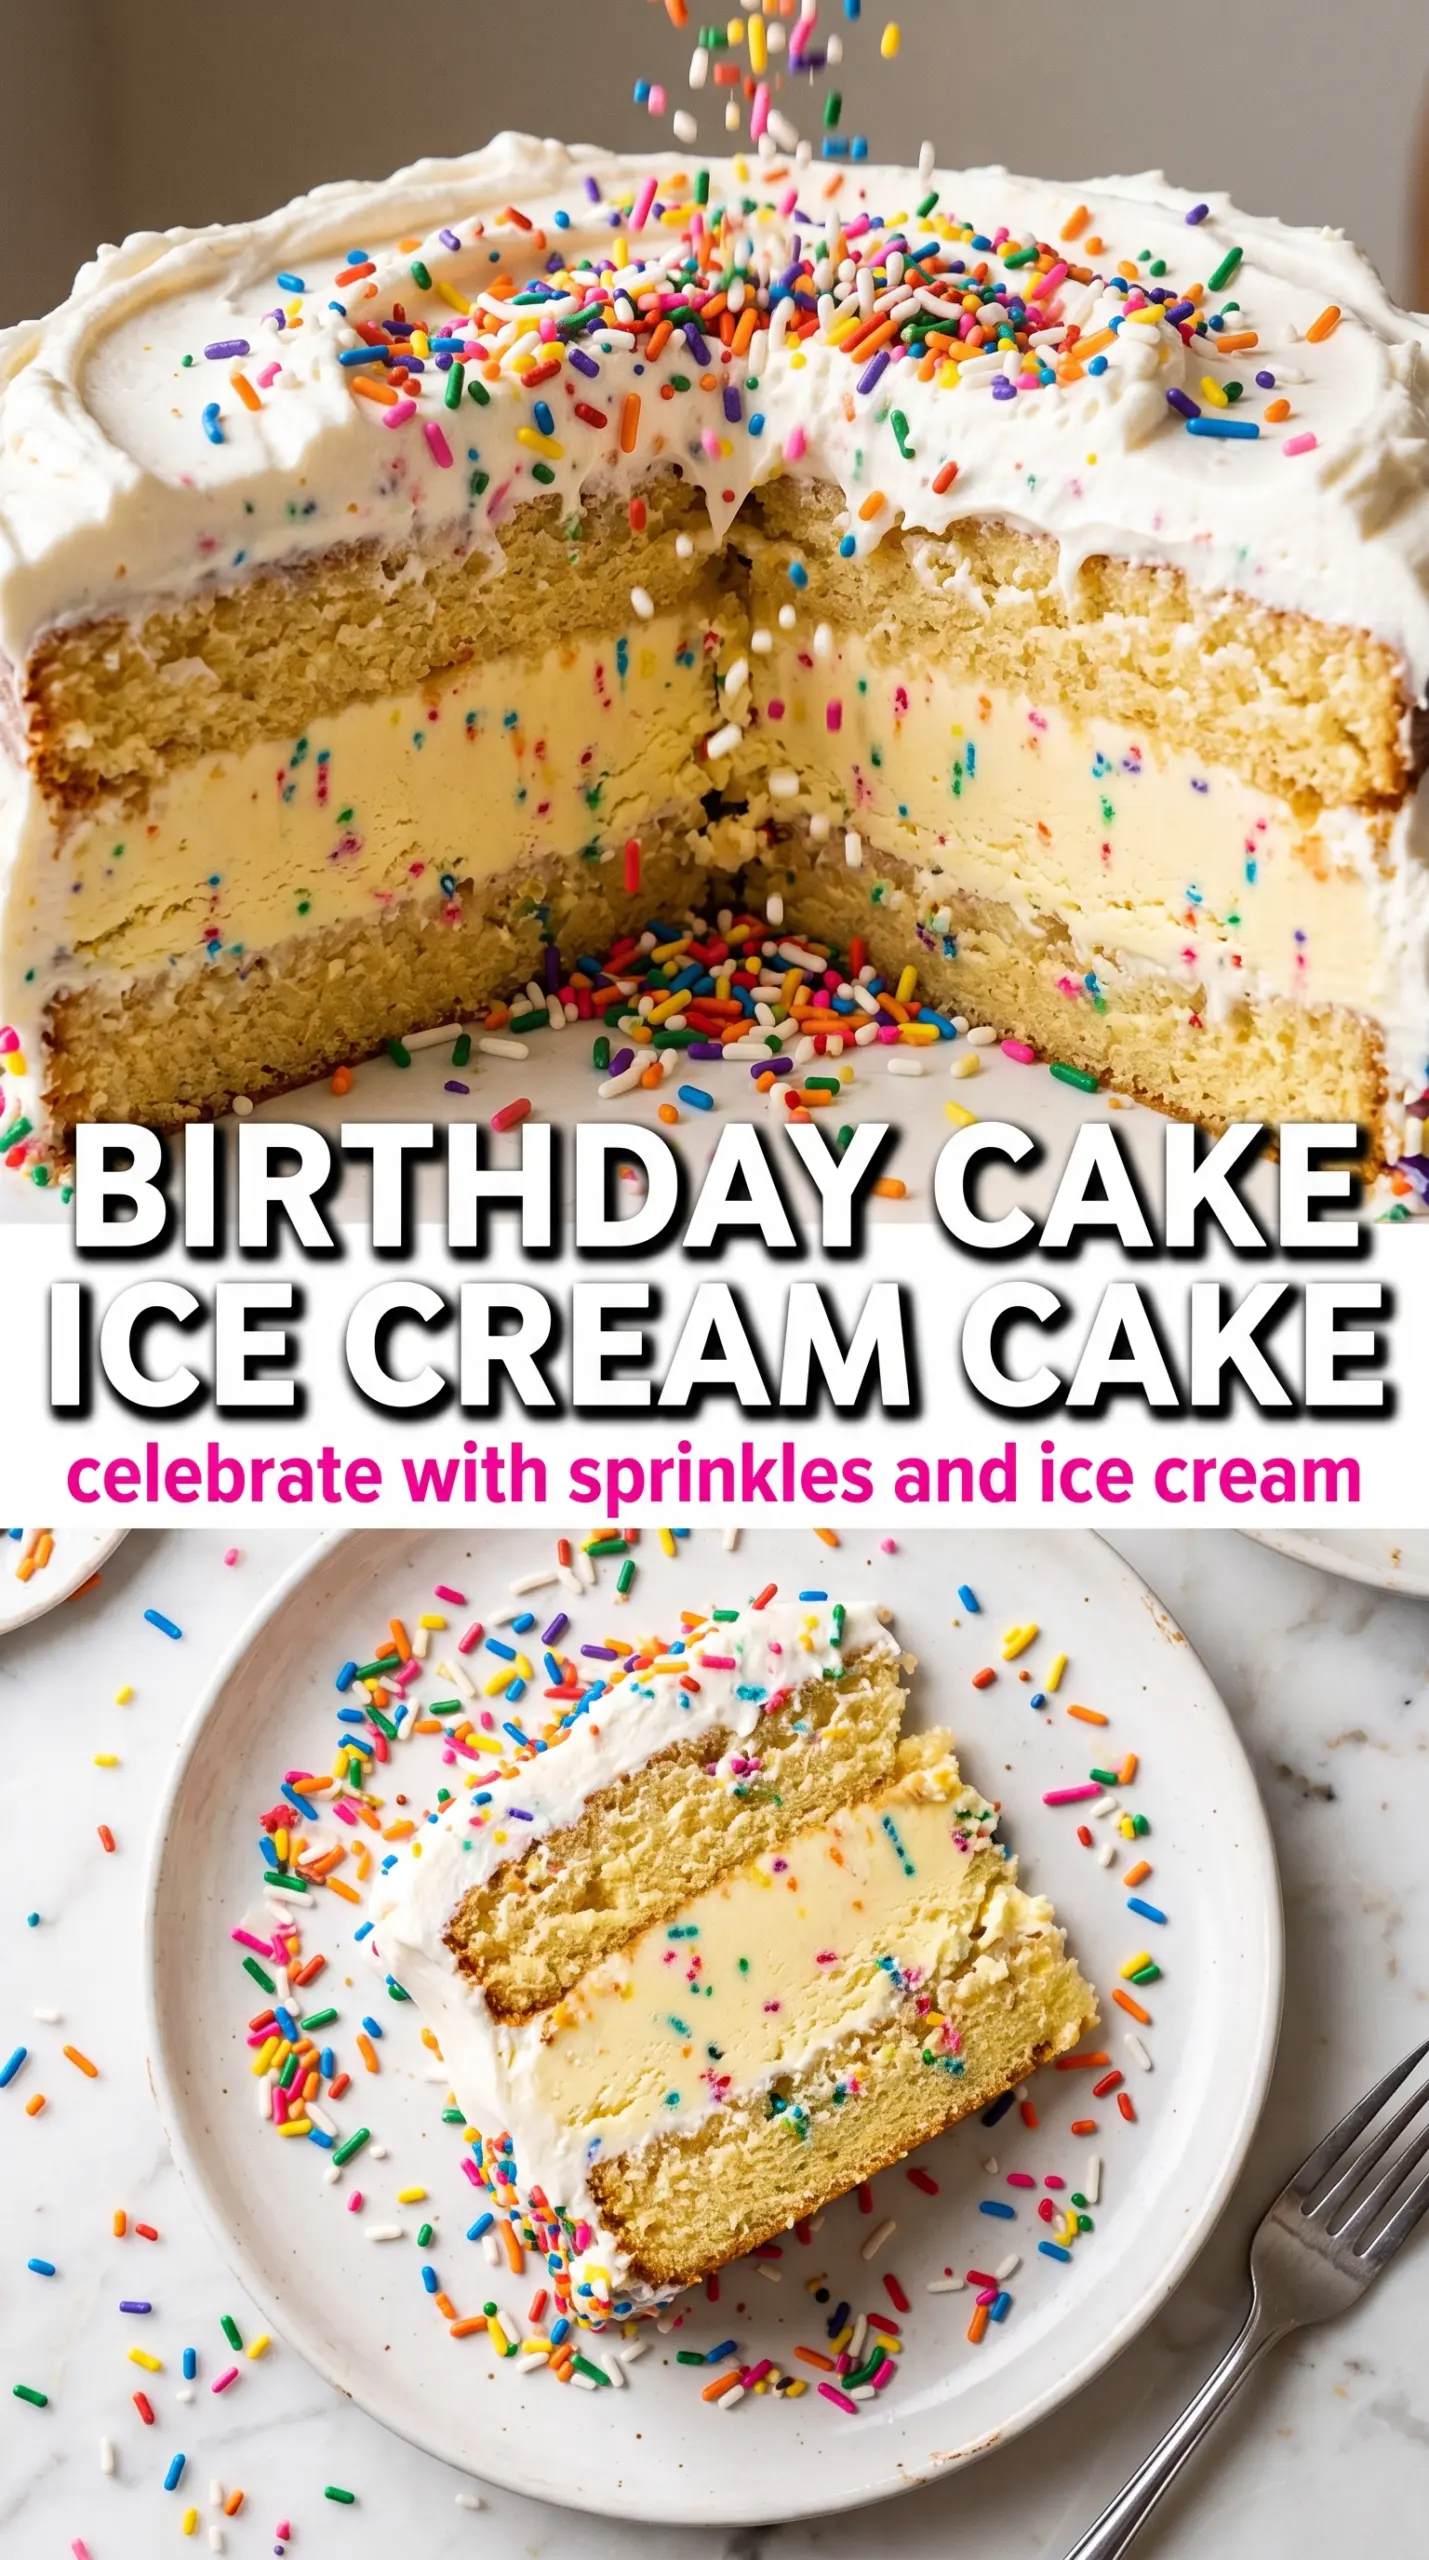
Birthday Cake Ice Cream Cake delivers the best parts of a celebration in one cold, sliceable dessert: soft funfetti cake, creamy cake batter ice cream, and a thick layer of whipped cream covered in rainbow sprinkles. The texture contrast is what makes it memorable. You get a firm frozen center that cuts cleanly, but it still tastes light and playful instead of heavy.
This version works because each layer has a job. The vanilla frosting isn’t there just for sweetness; it helps seal the cake layers so they stay tender even after hours in the freezer. Softening the ice cream just enough to spread it keeps the layers even, and folding in the sprinkles at the end keeps their color from bleeding too much. Freeze time matters here. If the cake isn’t fully firm before the whipped cream goes on, the top can slide and the whole thing gets messy fast.
Below, I’m walking through the little details that make this cake slice beautifully, plus the swaps that still keep the birthday-party feel if you need to work with what you’ve got.
The ice cream layer stayed smooth and the sprinkles didn’t bleed all over the whipped cream. I loved how the cake slices came out clean after freezing overnight.
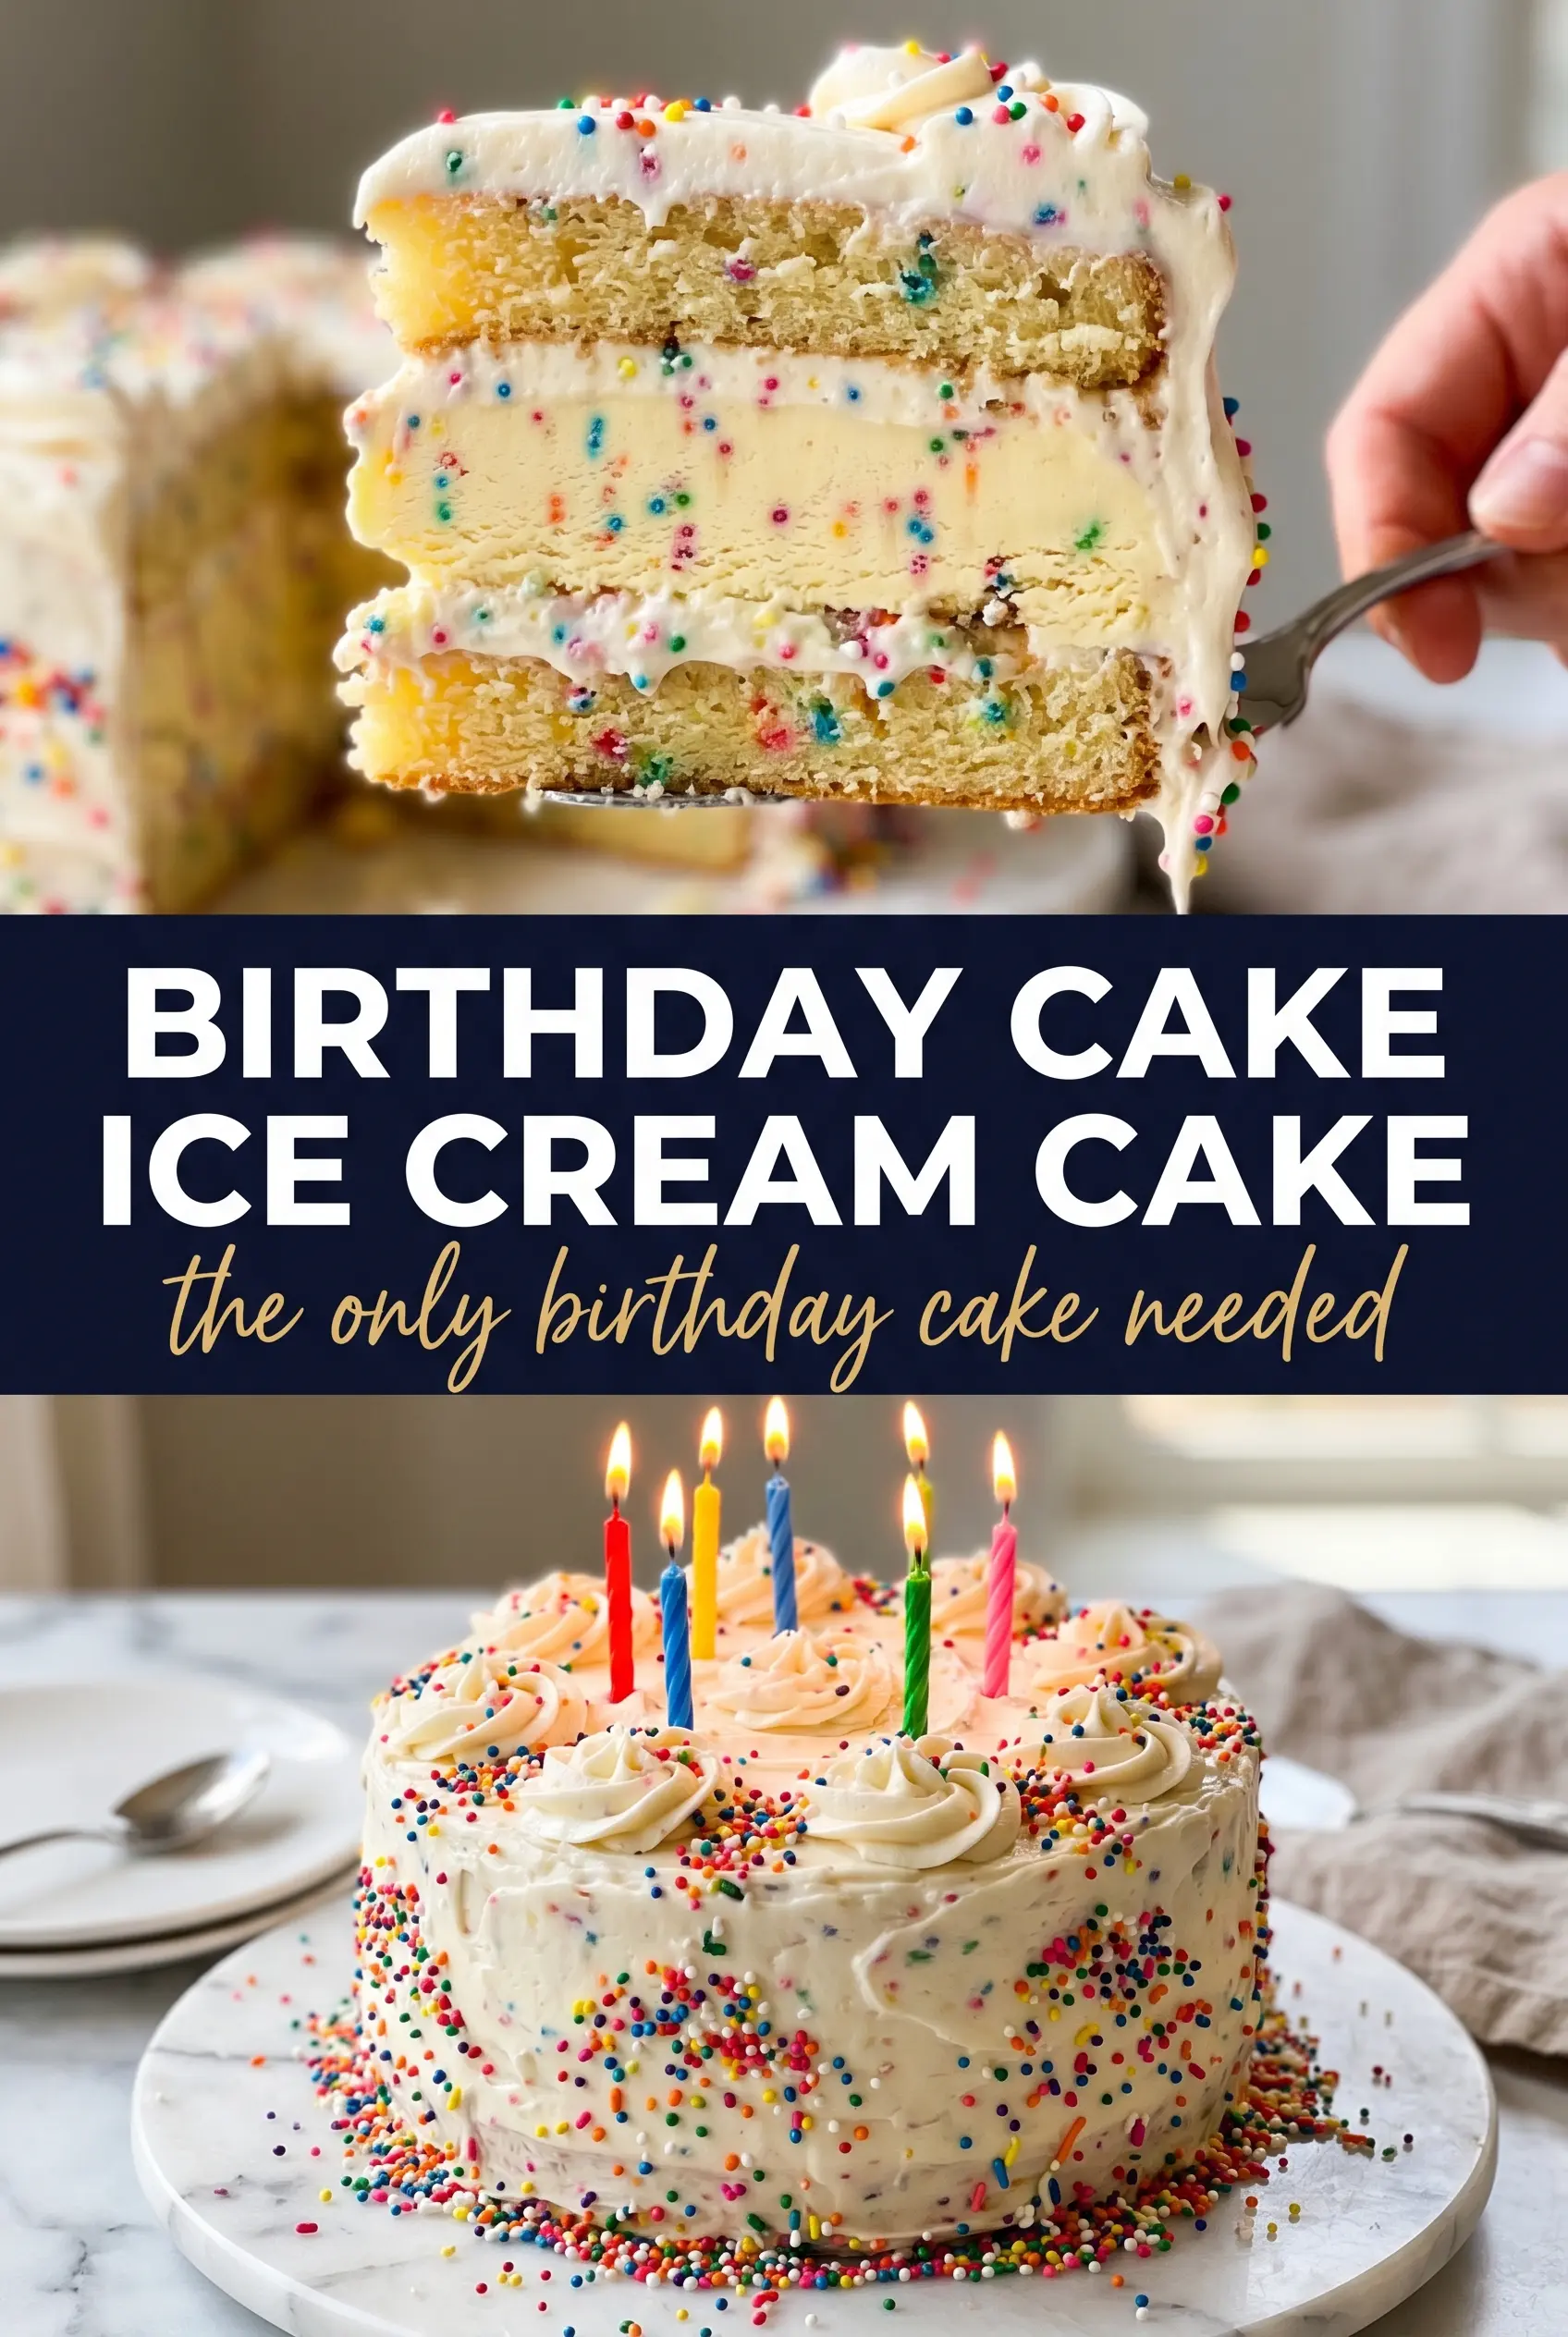
Keep this Birthday Cake Ice Cream Cake handy for parties when you want funfetti layers, cake batter ice cream, and a sprinkle-covered finish all in one slice.
The Part That Keeps the Layers from Slipping
The biggest mistake with an ice cream cake like this is building it before the cake is sturdy enough. Once the softened ice cream goes in, the weight starts working against you. If the cake layer is still warm or the frosting is too soft, the whole thing shifts when you try to add the second layer or spread the topping.
Freeze the first assembled layers until they feel hard at the center when you press the top gently. That pause is what gives you clean slices later. It also keeps the whipped cream on top instead of melting into the cake beneath it. This is one of those desserts that rewards patience more than fancy technique.
- Funfetti cake — A baked box mix works fine here, and honestly that’s part of the charm. What matters is a cake with enough structure to hold up in the freezer. If you bake from scratch, keep the crumb tender but not delicate.
- Birthday cake or cake batter ice cream — This is the flavor that gives the cake its birthday-party identity. Let it soften just enough to spread without making a puddle. If it gets too melty, it will soak into the cake instead of sitting in a neat layer.
- Vanilla frosting — This acts like a thin barrier between cake and ice cream, which helps prevent sogginess. A canned frosting is fine because it gets brushed on thinly. Don’t glob it on or the slices can turn greasy.
- Whipped cream — Use a stable whipped cream if you want the top to hold up after freezing. Freshly whipped cream tastes best, but if you’re making this far ahead, a stabilized version stays prettier.
- Rainbow sprinkles — Fold some into the ice cream for color inside, then use more on the outside for the full celebration look. Jimmies hold up better than nonpareils, which can bleed and melt into the cream.
What Each Ingredient Is Actually Doing in This Ice Cream Cake
- Base layer (cookies, cake, or graham cracker) — This provides structure and stability. Crushed and mixed with butter creates a firm foundation.
- Ice cream (the main star) — Use quality ice cream or make homemade. Softness matters for layering.
- Sauce or topping between layers (fudge, caramel, or fruit) — This adds moisture, flavor, and prevents dryness. Don’t skip this layer.
- Frosting or whipped cream (optional outer layer) — This prevents freezer burn and adds creaminess. Stabilized whipped cream works best.
- Freezing time (at least 4-6 hours) — This sets the layers so cake slices cleanly. Longer freezing prevents melting during serving.
- Room temperature before serving (5-10 minutes) — This softens the cake slightly for better texture. Serve immediately after thawing.
- Toppings (chocolate, nuts, cookies, or sprinkles) — These add visual appeal and texture. Add right before serving.
- Storage (in freezer at 0°F or below) — This prevents ice crystal formation and maintains quality. Cover with plastic wrap.
Building the Cake So It Cuts Cleanly
Setting the First Layer
Start with one cake layer in the springform pan and brush it with a thin coat of vanilla frosting. You want coverage, not frosting thickness. If the layer is too thick, the cake can slide when you add the ice cream. If you’re using crumbled cake instead of neat layers, press it down firmly so the base acts like one solid layer.
Spreading the Ice Cream
Stir the softened ice cream just enough to make it spreadable, then fold in the sprinkles right before layering. Spread it evenly all the way to the edges so the cake freezes into a level block. If the ice cream is still hard in spots, you’ll tear the cake underneath while trying to smooth it out.
Freezing Before the Topping
Freeze the assembled cake until it’s completely firm, not just cold on top. That usually takes about four hours, but a full overnight freeze gives the cleanest release from the pan. If you rush this part, the whipped cream will sink and the slices will lean instead of standing tall.
Finishing with Whipped Cream and Sprinkles
Spread the whipped cream over the frozen cake after it has hardened. Work quickly and keep the layer even, then cover the top and sides with sprinkles before the cream starts to firm up. Press the candles in at the very end so they stand upright without cracking the surface.
Make It a Neapolitan-Style Party Cake
Swap half the birthday cake ice cream for strawberry or chocolate if you want a more layered flavor. You’ll lose some of the pure funfetti look, but the cake becomes a little more balanced and less sweet, which works well for guests who don’t love full-on frosting energy.
Gluten-Free Version
Use a gluten-free funfetti-style cake or a plain gluten-free vanilla cake with sprinkles mixed into the batter. The freezer time and layering stay the same, but let the cake cool completely before assembling because gluten-free cakes can be more fragile when warm.
Dairy-Free Birthday Cake Ice Cream Cake
Use dairy-free cake batter ice cream, whipped topping, and a plant-based frosting. The texture will be a little softer after freezing, so give it extra time before slicing. This version still gives you the same birthday-cake feel without the dairy.
Storage and Reheating
- Refrigerator: Don’t store this in the fridge. The ice cream layer will melt and collapse.
- Freezer: Store tightly wrapped for up to 1 week for best texture. After that, the cake can start to pick up freezer flavors and the whipped cream top gets icy.
- Reheating: No reheating needed. For clean slices, let the cake sit at room temperature for 10 to 15 minutes before cutting so the knife glides through the frozen layers instead of cracking them.
Questions I Get Asked About This Recipe
Birthday Cake Ice Cream Cake
Ingredients
Equipment
Method
- If slicing cake, arrange 1 funfetti cake layer in a 9-inch springform pan and brush it with vanilla frosting, so the layer is evenly coated with a thin sheen.
- Fold 1/2 cup rainbow sprinkles into softened birthday cake or cake batter ice cream until the color is evenly distributed.
- Spread the sprinkle-flecked ice cream over the prepared cake layer in an even layer with a flat top.
- Add a second cake layer if using, then brush it with frosting so it adheres before freezing.
- Freeze for 4 hours until completely firm, with the cake holding its shape when pressed lightly at the edges.
- Cover the top and sides with whipped cream, smoothing it so there are no bare spots.
- Cover every inch with rainbow sprinkles and press birthday candles into the top so the decorations stick firmly.
- Freeze for 2 hours before releasing and serving, until fully set and sliceable.