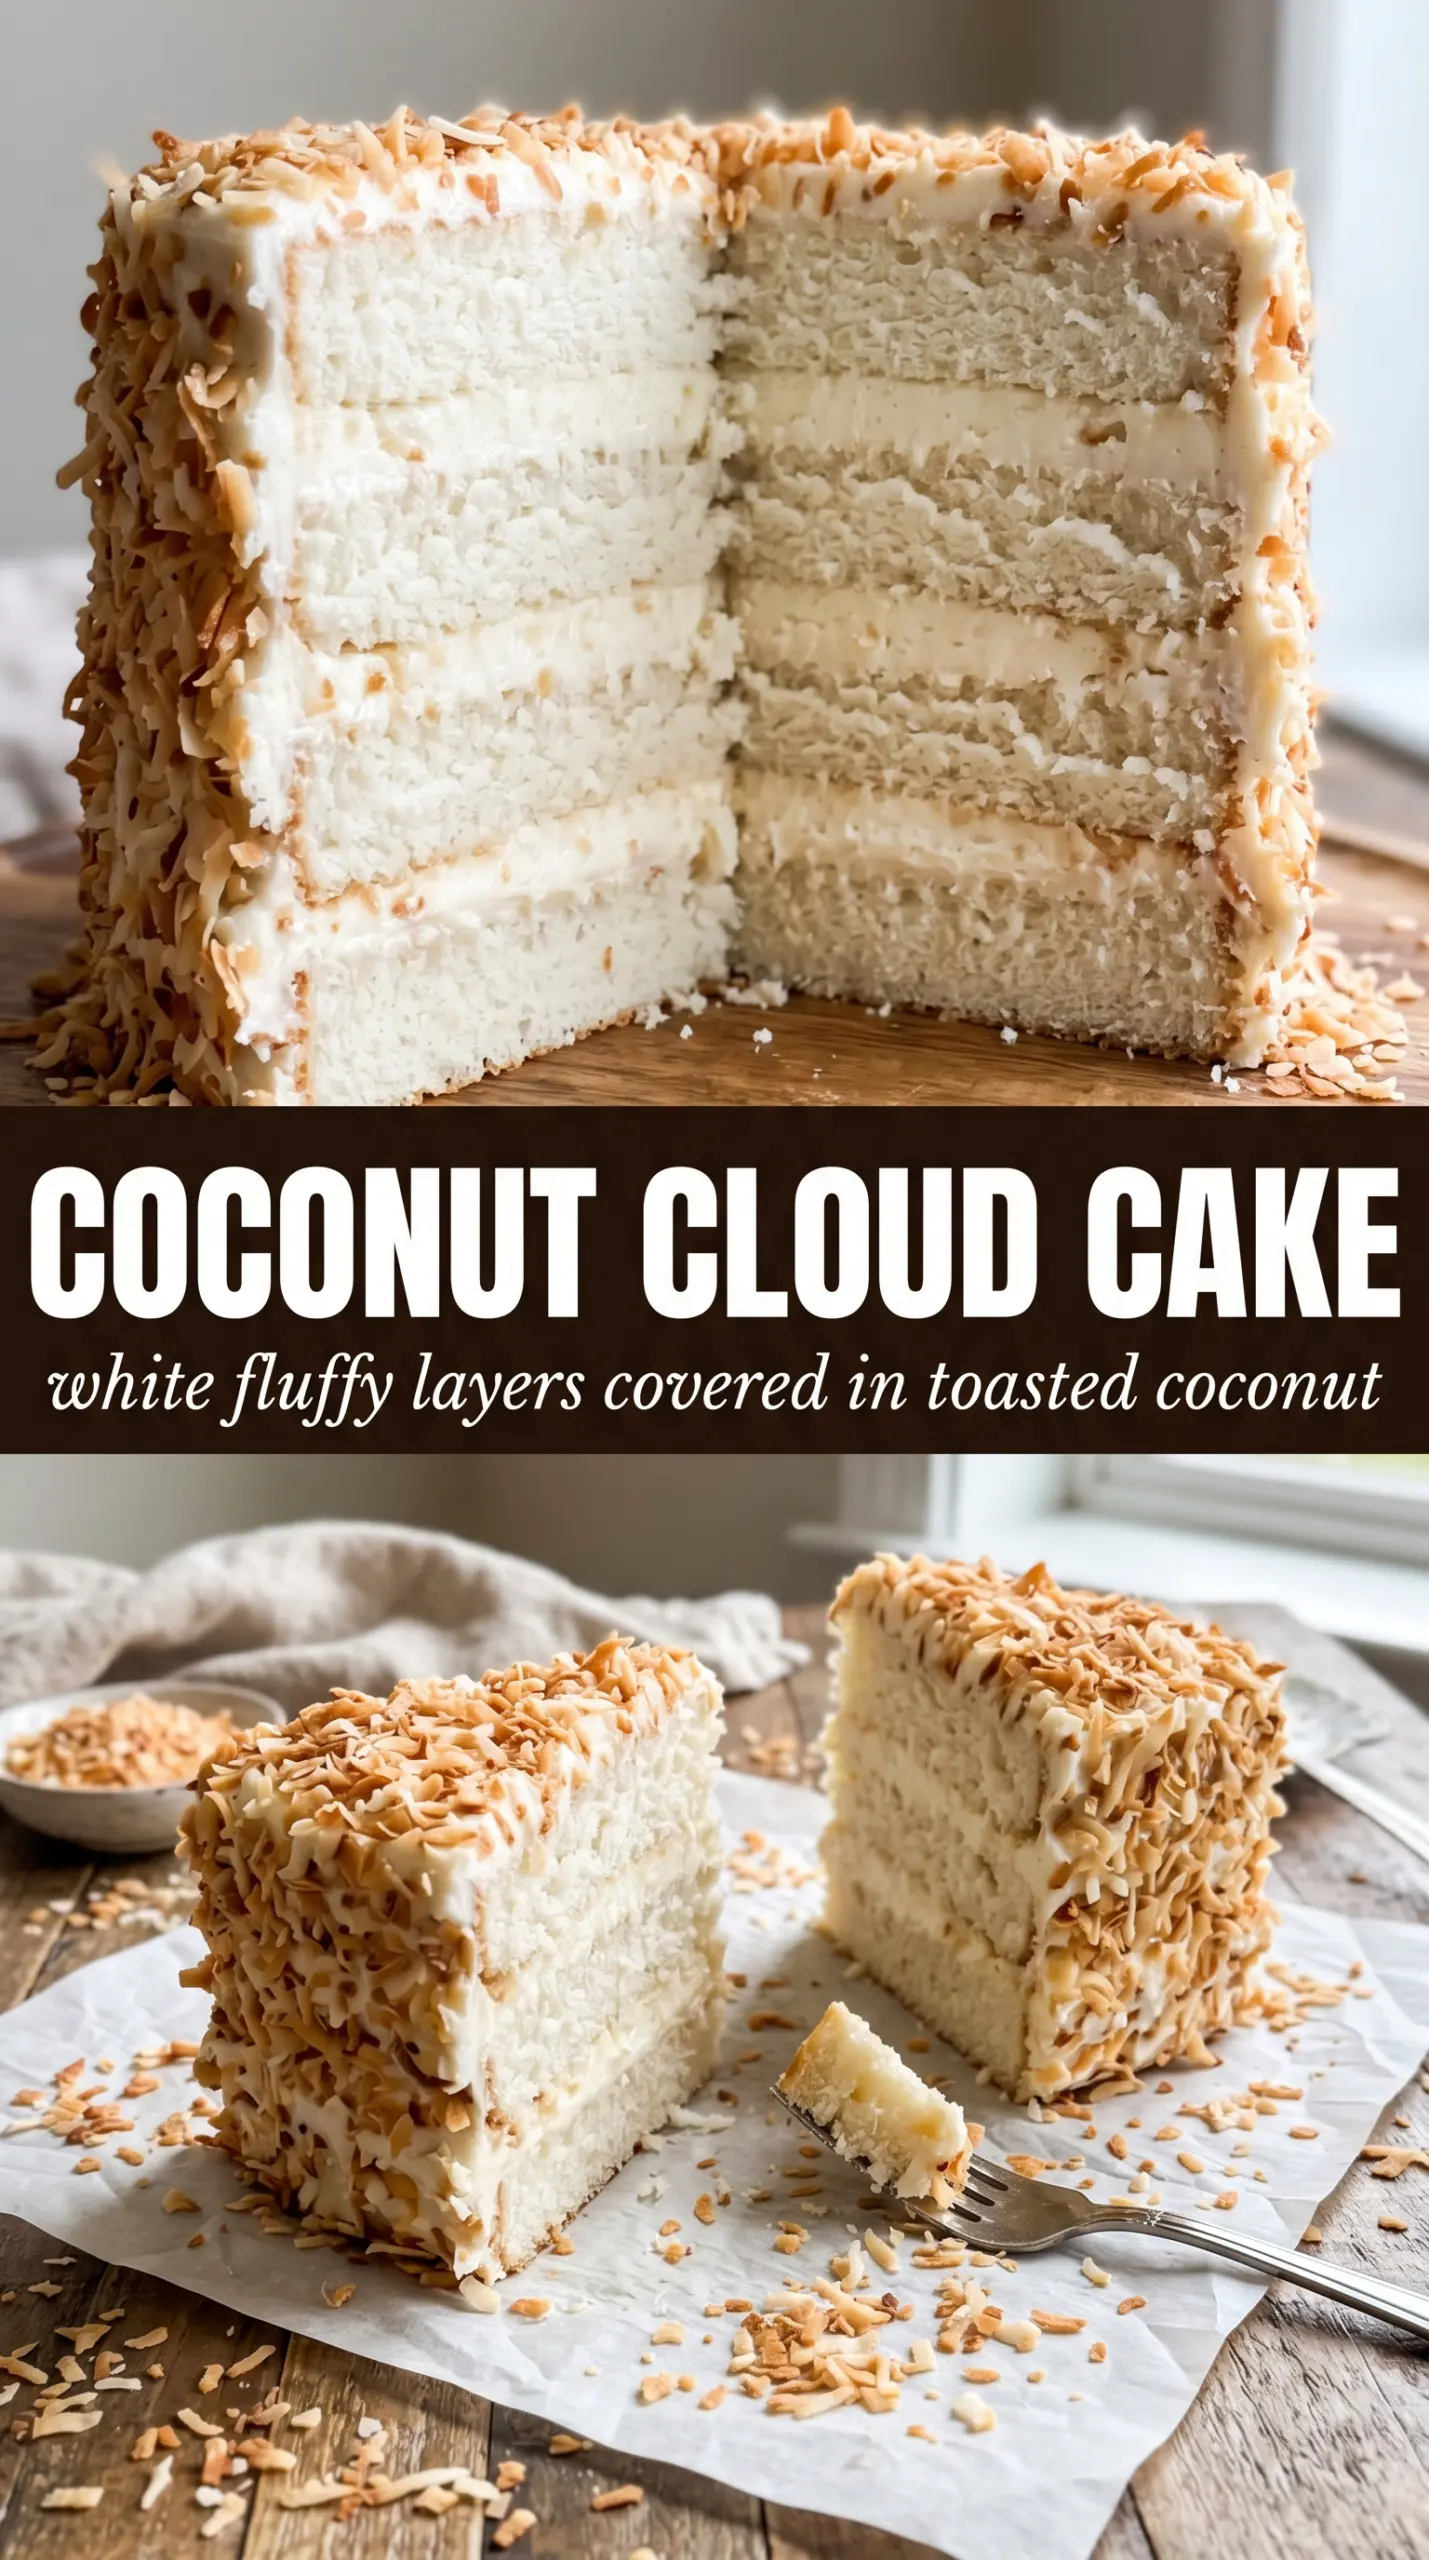
Coconut Cloud Cake earns its name the first time you cut into it. The layers stay pale and tender, the frosting turns plush and billowy, and the toasted coconut on the outside adds a delicate crunch that keeps every bite from feeling heavy. It looks like a celebration cake, but what keeps it in rotation is how balanced it eats: soft crumb, clean coconut flavor, and just enough tang from the cream cheese frosting to keep the sweetness in check.
The trick is building structure without losing that airy texture. Creaming the butter and sugar until it turns visibly lighter gives the cake lift, and using coconut milk instead of plain milk adds flavor without making the batter dense. The shredded coconut gets folded in at the end so it stays distributed instead of sinking, and the frosting is thick enough to hold the coconut coating without sliding down the sides.
Below you’ll find the little details that matter most, including how to keep the frosting smooth, when to press on the toasted coconut, and the swaps that still give you a tall, cloud-soft layer cake.
The cake stayed unbelievably light, and the toasted coconut on the outside gave it the best little crunch. I also loved that the frosting set up enough to slice cleanly without squishing the layers.
Save this Coconut Cloud Cake for the kind of dessert that looks dramatic, slices cleanly, and stays feather-light under all that toasted coconut.
The Hidden Trick Behind a Cake That Stays Cloud-Like Instead of Dense
The biggest mistake with coconut layer cake is treating it like a quick batter cake. If the butter and sugar aren’t beaten until the mixture turns pale and fluffy, the cake bakes up tight instead of tall. That extra air matters here because the shredded coconut adds texture and a little weight of its own.
The other thing that keeps this cake from getting heavy is the way the liquids go in. Alternate the dry ingredients with the coconut milk instead of dumping everything together at once. That keeps the batter smooth and prevents overmixing, which is the fastest way to lose that soft, cloud-like crumb.
- Butter — Softened butter creams into the sugar and traps air. Cold butter won’t do that job, and melted butter turns the cake greasy and flat.
- Coconut milk — This brings flavor and tenderness without thinning the batter too much. Use canned full-fat coconut milk for the best texture; shake the can well before measuring.
- Sweetened shredded coconut — Fold it in gently so it stays suspended through the layers instead of sinking. The sweetened version blends better into the cake and gives the frosting its signature coating.
- Cream cheese — This keeps the frosting from tasting one-note sweet. It also helps the frosting hold the coconut flakes firmly, which matters when you want that full snowy exterior.
What Each Ingredient Is Doing in the Cake and Frosting
- All-purpose flour — This gives the cake enough structure to hold three layers without turning chewy. Cake flour can make it a touch softer, but you lose a little stability, especially when the frosting is thick.
- Baking powder — This is what gives the cake its lift in the oven. If yours is old, the layers will bake up flatter and a little heavier.
- Coconut extract — A small amount makes the coconut flavor read clearly without tasting artificial. Don’t overdo it; too much can take over the whole cake.
- Powdered sugar — This sweetens and thickens the frosting at the same time. If the frosting looks loose after beating, add a little more until it holds soft peaks and spreads without running.
- Toasted shredded coconut — Toasted coconut gives the outside its texture and color. Add it while the frosting is still tacky so it presses on in an even layer.
Building the Batter and Coating the Cake Before the Frosting Sets
Start with a Properly Aerated Base
Beat the butter and sugar until the mixture looks lighter in color and fluffy enough to hold a slight trail from the mixer. That usually takes several minutes, and it matters more than the clock. If the mixture still looks dense and grainy, the cake won’t get the lift it needs.
Add the Eggs One at a Time
Drop each egg in and let it disappear before adding the next. If the batter looks curdled for a moment, keep going; that usually smooths out once the flour goes in. What you don’t want is a rushed addition that leaves streaks of egg in the bowl.
Alternate Dry Ingredients and Coconut Milk
Add a portion of the flour mixture, then some coconut milk, repeating until everything is incorporated. The batter should look thick and creamy, not loose and soupy. Stop mixing as soon as the flour disappears, because overmixing at this stage toughens the crumb.
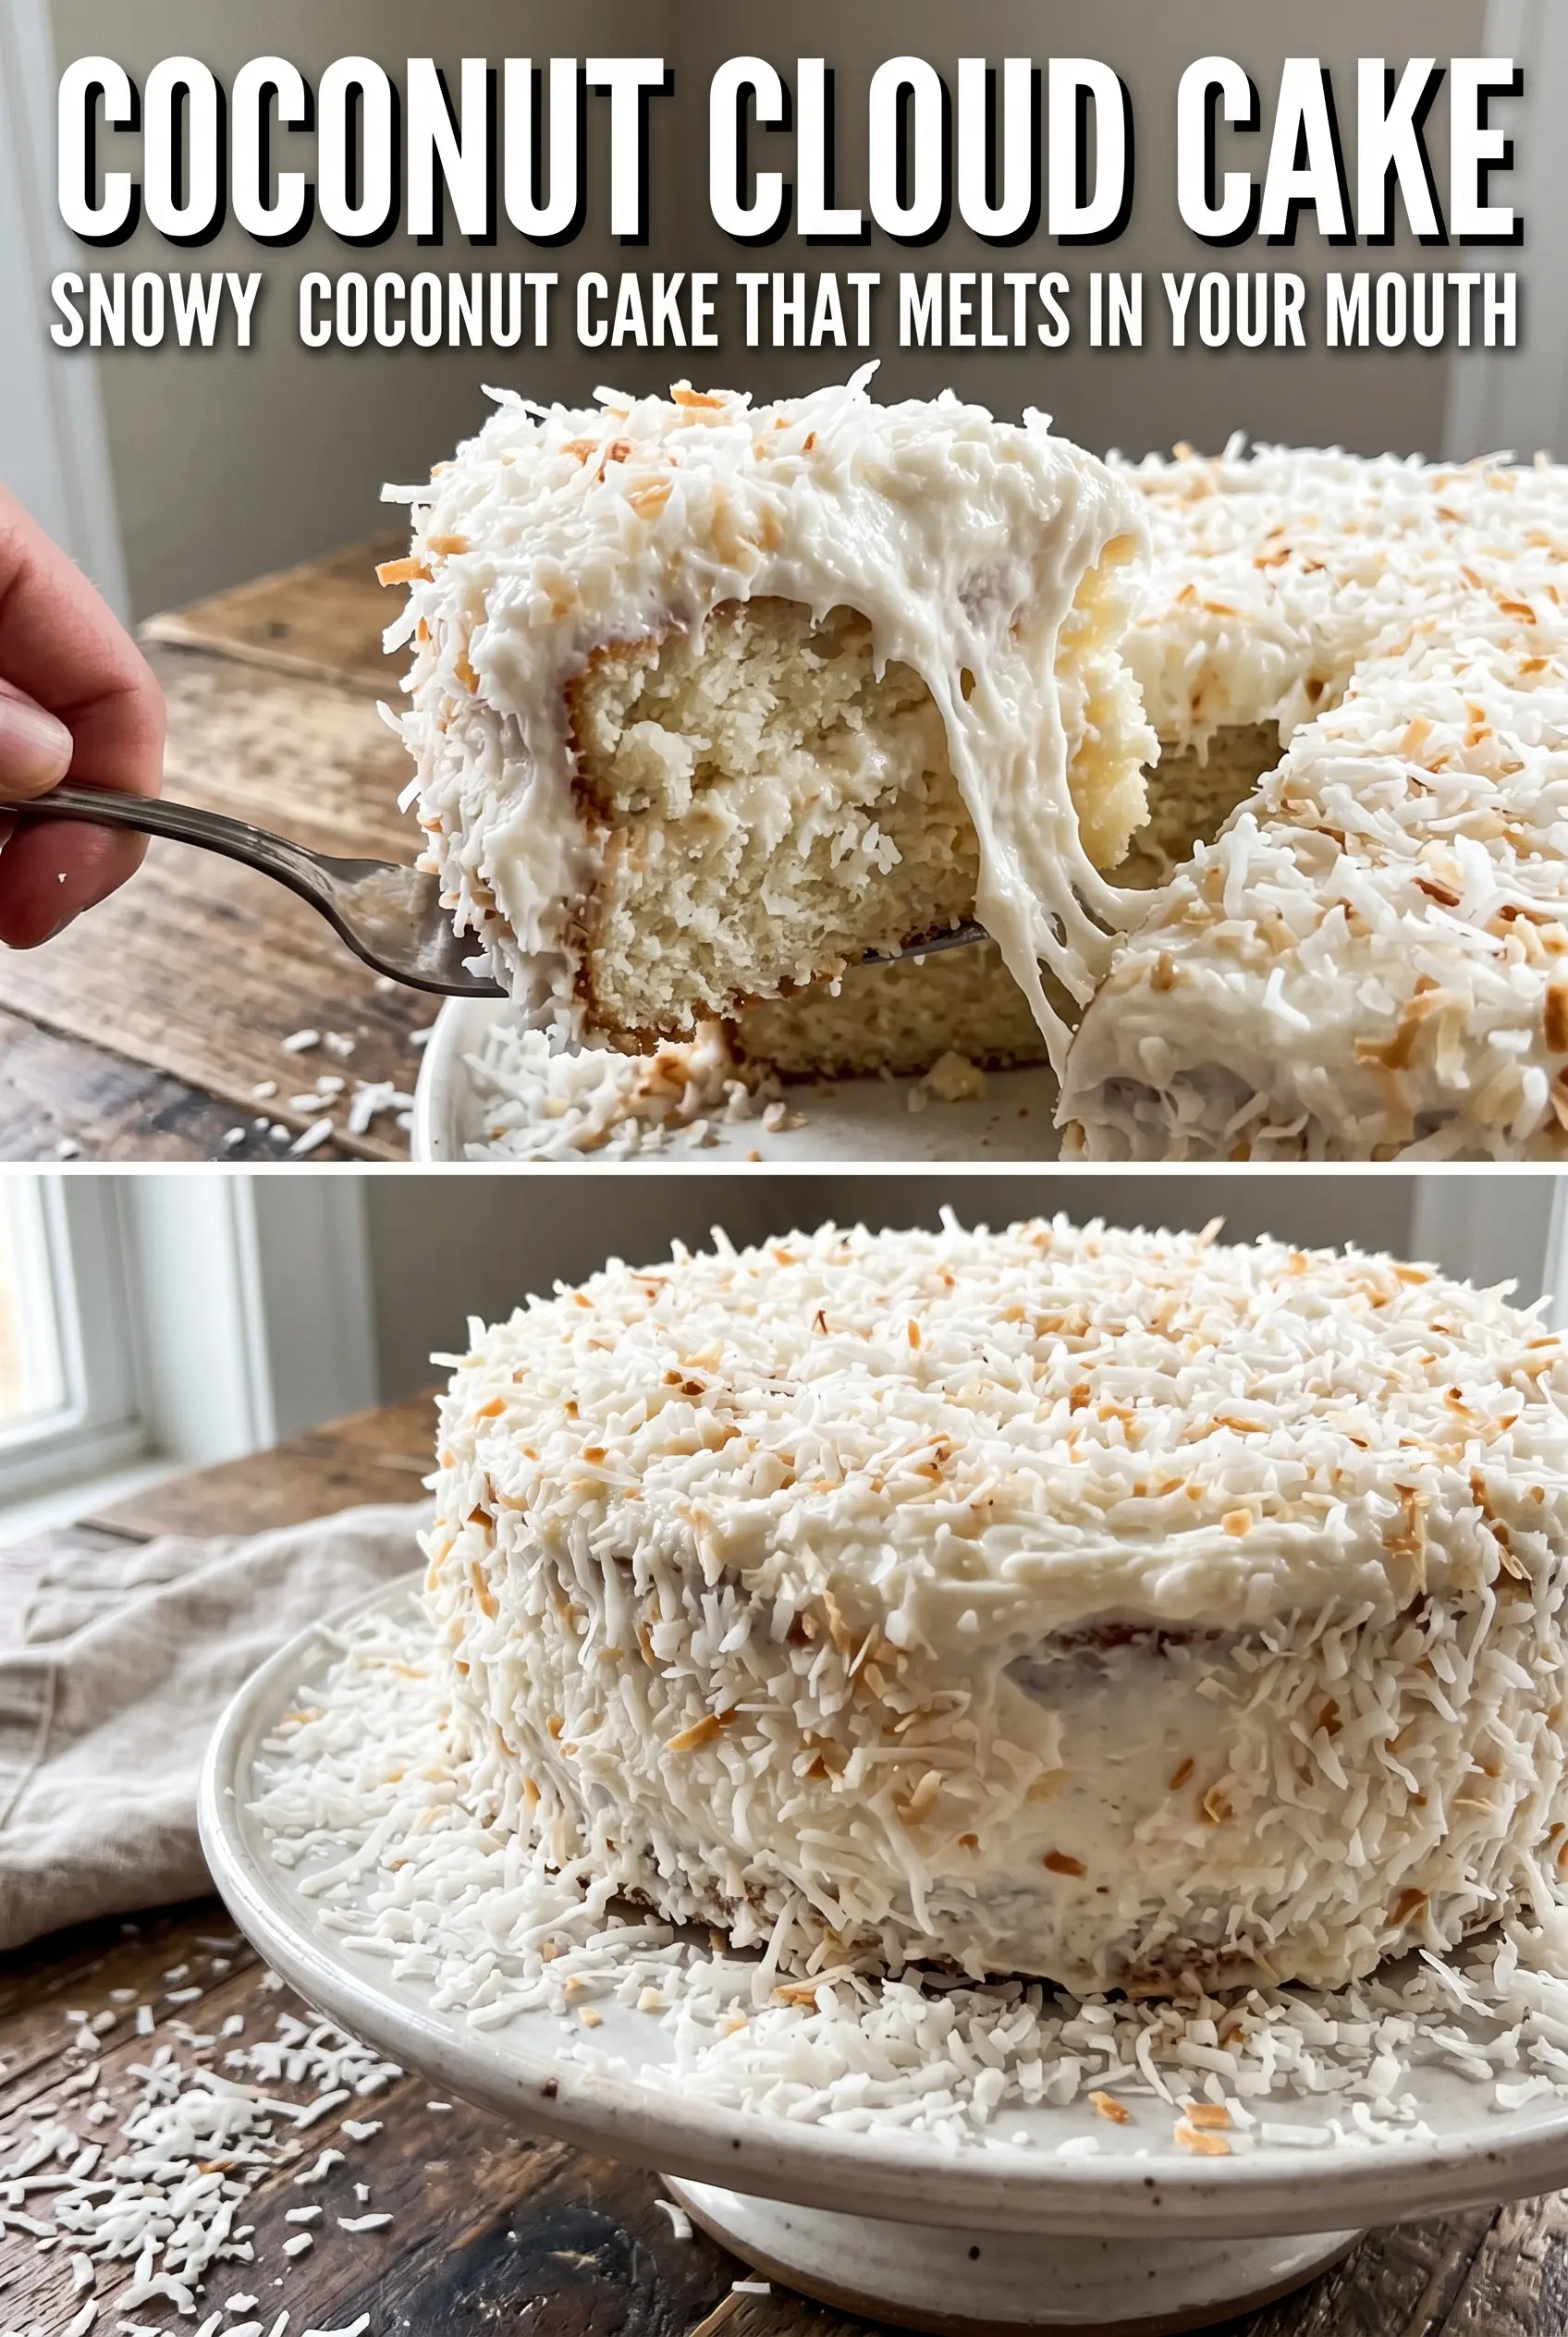
Frost, Then Coat Fast
Once the layers are completely cool, fill and frost the cake with a generous layer of cream cheese frosting. Press the toasted coconut onto the sides and top right away, before the frosting has a chance to crust over. If you wait too long, the coconut won’t stick evenly and you’ll end up patching bare spots.
How to Adapt This Coconut Cloud Cake for Different Pans, Flavors, and Diets
Make It as Two Taller 9-Inch Layers
Bake the batter in two 9-inch pans if you want a shorter, cleaner slice and fewer layers to stack. The cake will bake a little longer and the layers won’t feel as tall, but you’ll still get that soft coconut crumb and plenty of frosting between the layers.
Go Dairy-Free With One Smart Swap
Use plant-based butter and a dairy-free cream cheese that beats smoothly, then keep the rest of the recipe the same. The cake layers still work well because the coconut milk carries the flavor and moisture, but the frosting may be a little softer, so chill the finished cake before slicing.
Swap the Frosting Coating for Less Coconut Texture
If you want a smoother finish, skip the coconut coating on the sides and press toasted coconut only on top. You still keep the flavor and the decorative look, but each slice feels a little more refined and less crunchy.
Storage and Reheating
- Refrigerator: Store covered for up to 4 days. The frosting firms up in the fridge, so the cake slices a little cleaner after 20 to 30 minutes at room temperature.
- Freezer: Freeze individual unfrosted layers well wrapped for up to 2 months. The fully frosted cake can be frozen, but the coconut coating softens when thawed, so I only freeze it if I have to.
- Reheating: This cake isn’t meant to be reheated. Let chilled slices sit out until the frosting softens slightly; microwaving will melt the cream cheese frosting and ruin the texture.
Questions I Get Asked About This Coconut Layer Cake
Coconut Cloud Cake
Ingredients
Equipment
Method
- Preheat oven to 350°F, then grease three 8-inch or two 9-inch round cake pans and line with parchment for easy release.
- Beat butter and granulated sugar until very fluffy, scraping the bowl as needed so the mixture looks pale and airy.
- Add eggs one at a time, mixing after each until the batter is smooth and thick.
- Mix in vanilla extract and coconut extract just until incorporated.
- Alternately add the flour mixture and coconut milk, starting and ending with flour, and mix only until no dry streaks remain.
- Fold in sweetened shredded coconut so it distributes evenly through the batter without overmixing.
- Divide batter evenly among the pans and bake for 25-30 minutes at 350°F until a toothpick comes out clean.
- Cool the layers completely before frosting, so the cakes stay fluffy and the frosting sets without melting.
- Toast sweetened shredded coconut on a sheet pan until golden, then let it cool for pressing onto the cake.
- Beat cream cheese and butter until smooth, then add powdered sugar and coconut extract.
- Beat until fluffy so the frosting holds its shape for generous spreading.
- Fill and frost the cooled cake generously with coconut cream cheese frosting, covering the sides and top.
- Immediately press toasted coconut flakes firmly all over the outside and top until fully coated for a snow-white, textured finish.