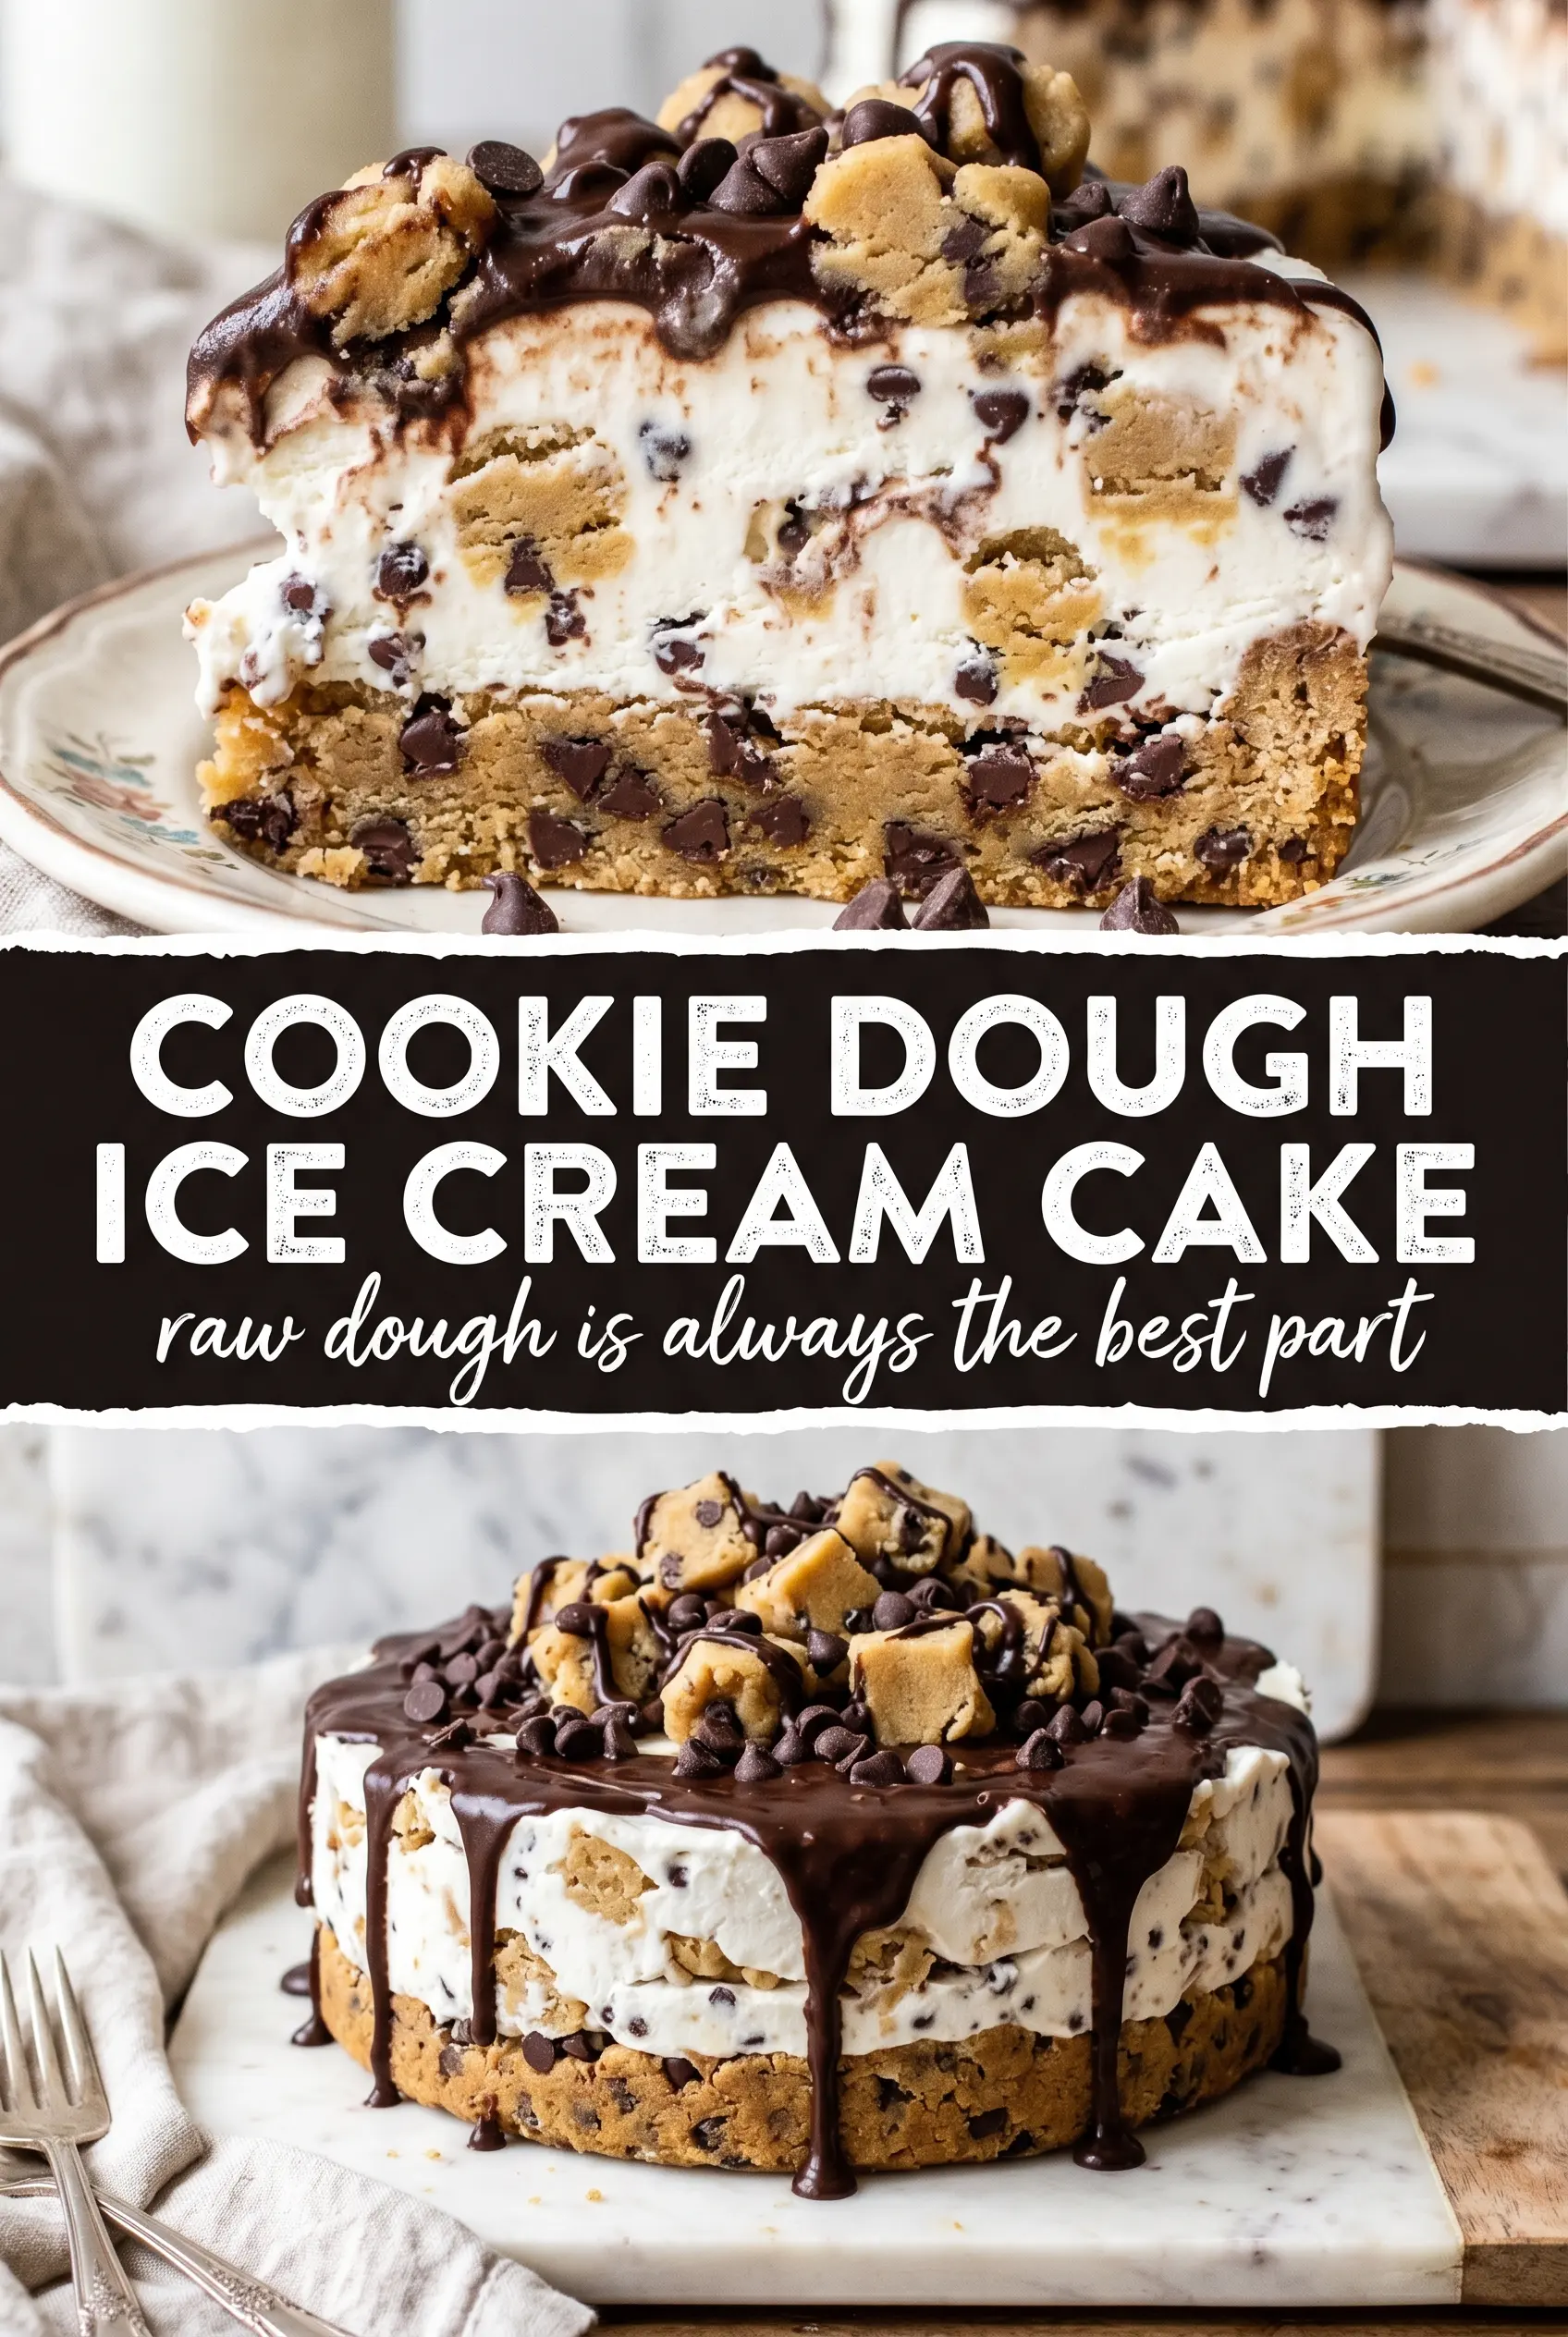
Cookie dough ice cream cake hits that sweet spot between nostalgic and over-the-top: a baked chocolate chip cookie base, a thick layer of vanilla ice cream studded with edible cookie dough bites, and a glossy chocolate ganache shell that sets into a clean sliceable top. Every bite gives you something different — soft cookie, cold creaminess, little pockets of chewy dough, and that snap from the chocolate on top.
The part that makes this cake work is the layering order. The cookie base has to be fully cool before the ice cream goes on, or the bottom starts melting and the layers slide. Softened ice cream spreads without tearing the cookie, and the edible cookie dough bites stay distinct instead of disappearing into the filling. The ganache goes on after the first long freeze so it can sit on top instead of sinking through the ice cream.
Below, I’ll show you the little timing details that keep the slices neat, plus a couple of ways to adapt the cake if you need a different base, a dairy-free version, or better make-ahead timing for a party.
The ice cream layer froze up firm enough to cut clean slices, and the cookie dough bites stayed chewy instead of getting icy. My kids kept going back for “just one more piece.”
Like this cookie dough ice cream cake? Save it for the birthday dessert that needs a cookie base, edible dough bites, and a glossy ganache top.
The Freeze Order That Keeps the Layers Clean
The biggest mistake with an ice cream cake is rushing the freezes. If the base isn’t cold before the ice cream goes on, the bottom softens and you lose that neat cookie layer. If the ice cream layer isn’t firm before the ganache, the chocolate sinks and leaves a patchy top instead of a clean shell. This cake needs pauses between each layer, and those pauses are what give you neat slices instead of a slumpy dessert.
The springform pan helps a lot here because the sides release without dragging the cake apart. I also like to line the bottom with parchment, which makes the first slice easier to lift. The ganache should be pourable, not hot; if it’s too warm, it melts the ice cream, and if it’s too cool, it clumps before you can spread it evenly.
What Each Layer Is Doing in This Cake
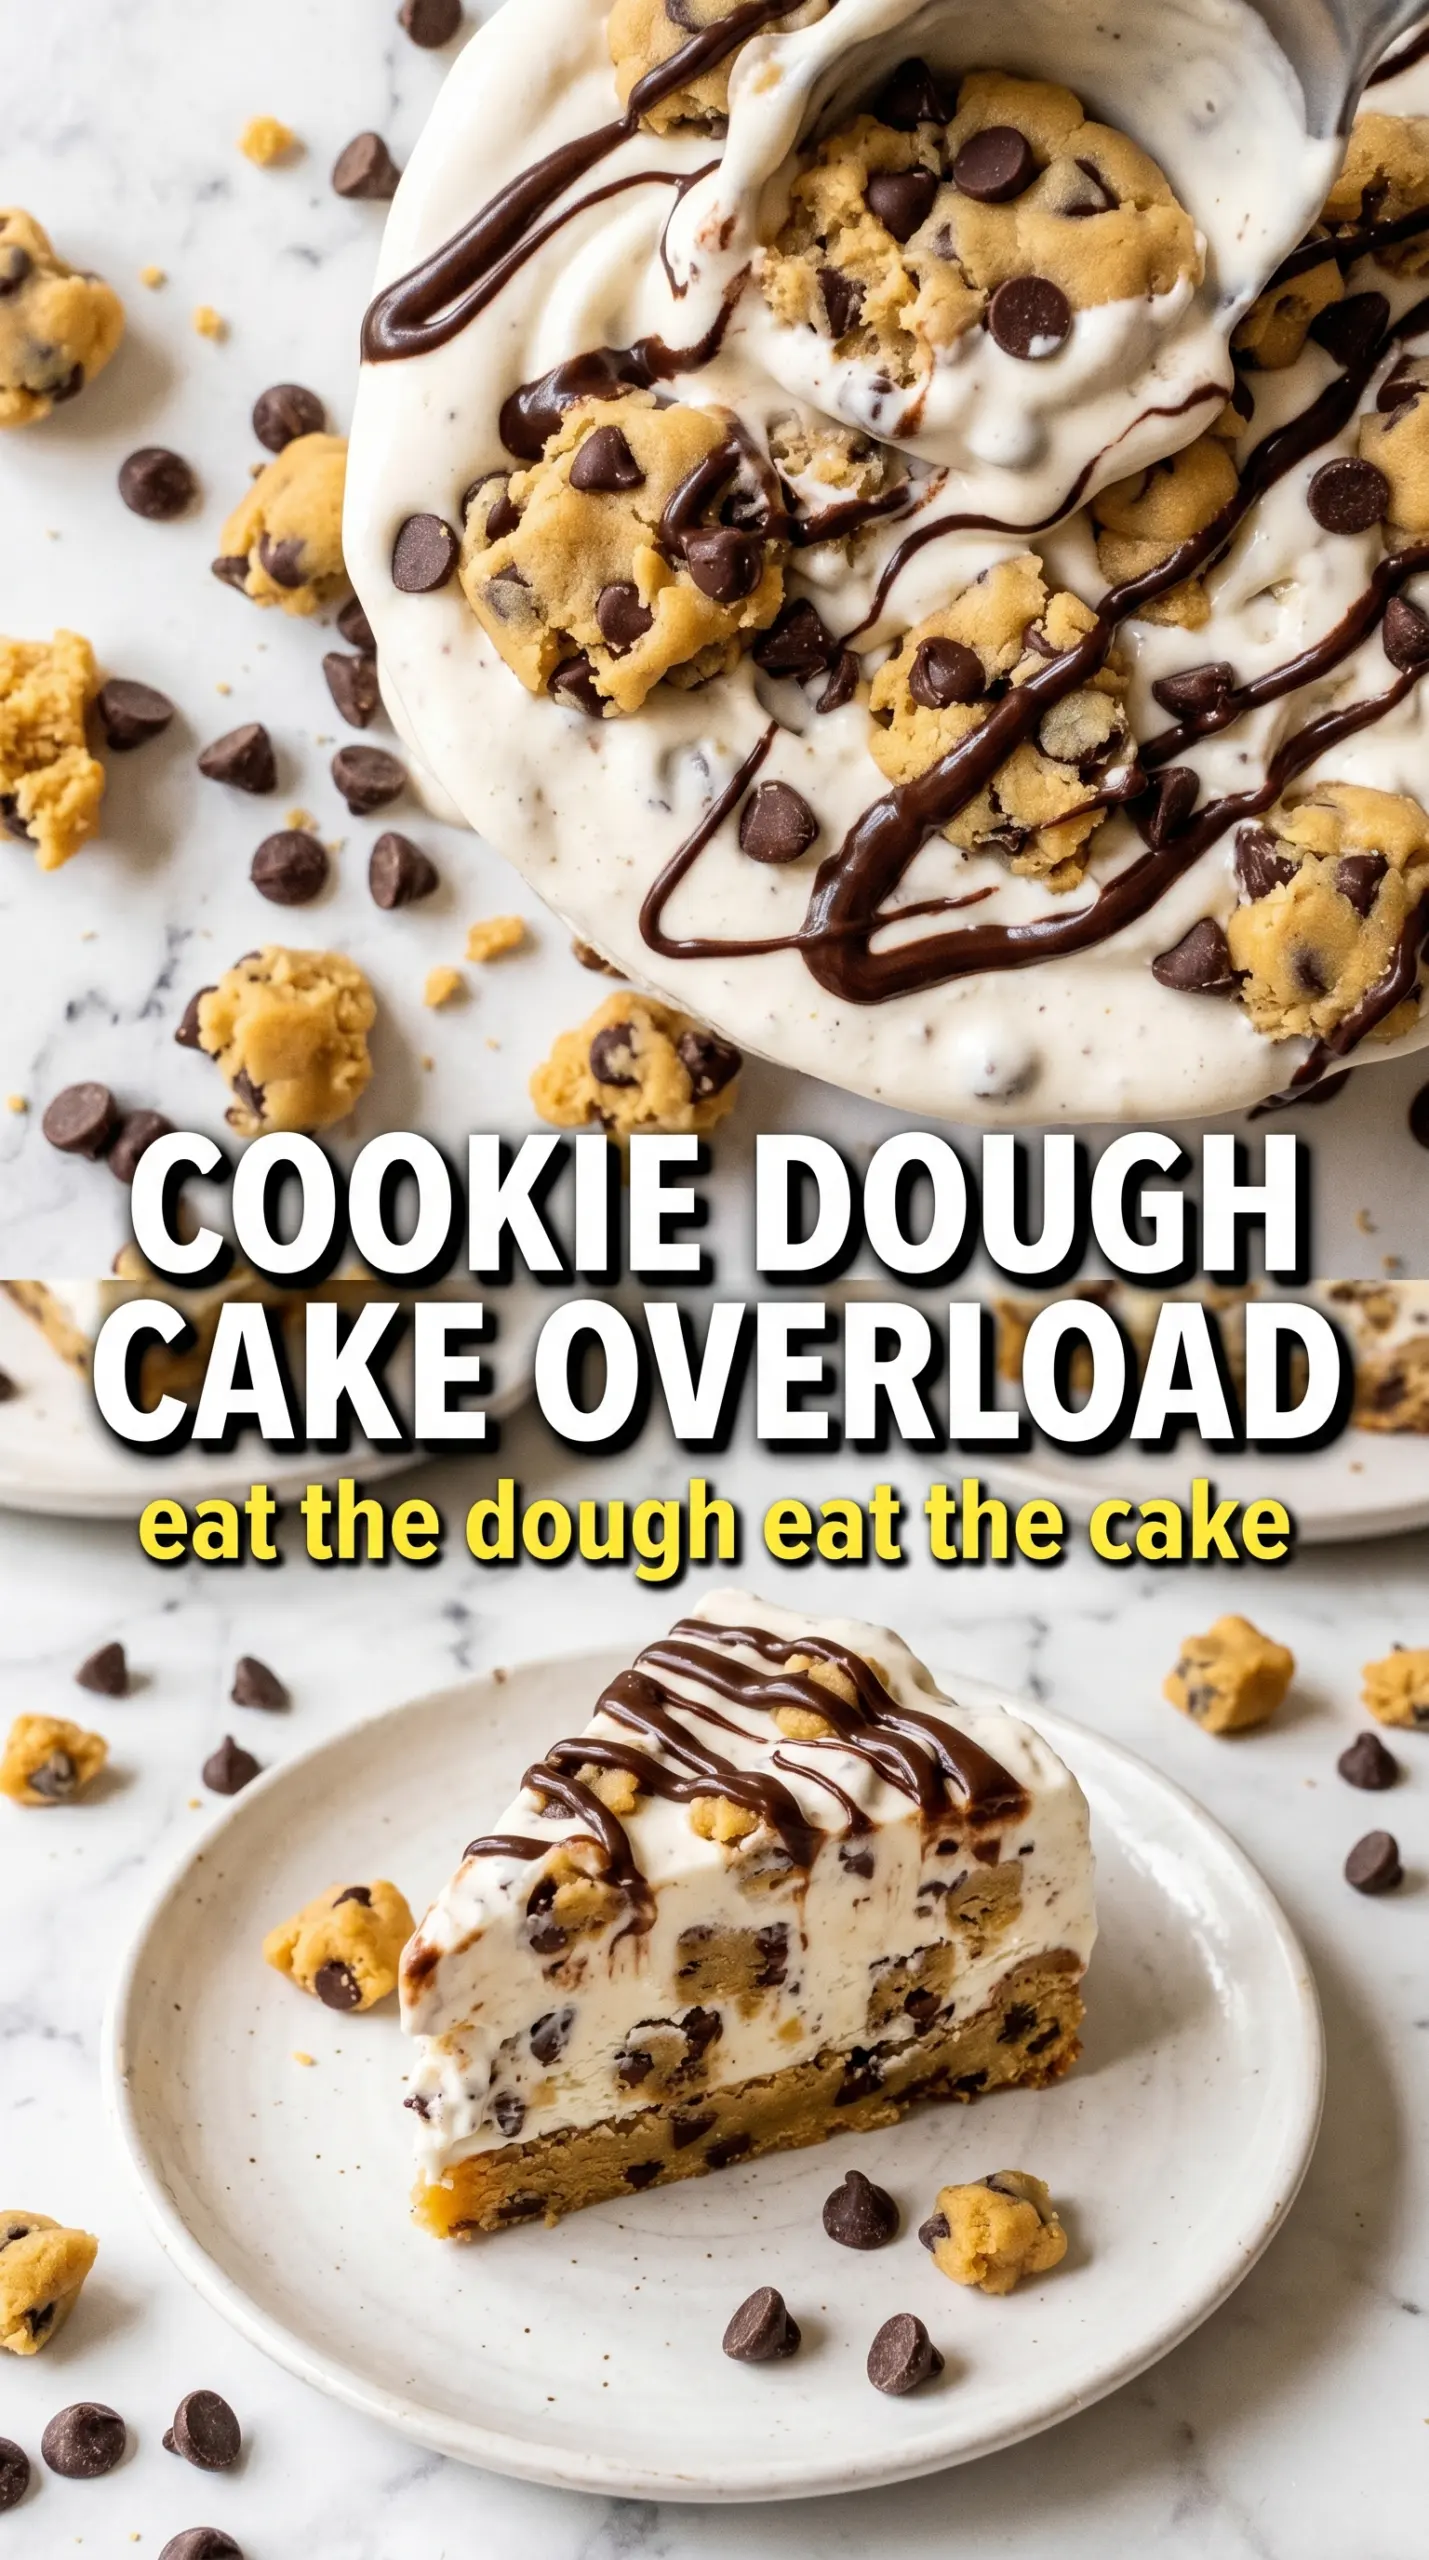
- Refrigerated cookie dough — This gives you a soft, sturdy base with enough structure to hold the ice cream. A homemade cookie base works too, but the store-bought tube is dependable and bakes into a consistent layer. Bake it until the edges are set and the center looks puffed, then cool it completely so it can support the frozen layers.
- Vanilla ice cream — Vanilla keeps the cookie dough flavor front and center. Let it soften just enough to fold and spread; if it turns soupy, it will freeze with ice crystals and won’t hold the cookie dough bites evenly.
- Edible cookie dough bites — These are the texture payoff. Fold them in at the end so they stay in chunks instead of smearing through the ice cream. Use bite-size pieces, not big clumps, or the cake will cut unevenly.
- Chocolate ganache — Ganache gives the cake its clean top and that bakery-style finish. A thinner ganache runs off the edges; one that’s too thick won’t level out. Let it cool until it still flows in a ribbon.
- Whipped cream and mini chocolate chips — These are for the finish, but they matter. Add them after the ganache has set enough to support the topping, or they’ll slide around and sink in.
Building the Cake Without Melting the Middle
Baking the Cookie Base
Press the refrigerated cookie dough into the springform pan and bake it until the edges are set and lightly browned. The center can look a little softer than a standard cookie; it firms as it cools. Pull it out when it still smells deeply buttery and the top is just turning golden. Let it cool all the way in the pan, because any warmth left in the base will turn the first ice cream layer loose.
Folding the Ice Cream Filling
Scoop the vanilla ice cream into a large bowl and let it sit until it bends under a spoon but doesn’t collapse into a puddle. Fold in the cookie dough bites gently so they stay in pieces. Spread the mixture over the cooled cookie base with an offset spatula or the back of a spoon, working quickly before it softens again. If the ice cream starts dragging, stop and let it sit on the counter for a minute before you finish smoothing it.
Freezing Before the Ganache
Freeze the filled cake until it feels hard all the way through when you press the center with a fingertip. That first freeze is what keeps the chocolate ganache from bleeding into the ice cream. Don’t pour the ganache on while the cake is only half set, or you’ll get a muddy top instead of a clean shell. Four hours is the minimum here, and longer is better if your freezer runs warm.
Finishing With Ganache and Toppings
Pour the ganache over the frozen cake and nudge it toward the edges so it covers the surface in one even layer. If it refuses to spread, it’s too cool; if it races off the sides, it’s too warm. Freeze it again until the top feels firm, then pipe on the whipped cream and scatter the mini chocolate chips and extra cookie dough bites. Hold the final cut for at least two more hours so everything slices cleanly.
How to Adapt the Cake for Different Pans, Diets, and Party Timelines
Use a homemade cookie base
A homemade chocolate chip cookie base gives you more control over sweetness and thickness. Bake it in the same springform pan, but keep it slightly thicker at the edges so the ice cream doesn’t creep under it. The tradeoff is a little more prep, but the flavor is deeper and less sweet.
Make it dairy-free
Use a dairy-free vanilla ice cream, coconut-based whipped topping, and a dairy-free ganache made with coconut cream and dairy-free chocolate. The texture will still be creamy, but the flavor gets a faint coconut note unless you choose a neutral brand. This version works well as long as every component is fully chilled before assembly.
Turn it into a birthday cake centerpiece
Add a thicker whipped cream border and extra cookie dough bites on top for a more dramatic finish. This version holds its shape well for candles, but bring it out only right before serving so the ice cream doesn’t soften under the room temperature air. If you need the cleanest slices, dip a sharp knife in hot water and wipe it dry between cuts.
Storage and Reheating
- Refrigerator: Don’t store this in the fridge. It will melt and lose its layers within minutes.
- Freezer: Wrap the finished cake tightly and keep it frozen for up to 1 week for the best texture. After that, the cookie base can get icy at the edges.
- Reheating: No reheating needed. For the cleanest slices, let the cake sit at room temperature for 5 to 10 minutes before cutting, but don’t let it soften long enough for the ganache to sweat.
Questions I Get Asked About This Recipe
Cookie Dough Ice Cream Cake
Ingredients
Equipment
Method
- Bake refrigerated cookie dough in a 9-inch springform pan at 350F for 12-15 minutes, until set. Let the cookie base cool completely for a firm foundation.
- Fold edible cookie dough bites into softened vanilla ice cream until evenly distributed. Spread the ice cream mixture over the cooled cookie base for full coverage.
- Freeze the cake for 4 hours, until completely firm. The layer should feel solid when gently pressed near the edge.
- Pour chocolate ganache over the top, covering the surface. Freeze for 1 hour, until the ganache sets and looks matte and set.
- Pipe whipped cream on top of the set ganache. Scatter mini chocolate chips and additional edible cookie dough bites over the whipped cream.
- Freeze for 2 more hours before releasing and slicing. Keep the top firm so slices hold their layers cleanly.