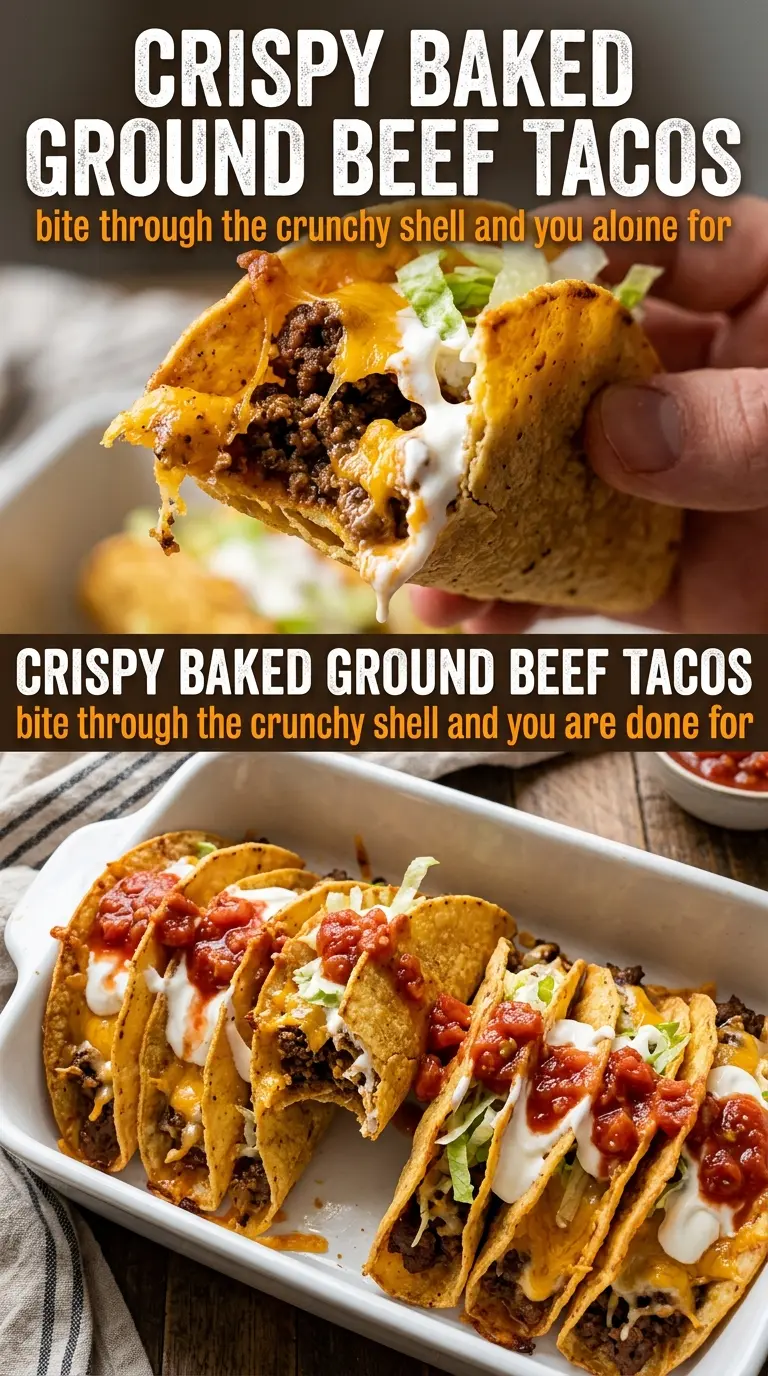
Crispy baked ground beef tacos hit that sweet spot between crunchy and satisfying without needing a pan of hot oil on the stove. The shells come out deeply golden and shatter at the first bite, while the seasoned beef stays juicy enough to hold its own under the toppings. It’s the kind of dinner that disappears fast because the texture contrast is doing half the work for you.
The trick is brushing the tortillas lightly with oil on both sides before they go into the oven. That thin coating helps them crisp instead of drying out, and folding them over while they bake gives you that taco shape without needing to fry anything. The beef also matters: simmering it with the seasoning and a little water gives you a saucy filling instead of dry crumbles that fall out of the shell.
Below you’ll find the small details that make these tacos hold together better, plus a few smart ways to change them up if you need to work with what’s in the kitchen.
The shells got crisp without cracking apart, and the beef filling stayed juicy instead of falling out of the taco. I baked a second tray because the first one went faster than I expected.
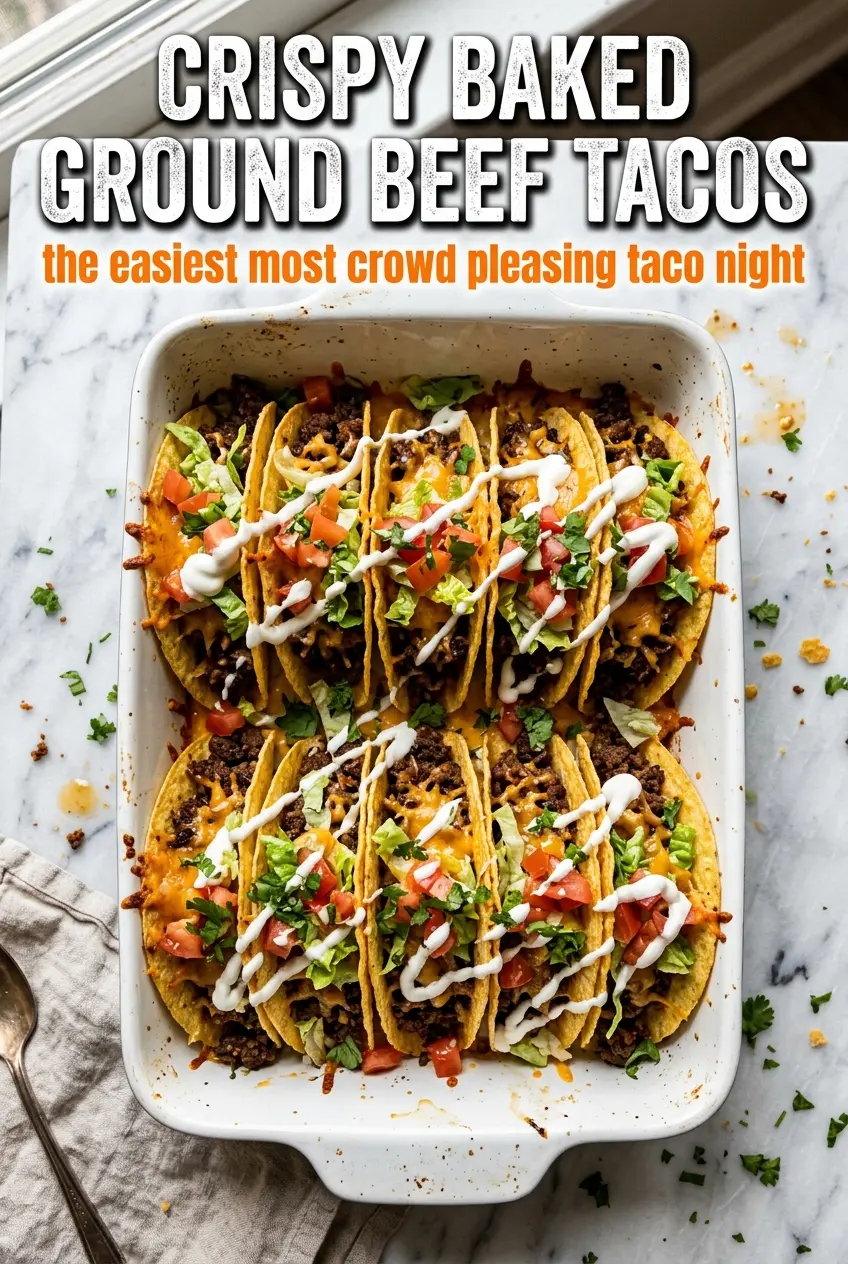
Crispy Baked Ground Beef Tacos with golden shells are perfect for nights when you want crunchy edges and a juicy filling without frying.
The Reason These Tacos Crisp Without Turning Tough
Oven-baked tacos fail when the tortillas dry out before they have a chance to set. Corn tortillas need a little fat on the surface so the heat can toast them instead of just dehydrating them. That thin oil layer is what gives you a shell that bends, crisps, and holds its shape instead of going brittle and cracking on the tray.
The other thing that keeps these tacos from falling apart is the bake position. Folding the tortillas and arranging them carefully lets the edges support each other while they cook. If they sit flat, they soften in the middle and never get that crisp edge people want from a baked taco.
What Each Ingredient Is Actually Doing In This Dish
- Ground beef — Use an 80/20 blend if you can. It gives you enough fat for flavor, but not so much that the filling turns greasy after baking. Leaner beef works too, but it needs the seasoning and water to stay juicy.
- Taco seasoning — A packet brings salt, chile, cumin, and starch in one shot, which helps the beef cling together instead of drying out. Homemade seasoning works fine if you build enough salt into it and don’t skip the simmer.
- Corn tortillas — These crisp better than flour tortillas in the oven and keep the taco feeling sturdy instead of chewy. Fresh tortillas are best; if yours are stiff, warm them briefly so they fold without tearing.
- Olive oil — The light coating is what turns the tortillas into proper shells. Too much oil makes them fry-soft and greasy, so brush on just enough to sheen both sides.
- Cheddar cheese — Sharp cheddar gives you a salty melt that stands up to the beef. Pre-shredded cheese works, but freshly shredded melts a little cleaner and doesn’t clump as much.
- Sour cream and salsa — These finish the tacos with coolness and acid, which keeps the beef from tasting heavy. Add them right before serving so the shells stay crisp.
Building The Filling And Shells In The Right Order
Brown The Beef Until The Pan Stays Mostly Dry
Cook the beef over medium-high heat and break it up as it browns. You want the moisture to cook off and the edges to pick up some color before the seasoning goes in. If the pan stays watery, the meat will steam instead of browning, and the filling ends up soft and flat-tasting. Drain off excess fat if there’s a pool left behind, then stir in the seasoning and water.
Simmer Until The Seasoning Clings
Let the beef simmer for about 5 minutes, stirring now and then, until the liquid reduces and coats the meat. This is where the filling goes from loose and soupy to scoopable. If you pull it off too early, the taco filling will leak into the shell and make the bottom soggy. The finished beef should look moist, not wet.
Brush, Fold, And Bake For Crisp Edges
Brush both sides of each tortilla lightly with oil, then fold them into taco shape on the baking sheet. Bake at 400°F until they turn golden and feel firm at the edges. If they still bend too much when you lift one, give them another minute or two. Pull them before they get too dark, because the tortillas continue to crisp as they cool.
Fill Fast And Serve Right Away
Once the shells are crisp, fill them while they’re still warm. Add the beef first so the cheese can soften against the heat, then finish with lettuce, tomatoes, onion, sour cream, and salsa. Waiting too long after baking lets the shells lose their crunch. These tacos are at their best the minute they come out of the oven.
Ways To Adjust These Tacos Without Losing The Crunch
Make Them Dairy-Free
Skip the cheddar and sour cream, then finish with extra salsa, diced avocado, or a dairy-free crema. The tacos stay crisp either way, but you lose the cooling richness that balances the seasoned beef, so add something creamy back in if you want the same contrast.
Use Ground Turkey Instead Of Beef
Ground turkey works well here, but it needs a little help because it’s leaner than beef. Add a small splash of oil to the skillet and don’t skip the simmer with water, or the filling can turn dry. The result is lighter and a little less rich, but still plenty satisfying.
Use Flour Tortillas For A Softer Shell
Flour tortillas will bake up softer and a little more flexible, which some people prefer. They won’t get the same shattery crunch as corn tortillas, and they’re more likely to go chewy if overbaked. If you go this route, watch them closely and pull them as soon as the edges start to turn golden.
Storage and Reheating
- Refrigerator: Store the beef filling for up to 4 days. Keep the tortillas and toppings separate so the shells don’t soften.
- Freezer: The beef freezes well for up to 2 months. Cool it completely, pack it airtight, and thaw overnight in the fridge before reheating.
- Reheating: Warm the beef in a skillet or microwave until hot, then crisp fresh tortillas in the oven again if needed. Don’t assemble the tacos ahead of time, or the shells will lose their texture fast.
Questions I Get Asked About This Recipe
Crispy Baked Ground Beef Tacos
Ingredients
Equipment
Method
- Brown the ground beef in a skillet over medium-high heat, breaking apart as it cooks, about 8 minutes, until no longer pink. Visually check for small crumbles and a lightly browned surface.
- Drain excess fat, then stir in taco seasoning, water, and salt and pepper. Bring to a simmer.
- Simmer the beef mixture for 5 minutes, stirring occasionally, until thickened and evenly coated. Look for a glossy, clinging consistency.
- Brush both sides of the corn tortillas lightly with olive oil. You should see a thin sheen across each tortilla surface.
- Fold each tortilla in half and arrange on a sheet pan, spaced so they crisp rather than steam. Use a single layer for best golden edges.
- Bake at 400°F for 8-10 minutes until crisp and golden. Watch the edges turn dark golden brown.
- Fill each taco shell with seasoned ground beef. Pile the filling near the center so it won’t spill out.
- Top the tacos with shredded cheddar cheese, then add shredded lettuce, diced tomatoes, and diced onion. Spread toppings lightly so the shells stay crunchy.
- Drizzle with sour cream and salsa and serve immediately. The contrast should be visible: warm filling against bright, fresh toppings.