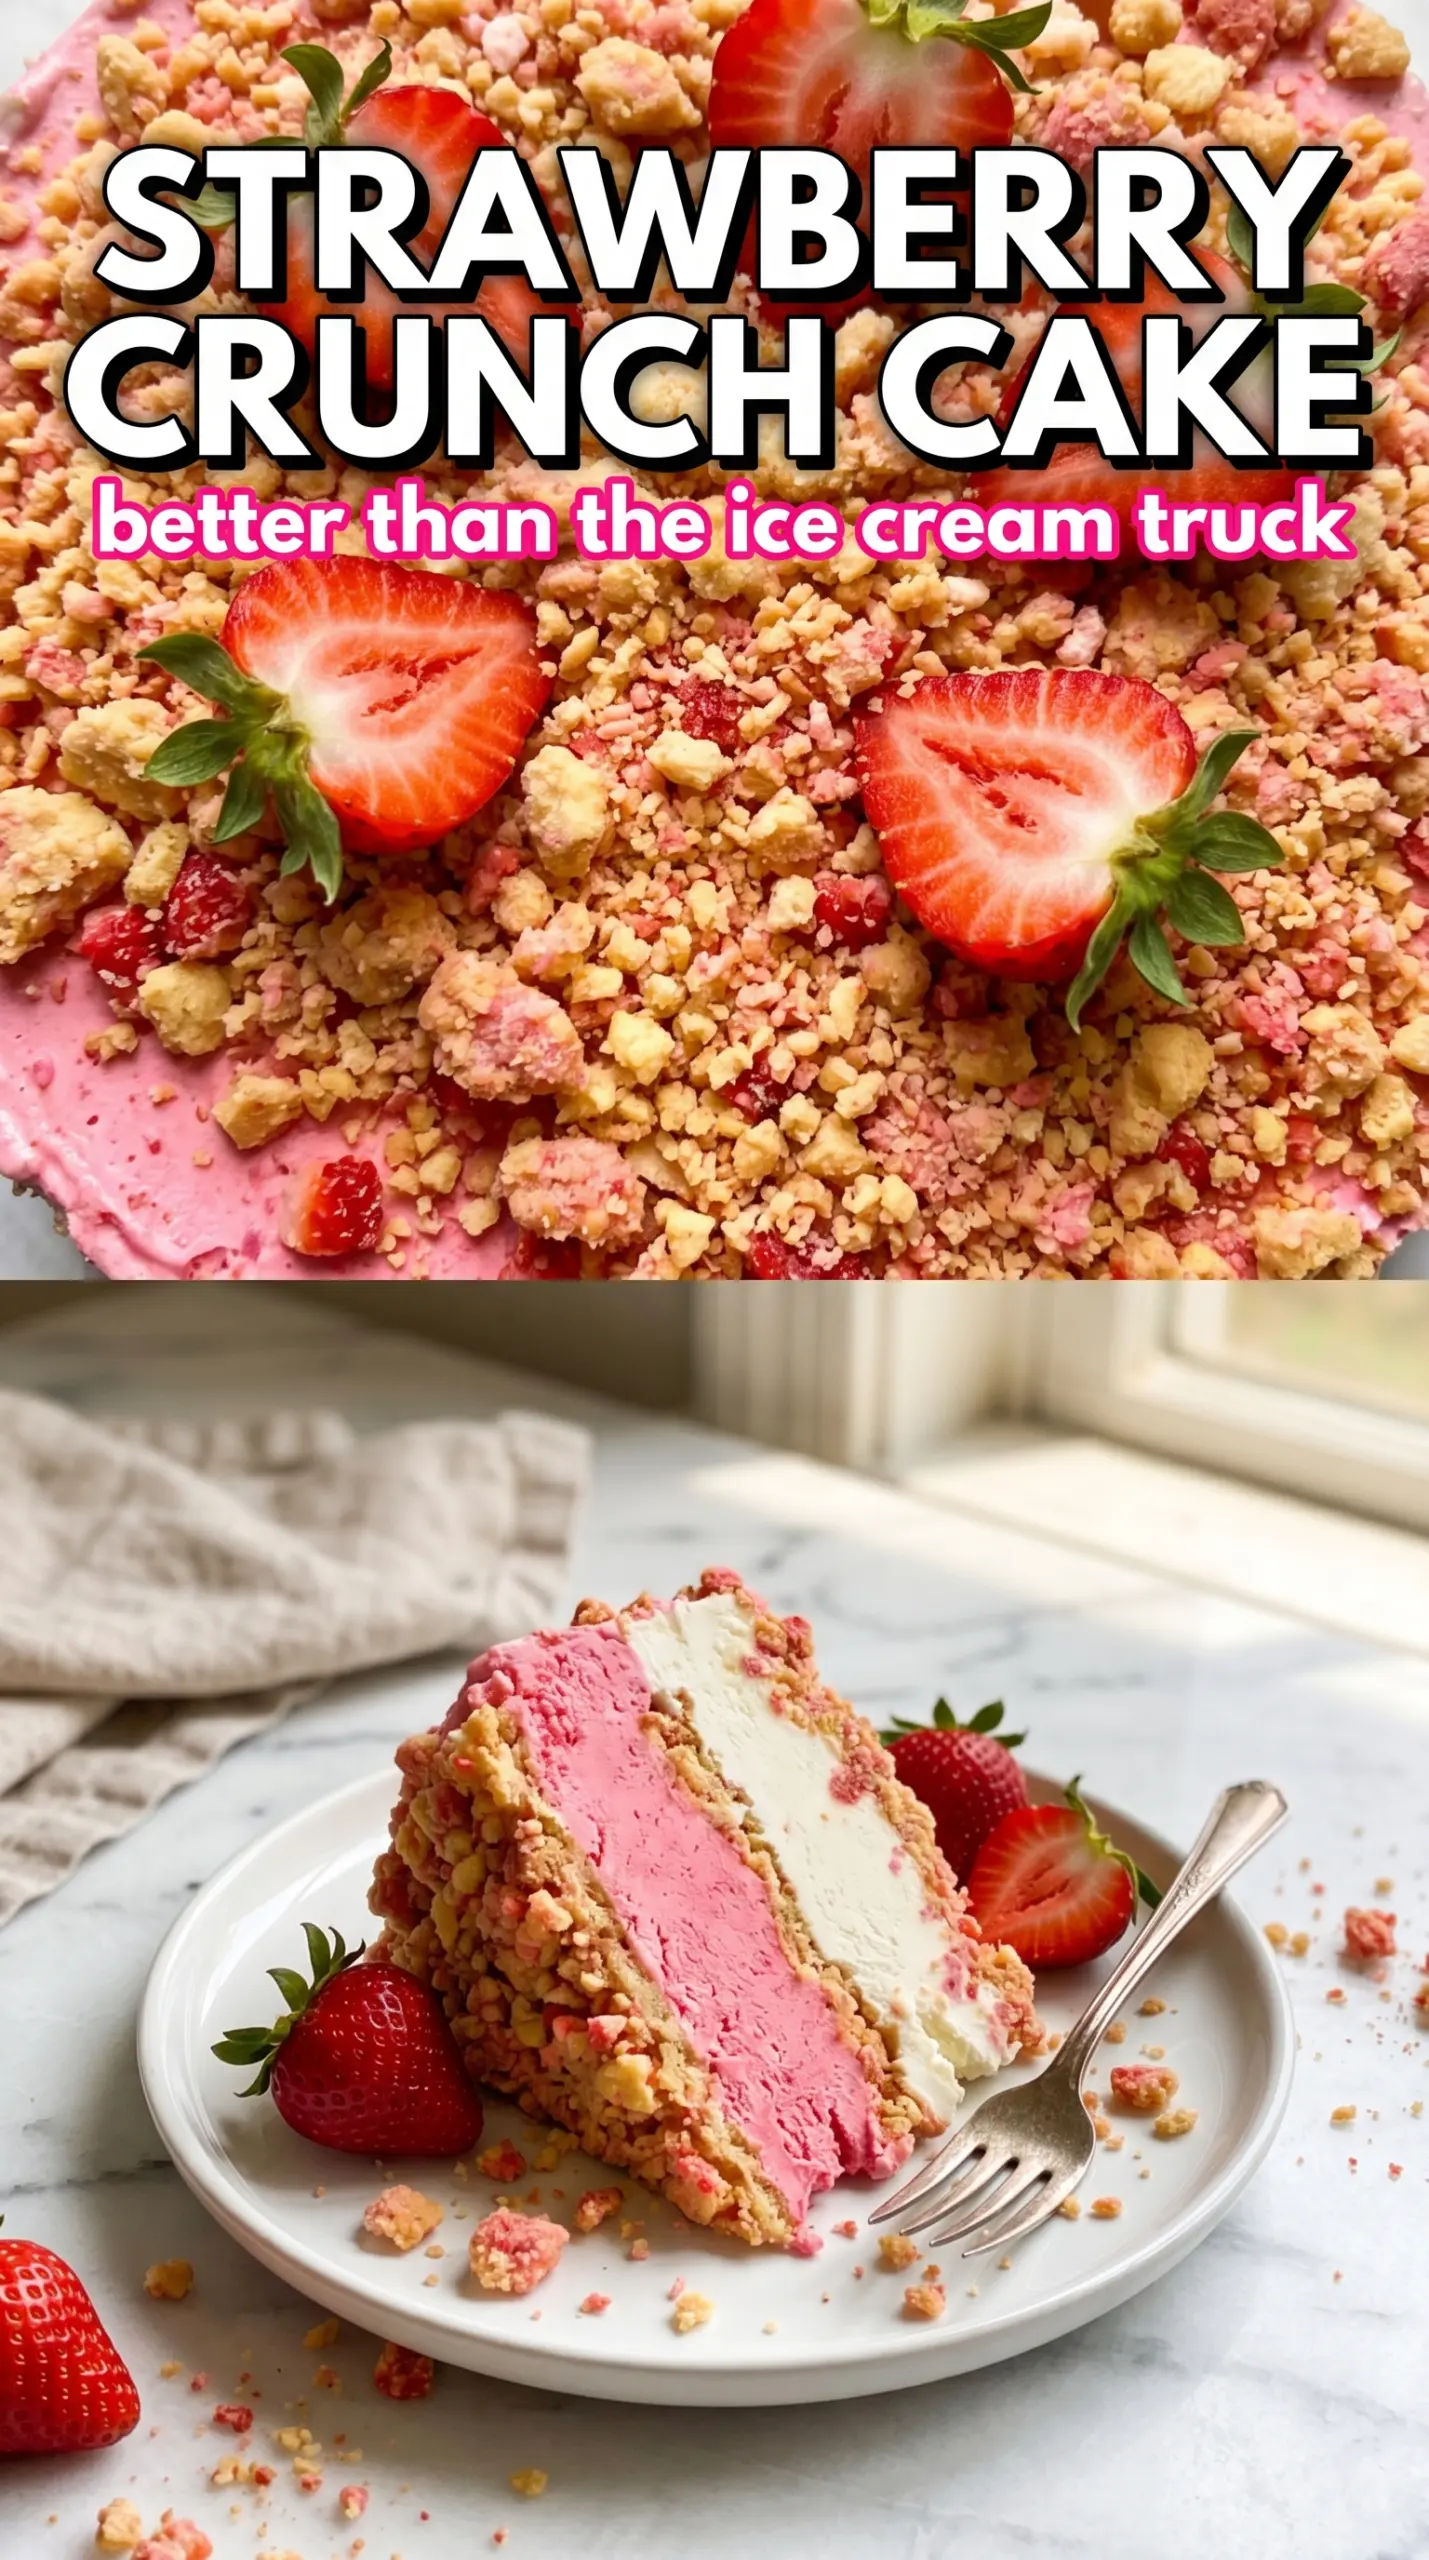
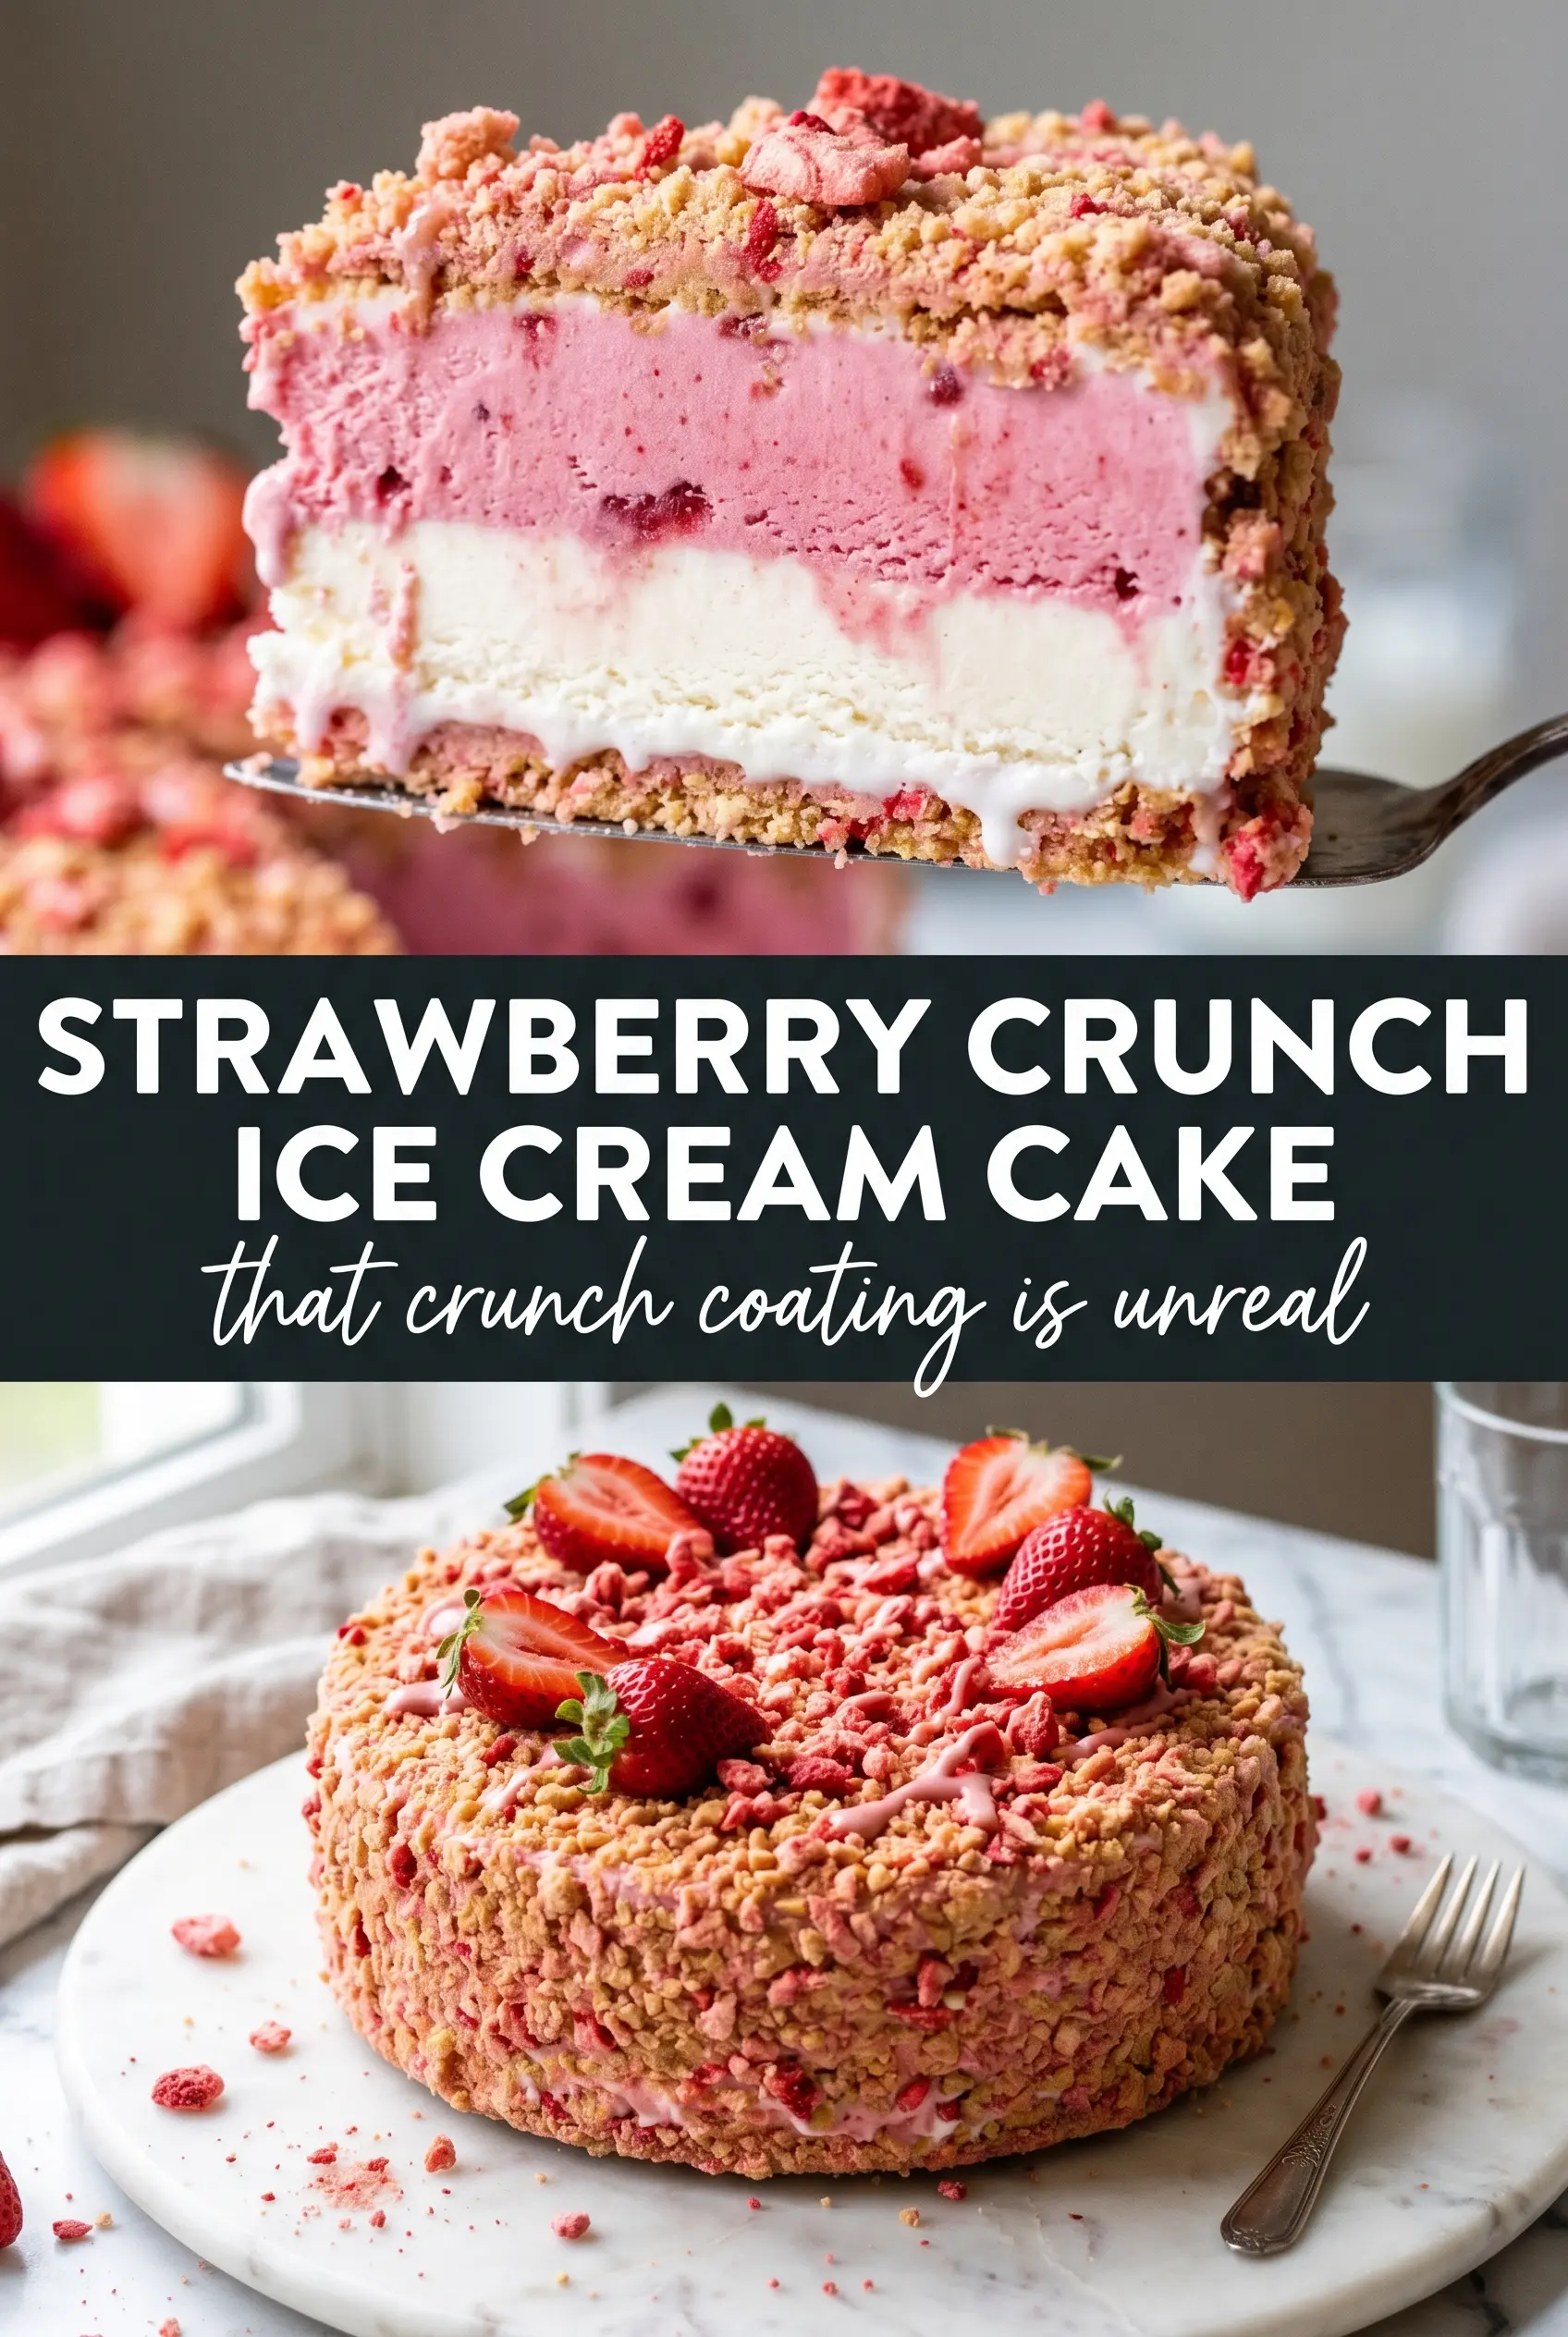
Strawberry crunch ice cream cake lands with a cold, creamy center and that unmistakable pink-and-gold crumble that crackles under the fork. The crust gives just enough salt and cookie flavor to keep every bite from tasting one-note, and the whipped topping rounds everything out without making the cake heavy. It slices cleanly after a proper freeze, which matters more here than almost anything else.
The trick is using freeze-dried strawberries for both the crust and the crunch topping. Fresh berries bring water, and water turns a crisp crumble into a soft, muddy layer. Golden Oreos add the buttery vanilla base that makes the strawberry flavor pop, and the softened ice cream spreads without tearing the crust underneath. A long freeze between layers gives the cake its shape, so each slice looks as good as it tastes.
Below, you’ll find the small details that keep the topping crisp, the best way to handle the ice cream so it spreads easily, and a few smart swaps if you need to adjust the cake for a different crowd.
The strawberry crunch stayed crisp on top even after the cake sat out for a few minutes, and the crust held together cleanly when I sliced it. My kids picked off the crunchy edges first.
Save this strawberry crunch ice cream cake for the kind of dessert night that needs a pink strawberry center and a buttery Oreo crunch.
The Freeze Time That Keeps the Crunch Layer Crisp
The biggest mistake with an ice cream cake like this is rushing the layers. If the crust doesn’t get a short freeze before the ice cream goes in, it smears instead of setting, and the base loses the clean edge that makes slicing easy. The same goes for the finished cake: the topping needs time to firm up around the whipped layer so it doesn’t slide off when you cut into it.
Softened ice cream helps here, but softened is not melted. You want it spreadable, not soupy. If it gets too loose, it sinks into the crust and blurs the line between layers, which is exactly what makes store-bought ice cream cakes look neat and homemade versions look messy.
- Freeze-dried strawberries — These do the heavy lifting in both the crust and the topping because they add bright strawberry flavor without extra moisture. Crush them to a fine powder for the crust, then leave a few small bits in the topping for texture.
- Golden Oreos — Their vanilla-cookie flavor gives this cake the classic strawberry shortcake vibe. Regular Oreos will work in a pinch, but they change the look and pull the flavor away from strawberry shortcake territory.
- Strawberry ice cream — Use a brand that freezes firm and tastes good on its own. If it’s icy or thin straight from the carton, it will stay soft longer and the cake won’t slice as cleanly.
- Whipped topping — This creates the smooth middle layer that helps the crunch topping cling. Homemade whipped cream can work, but it softens faster, so the cake needs a longer freeze before serving.
What Each Ingredient Is Actually Doing in This Ice Cream Cake
- Base layer (cookies, cake, or graham cracker) — This provides structure and stability. Crushed and mixed with butter creates a firm foundation.
- Ice cream (the main star) — Use quality ice cream or make homemade. Softness matters for layering.
- Sauce or topping between layers (fudge, caramel, or fruit) — This adds moisture, flavor, and prevents dryness. Don’t skip this layer.
- Frosting or whipped cream (optional outer layer) — This prevents freezer burn and adds creaminess. Stabilized whipped cream works best.
- Freezing time (at least 4-6 hours) — This sets the layers so cake slices cleanly. Longer freezing prevents melting during serving.
- Room temperature before serving (5-10 minutes) — This softens the cake slightly for better texture. Serve immediately after thawing.
- Toppings (chocolate, nuts, cookies, or sprinkles) — These add visual appeal and texture. Add right before serving.
- Storage (in freezer at 0°F or below) — This prevents ice crystal formation and maintains quality. Cover with plastic wrap.
Building the Layers Without Letting the Cake Collapse
Pressing the Crust
Mix the crushed Golden Oreos, strawberry powder, and melted butter until the crumbs look evenly damp, then press them firmly into the springform pan. Use the bottom of a measuring cup to pack the crust flat from the center outward. If the crust feels sandy or loose, it needs a little more butter; if it looks greasy, it was overmixed.
Spreading the Ice Cream
Let the strawberry ice cream soften just enough that a spoon glides through it without resistance. Spoon it over the chilled crust in sections, then smooth it into the corners so there are no gaps along the edge. Don’t let it sit on the counter too long or it will melt into the crust instead of resting on top of it.
Finishing the Top and Sides
Spread the whipped topping in an even layer, then press the strawberry crunch mixture onto the top and sides. Work gently so you don’t drag the whipped layer off the cake. The topping sticks best when the whipped layer is cold but not frozen hard, which is why the cake needs that first long freeze before the final coating goes on.
The Final Freeze Before Slicing
After the crunch topping is on, freeze the cake again until the outside feels firm all the way through. That last stretch is what gives you clean slices and keeps the topping from falling in loose crumbs at the table. Garnish with fresh strawberries right before serving so they stay bright and don’t bleed onto the cake.
How to Adjust the Cake When You Need a Different Finish
Make it dairy-free
Use a dairy-free strawberry ice cream and a non-dairy whipped topping with a similar texture. The flavor stays close to the original, but the cake may soften a little faster, so keep it frozen until the last minute before serving.
Swap in vanilla ice cream
Vanilla ice cream gives you a more classic strawberry shortcake flavor and lets the crunch topping stand out even more. You lose some pink color in the center, but the strawberry powder in the crust and topping still carries the berry flavor.
Use a smaller pan for taller slices
A 7- or 8-inch pan makes a taller cake with thicker layers, which looks nice for a special occasion. The downside is a longer freeze time, since the center takes more time to set fully.
Storage and Reheating
- Refrigerator: Not a good make-ahead-at-room-temp dessert. If leftovers need to be kept after serving, return slices to the freezer within 30 minutes so the ice cream doesn’t turn sloppy.
- Freezer: Wrap the cake tightly in plastic wrap, then foil, and freeze for up to 1 week for the best texture. After that, the crunch topping starts to lose its snap and the ice cream can pick up freezer flavor.
- Reheating: No reheating needed. Let a frozen slice sit at room temperature for 5 to 10 minutes before serving so the knife slides cleanly through the crust without cracking the whole slice apart.
Questions I Get Asked About This Recipe
Easy Strawberry Crunch Ice Cream Cake
Ingredients
Equipment
Method
- Mix 20 crushed Golden Oreos, 1/2 cup crushed freeze-dried strawberries, and 4 tablespoons melted unsalted butter until the mixture resembles wet crumbs, then press it firmly into a 9-inch springform pan. Freeze for 15 minutes (visual cue: crust looks set and holds together).
- Spread the softened strawberry ice cream over the crust in an even layer, smoothing the top for a clean surface. Freeze for 4 hours (visual cue: layer is firm enough to stay flat).
- Cover the entire top and sides with whipped topping in an even coat so the crumbs will adhere. (Visual cue: the surface looks fully coated with no bare ice cream showing).
- Mix the remaining 10 crushed Golden Oreos, 1/2 cup crushed freeze-dried strawberries, and 3 tablespoons melted unsalted butter into crumbles, then press the crumbles onto the top and sides. Freeze for 2 hours (visual cue: crunch coating looks set and sticks firmly).
- Garnish with fresh strawberries right before serving. (Visual cue: bright red berries sit on top of the pink-and-golden coating).