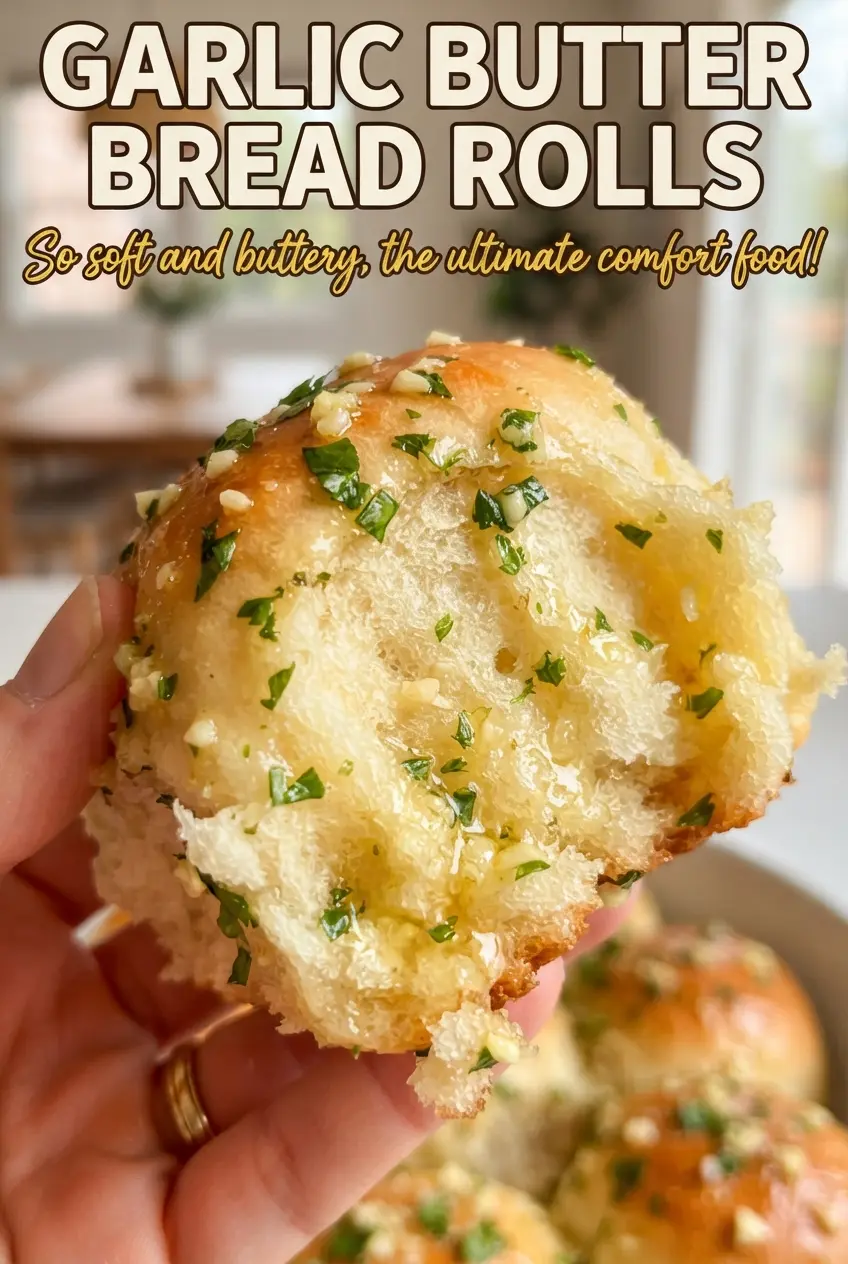
Garlic butter bread rolls come out soft in the middle with golden tops that catch every bit of the buttery glaze. The best part is the pull-apart texture: the rolls bake close together, so the sides stay tender while the tops turn lightly crisp and ready for a generous brush of garlic butter. They’re the kind of side that disappears fast, especially when served warm enough for the butter to soak into every crack and ridge.
This version keeps the dough simple and dependable. Warm milk gives the rolls a richer crumb than water does, and the first rise builds enough structure for a fluffy interior without turning the dough heavy. The garlic butter goes on after baking, not before, so the garlic stays fragrant instead of turning bitter in the oven. A little flaky salt at the end sharpens the whole thing and keeps the rolls from tasting flat.
Below, I’ve included the timing cues that matter most, plus a few swaps if you need to work around what’s in your kitchen. The dough is straightforward, but a few small details make the difference between average dinner rolls and the ones people reach for before the rest of the meal hits the table.
The rolls were unbelievably soft, and brushing the garlic butter on while they were still hot made the tops soak it up without getting soggy. I’ll be using this dough for sliders too.
These garlic butter bread rolls stay pillowy and pull apart beautifully, especially when you brush on the garlic butter while they’re still hot.
The Reason These Rolls Stay Soft Instead of Drying Out
Most dinner roll recipes dry out for one of two reasons: too much flour gets worked in, or the dough never gets enough strength before baking. These garlic butter bread rolls avoid both problems by starting with a sticky-enough dough that turns smooth after kneading, not during the first minute of mixing. That matters. If you add flour until the dough feels stiff on the counter, you’ll bake out the tenderness before the rolls ever have a chance to rise.
The other thing working in your favor is the pan. Baking the rolls close together in a 9×13-inch dish helps them rise upward instead of spreading outward, which gives you soft sides and a plush center. The milk, butter, and egg all add richness, but the real texture win comes from stopping the knead when the dough is elastic and bounces back slowly when pressed.
- Warm milk — This wakes up the yeast and adds tenderness. It should feel warm, not hot; anything above about 115°F can slow or damage the yeast.
- Instant yeast — Instant yeast makes the rise predictable and fast. If you only have active dry yeast, bloom it in the warm milk for 5 to 10 minutes first and expect the rise to take a little longer.
- All-purpose flour — This gives you enough structure without making the rolls chewy. Add just enough for the dough to pull away from the bowl and stay soft.
- Butter topping — The garlic butter goes on after baking so the rolls absorb the flavor instead of losing it in the oven.
What Each Ingredient Is Actually Doing in the Dough

- Milk — Adds richness and keeps the crumb soft. Whole milk gives the best result, but any milk you keep on hand will work.
- Sugar — Feeds the yeast and lightly rounds out the flavor. It also helps the tops brown in the oven.
- Egg — Makes the dough richer and helps the rolls bake up with a finer, softer crumb.
- Melted butter in the dough — Keeps the rolls tender and gives them that bakery-style richness. Let it cool slightly before adding it so it doesn’t knock back the yeast.
- Garlic, parsley, and flaky salt — The garlic brings the savory hit, the parsley keeps the butter bright, and the flaky salt gives the tops a little crunch and contrast.
Building the Dough, Rise, and Garlic Butter Finish
Waking Up the Yeast
Whisk the warm milk, yeast, and sugar together and wait until the top looks foamy and active. That foam tells you the yeast is alive and ready to work. If the mixture stays flat after 5 minutes, the milk was probably too hot or too cold, and the rolls won’t rise well later. Once the yeast is active, add the egg, melted butter, salt, and flour.
Mixing to the Right Dough
Knead the dough for 6 to 8 minutes until it looks smooth and feels elastic. It should still be soft, but it shouldn’t smear or cling like batter. If the dough is dry and stiff, the rolls will bake up dense, so resist the urge to keep adding flour unless it’s truly unmanageable. A little tackiness at this stage is a good sign.
First Rise and Shaping
Cover the dough and let it rise until doubled, about 1 hour. After that, divide it into 12 even pieces and roll each one into a tight ball so they rise evenly in the pan. If the balls are loose or ragged, they’ll bake with uneven tops and gaps between the rolls. Arrange them in a greased 9×13-inch pan, then let them rise again until puffy and touching.
Baking and Buttering
Bake at 375°F until the rolls are deep golden on top and sound slightly hollow when tapped, about 18 to 20 minutes. Stir the melted butter with the garlic and parsley while the rolls bake, then brush it over the hot rolls the second they come out of the oven. That timing keeps the garlic fragrant and lets the butter soak in instead of just sitting on top.
How to Adapt These Rolls Without Losing the Soft Crumb
Dairy-Free Version
Use an unsweetened non-dairy milk and a plant-based butter that melts cleanly. The rolls will still rise and brown well, but they’ll taste a little less rich, so don’t skip the garlic butter topping. That finishing layer carries most of the flavor here.
Using Active Dry Yeast Instead of Instant
Bloom the active dry yeast in the warm milk and sugar for 5 to 10 minutes before adding the rest of the ingredients. The rise may take a little longer, but the texture will still be light as long as the dough doubles before shaping and puffs nicely in the pan.
Parmesan Garlic Rolls
Add a handful of finely grated Parmesan to the garlic butter or sprinkle a little over the tops right after brushing. This gives the rolls a sharper, saltier finish and a slightly more savory crust without changing the dough itself.
Storage and Reheating
- Refrigerator: Store covered for up to 3 days. The rolls will lose a little of their just-baked softness, but they rebound well with gentle reheating.
- Freezer: Freeze baked rolls tightly wrapped for up to 2 months. Thaw at room temperature, then warm before serving.
- Reheating: Rewarm in a 300°F oven, covered loosely with foil, for 8 to 10 minutes. Microwave reheating turns the rolls rubbery, so skip it if you want that fluffy texture back.
Questions I Get Asked About This Recipe
Garlic Butter Bread Rolls
Ingredients
Equipment
Method
- Whisk warm milk, instant yeast, and sugar together, then let sit 5 minutes until foamy.
- If the mixture isn’t foamy after 5 minutes, discard and start again with fresh yeast.
- Add the egg, melted butter, salt, and all-purpose flour, then mix until a shaggy dough forms.
- Knead 6-8 minutes until smooth and elastic, then return to the bowl.
- Cover and let rise for 1 hour until doubled in size.
- Divide the dough into 12 equal balls, then place in a greased 9x13-inch pan.
- Cover and let rise 30 minutes until puffy.
- Preheat the oven to 375°F, then bake for 18-20 minutes until golden brown.
- Stir melted butter with minced garlic and chopped parsley, then brush generously over the hot rolls.
- Sprinkle flaky sea salt over the top, then serve warm.