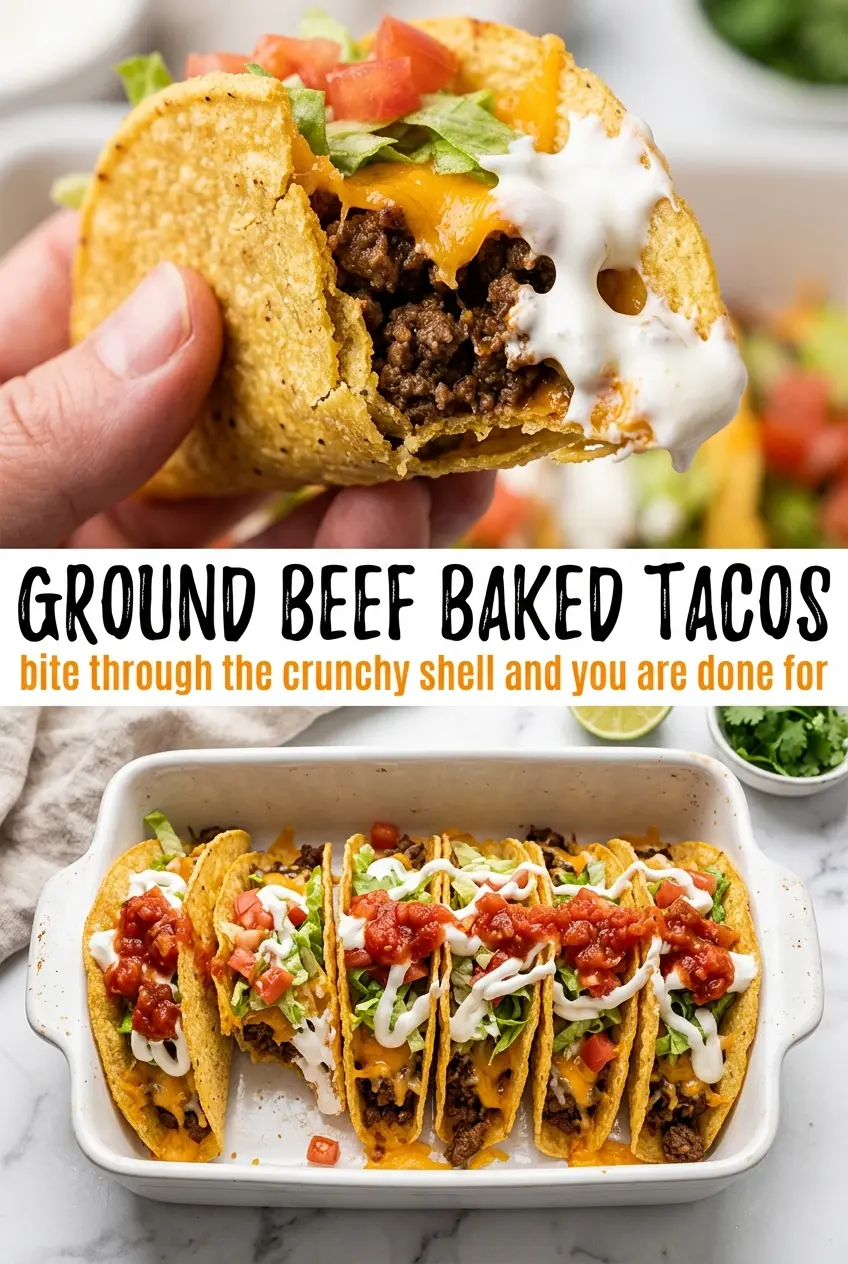
Crispy ground beef baked tacos bring the best parts of taco night into one pan: sturdy shells, juicy seasoned beef, and cheese melted right over the top so every bite holds together. Baking the filled shells instead of serving everything separately keeps the tacos hot, gives the cheese time to melt into the beef, and takes some of the last-minute scrambling out of dinner.
The small details matter here. The beef gets seasoned and simmered before it goes into the shells, which keeps the filling savory instead of dry and crumbly. A little water helps the seasoning cling to the meat, and baking the tacos upright gives you those crisp edges without the shells collapsing before they reach the table.
Below you’ll find the trick for keeping hard shells crisp, the ingredient choices that make the filling taste fuller, and a few ways to adapt the pan for different toppings or dietary needs.
The shells stayed crisp even after baking, and the seasoned beef had just enough moisture that it didn’t taste dry. My kids loaded theirs up with lettuce and sour cream and there wasn’t a taco left in the dish.
Save these crispy ground beef baked tacos for the night you want taco night with melted cheese and no taco-shell chaos.
The Trick to Keeping Hard Taco Shells Crisp in the Oven
Hard shells can turn soft fast if the filling is too wet or the oven is too hot. This version keeps the shells upright and the beef tucked in tightly, so the shells warm through without getting damp on the bottom. The short bake is enough to melt the cheese and set the shells without giving the tomatoes or sour cream a chance to soften everything too soon.
- Drain the beef well — excess fat is one of the main reasons baked tacos go greasy and lose their crunch. A leaner ground beef helps, but even fattier beef works if you drain it thoroughly after browning.
- Keep the seasoning saucy, not watery — the 1/4 cup of water is just enough to coat the meat and help the taco seasoning bloom. If the pan looks soupy, let it simmer another minute before filling the shells.
- Add fresh toppings after baking — tomatoes, lettuce, sour cream, and salsa belong at the end. Putting them on before the oven is the quickest way to soggy shells.
What the Beef, Cheese, and Shells Are Each Doing Here

- Ground beef — this is the backbone of the filling. An 80/20 or 85/15 beef gives the best flavor, but if you use something leaner, keep an eye on the skillet so the meat doesn’t dry out before the seasoning goes in.
- Taco seasoning — store-bought seasoning keeps the recipe fast and reliable. If you use a homemade blend, add enough salt and cumin to mimic the packaged version’s depth, or the filling will taste flat after baking.
- Cheddar cheese — cheddar melts cleanly and gives the tacos that familiar taco-shop finish. Pre-shredded cheese works fine, though block-grated cheese melts a little smoother because it doesn’t carry the anti-caking coating.
- Hard taco shells — the shell choice matters because they have to hold their shape in the oven. Standard hard shells are the easiest route; street-taco style soft tortillas won’t give you the same crisp structure or upright presentation.
- Tomatoes, lettuce, sour cream, and jalapeño — these are here for freshness, creaminess, and heat, but they should stay cold and crisp. Dice the tomatoes small so they don’t slide off, and pat them dry if they’re especially juicy.
Building the Tacos So the Shells Stay Crisp
Brown the Beef Until the Moisture Cooks Off
Cook the ground beef over medium-high heat and break it into small crumbles as it browns. You want no pink left and only a thin layer of rendered fat in the pan before you drain it. If you rush this part, the filling stays wet and the shells soften from the bottom once they hit the oven.
Season and Simmer Until the Filling Clings
Stir in the taco seasoning and water, then let the mixture simmer for 2 to 3 minutes. It should look glossy and lightly thickened, not soupy. The beef is ready when the seasoning coats every crumble and there’s just enough moisture left to keep the filling from tasting dry.
Fill, Bake, and Let the Cheese Melt Over the Top
Stand the shells upright in the baking dish and divide the beef evenly among them. Top with cheddar and bake just until the cheese melts and the shells smell toasted, about 10 to 12 minutes. If they stay in much longer, the edges can darken too fast and the cheese can turn oily instead of creamy.
Finish With Cold Toppings Right Before Serving
Add the tomatoes, lettuce, sour cream, and jalapeño after the tacos come out of the oven. That contrast of hot beef and cool toppings is what makes these taste finished. Salsa on the side keeps the shells from getting soggy before the first bite.
How to Adapt These Baked Tacos for Different Tables
Make Them Gluten-Free
Use hard taco shells and taco seasoning that are labeled gluten-free. The rest of the recipe already works in your favor, and the finished tacos keep the same crisp texture without any other changes.
Swap in Ground Turkey or Chicken
Ground turkey or chicken gives you a lighter filling, but it needs a little extra attention because it dries out faster than beef. Keep the seasoning and water the same, then stop cooking as soon as the meat is no longer pink and the mixture has thickened.
Make It Spicier Without Changing the Base
The easiest way to add heat is with diced jalapeño and a hotter salsa at serving time. If you stir hot sauce into the beef, keep it light so it doesn’t overpower the seasoning or make the filling too wet.
Storage and Reheating
- Refrigerator: Store leftover filling separately from the shells for up to 3 days. The shells will soften if they sit assembled.
- Freezer: The seasoned beef freezes well for up to 2 months. Freeze it flat in a sealed container, then thaw in the fridge before reheating and assembling fresh tacos.
- Reheating: Warm the beef in a skillet over medium heat or in the microwave until steaming hot. Re-crisp shells in the oven for a few minutes if needed, but don’t reheat assembled tacos or the lettuce and sour cream will turn the whole thing soggy.
Questions I Get Asked About This Recipe
Ground Beef Baked Tacos
Ingredients
Equipment
Method
- Preheat the oven to 350°F. Brown ground beef in a skillet over medium-high heat, breaking it into crumbles as it cooks, until no longer pink, then drain excess fat.
- Stir taco seasoning and water into the cooked beef. Simmer for 2-3 minutes, until the mixture looks glossy and clings to the crumbles.
- Arrange the hard taco shells in a baking dish, standing them upright. Divide the seasoned beef among the shells so the filling peeks out above the edges.
- Sprinkle shredded cheddar cheese over each taco. Bake for 10-12 minutes at 350°F until the shells are crispy and the cheese is melted with light golden spots.
- Top each taco with diced tomatoes, shredded lettuce, a dollop of sour cream, and diced jalapeño. Serve immediately with salsa on the side.