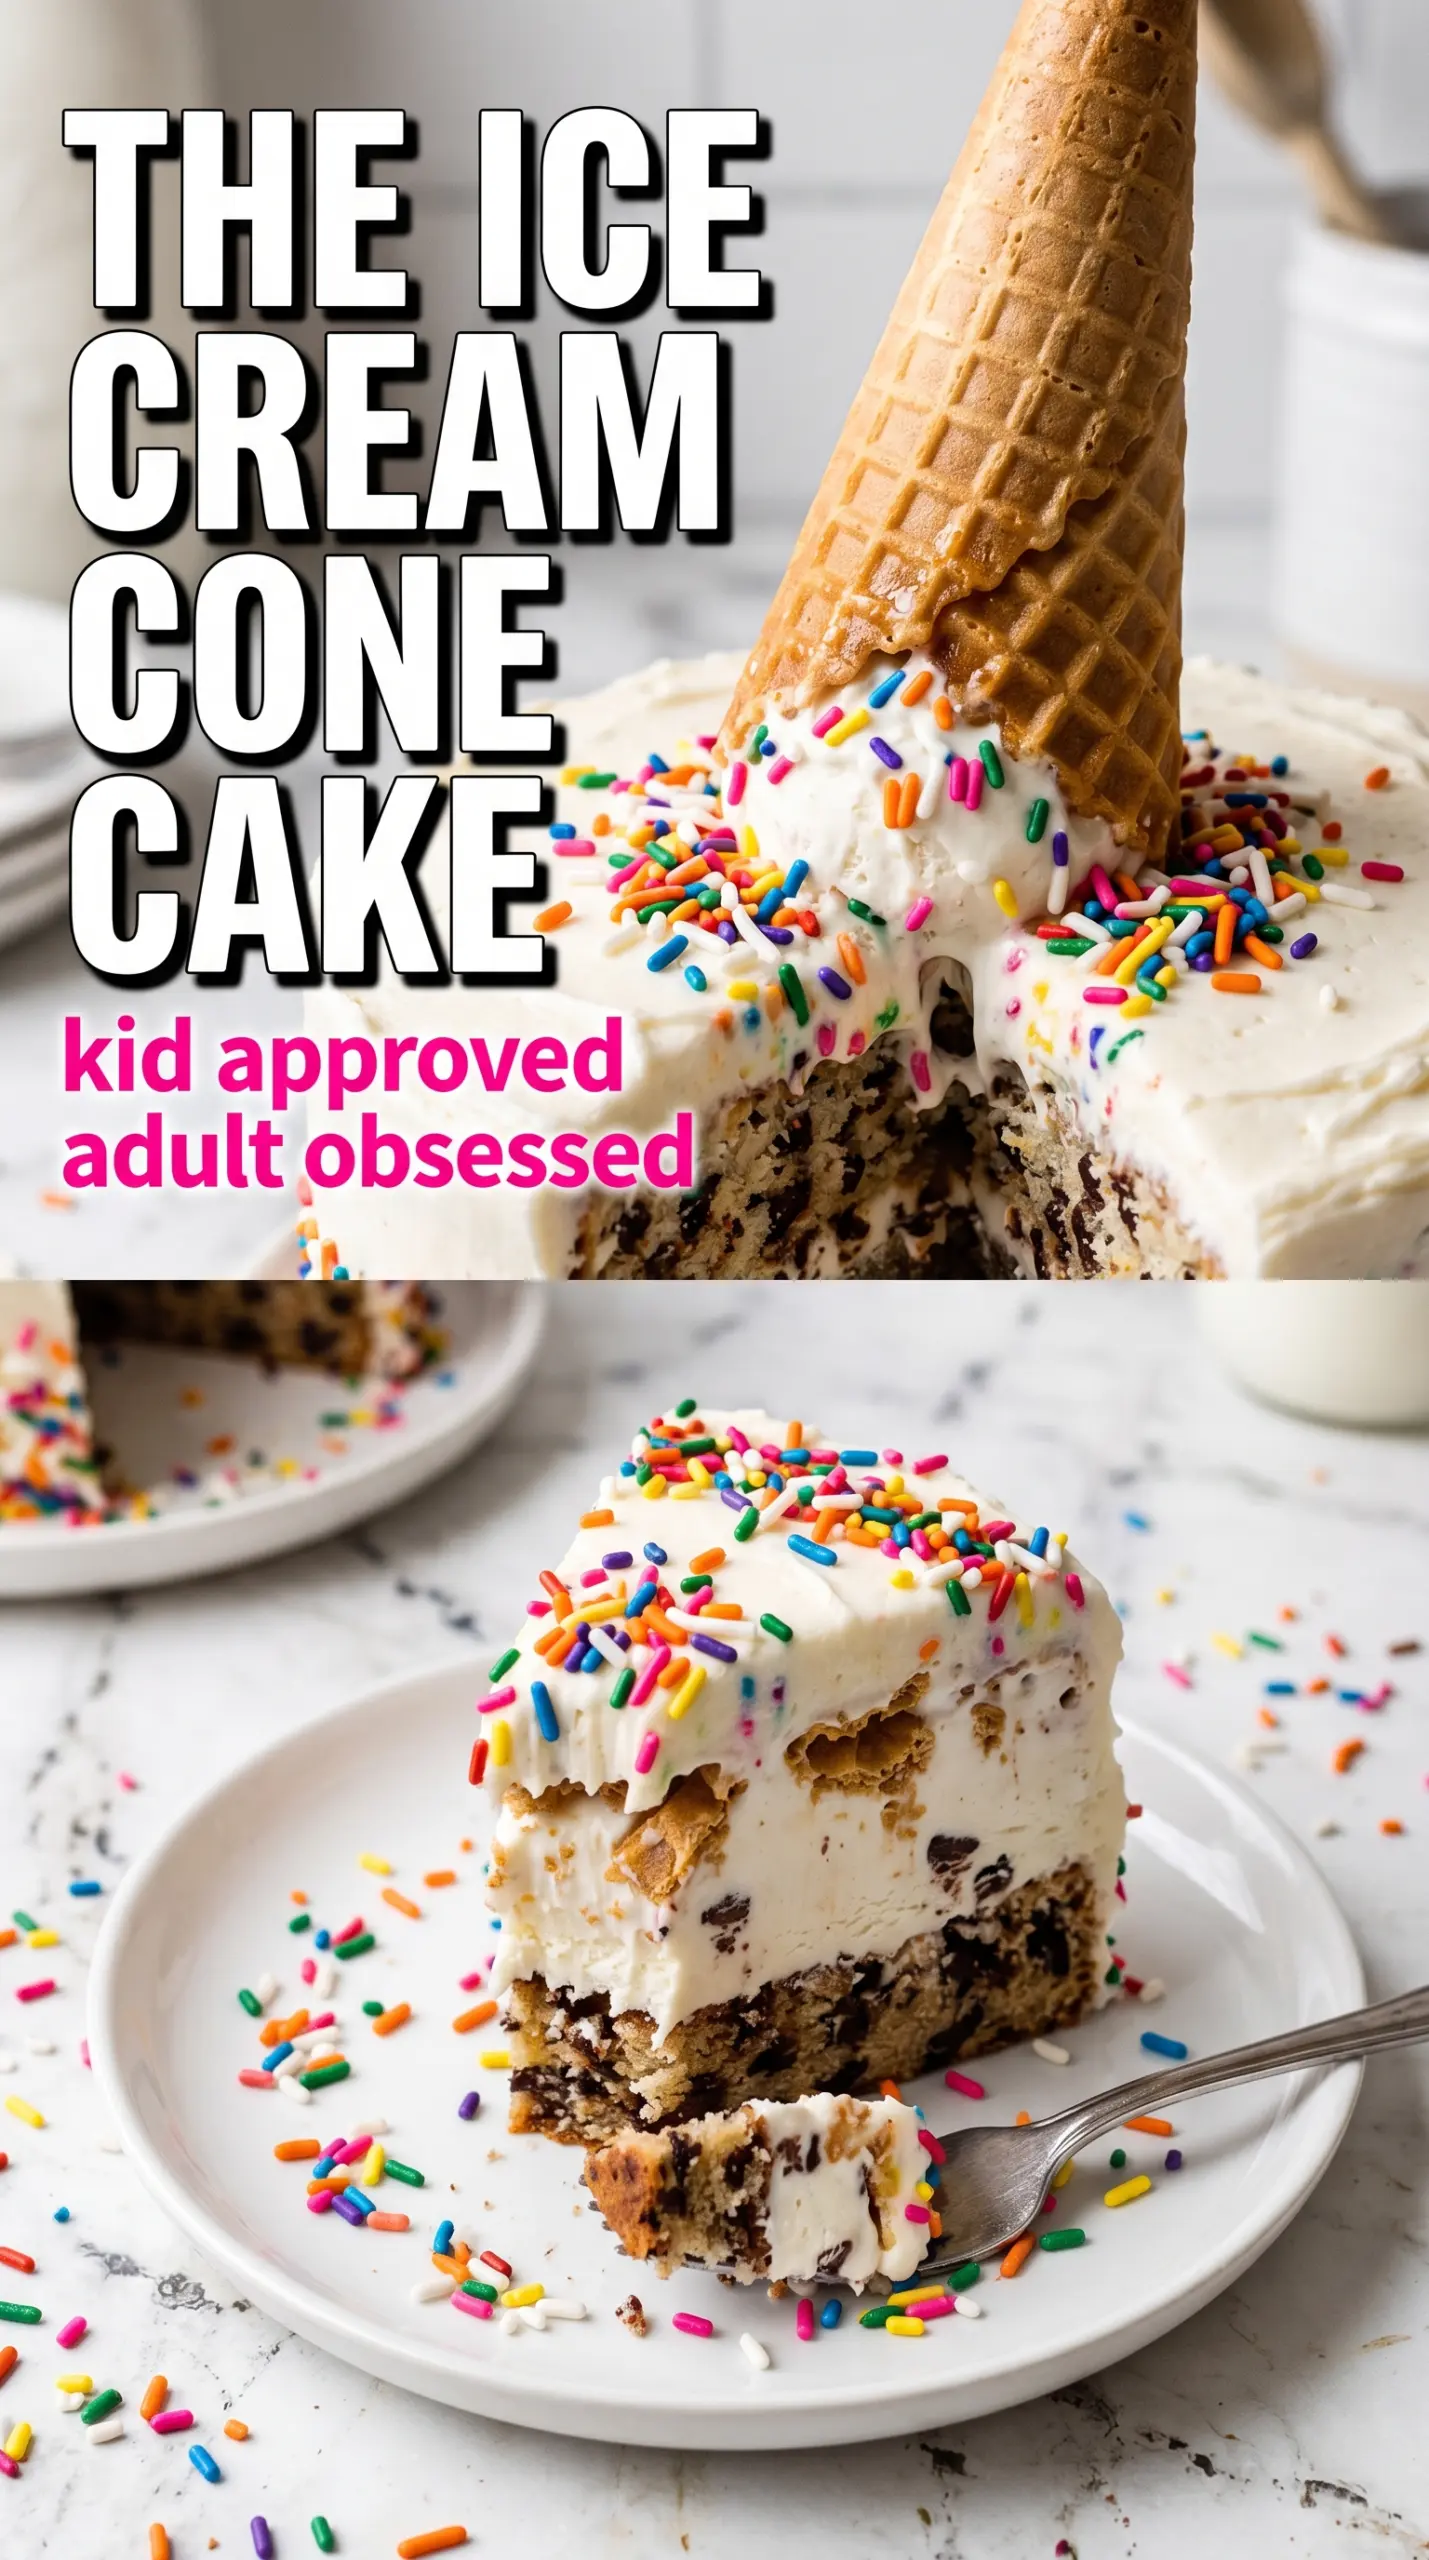
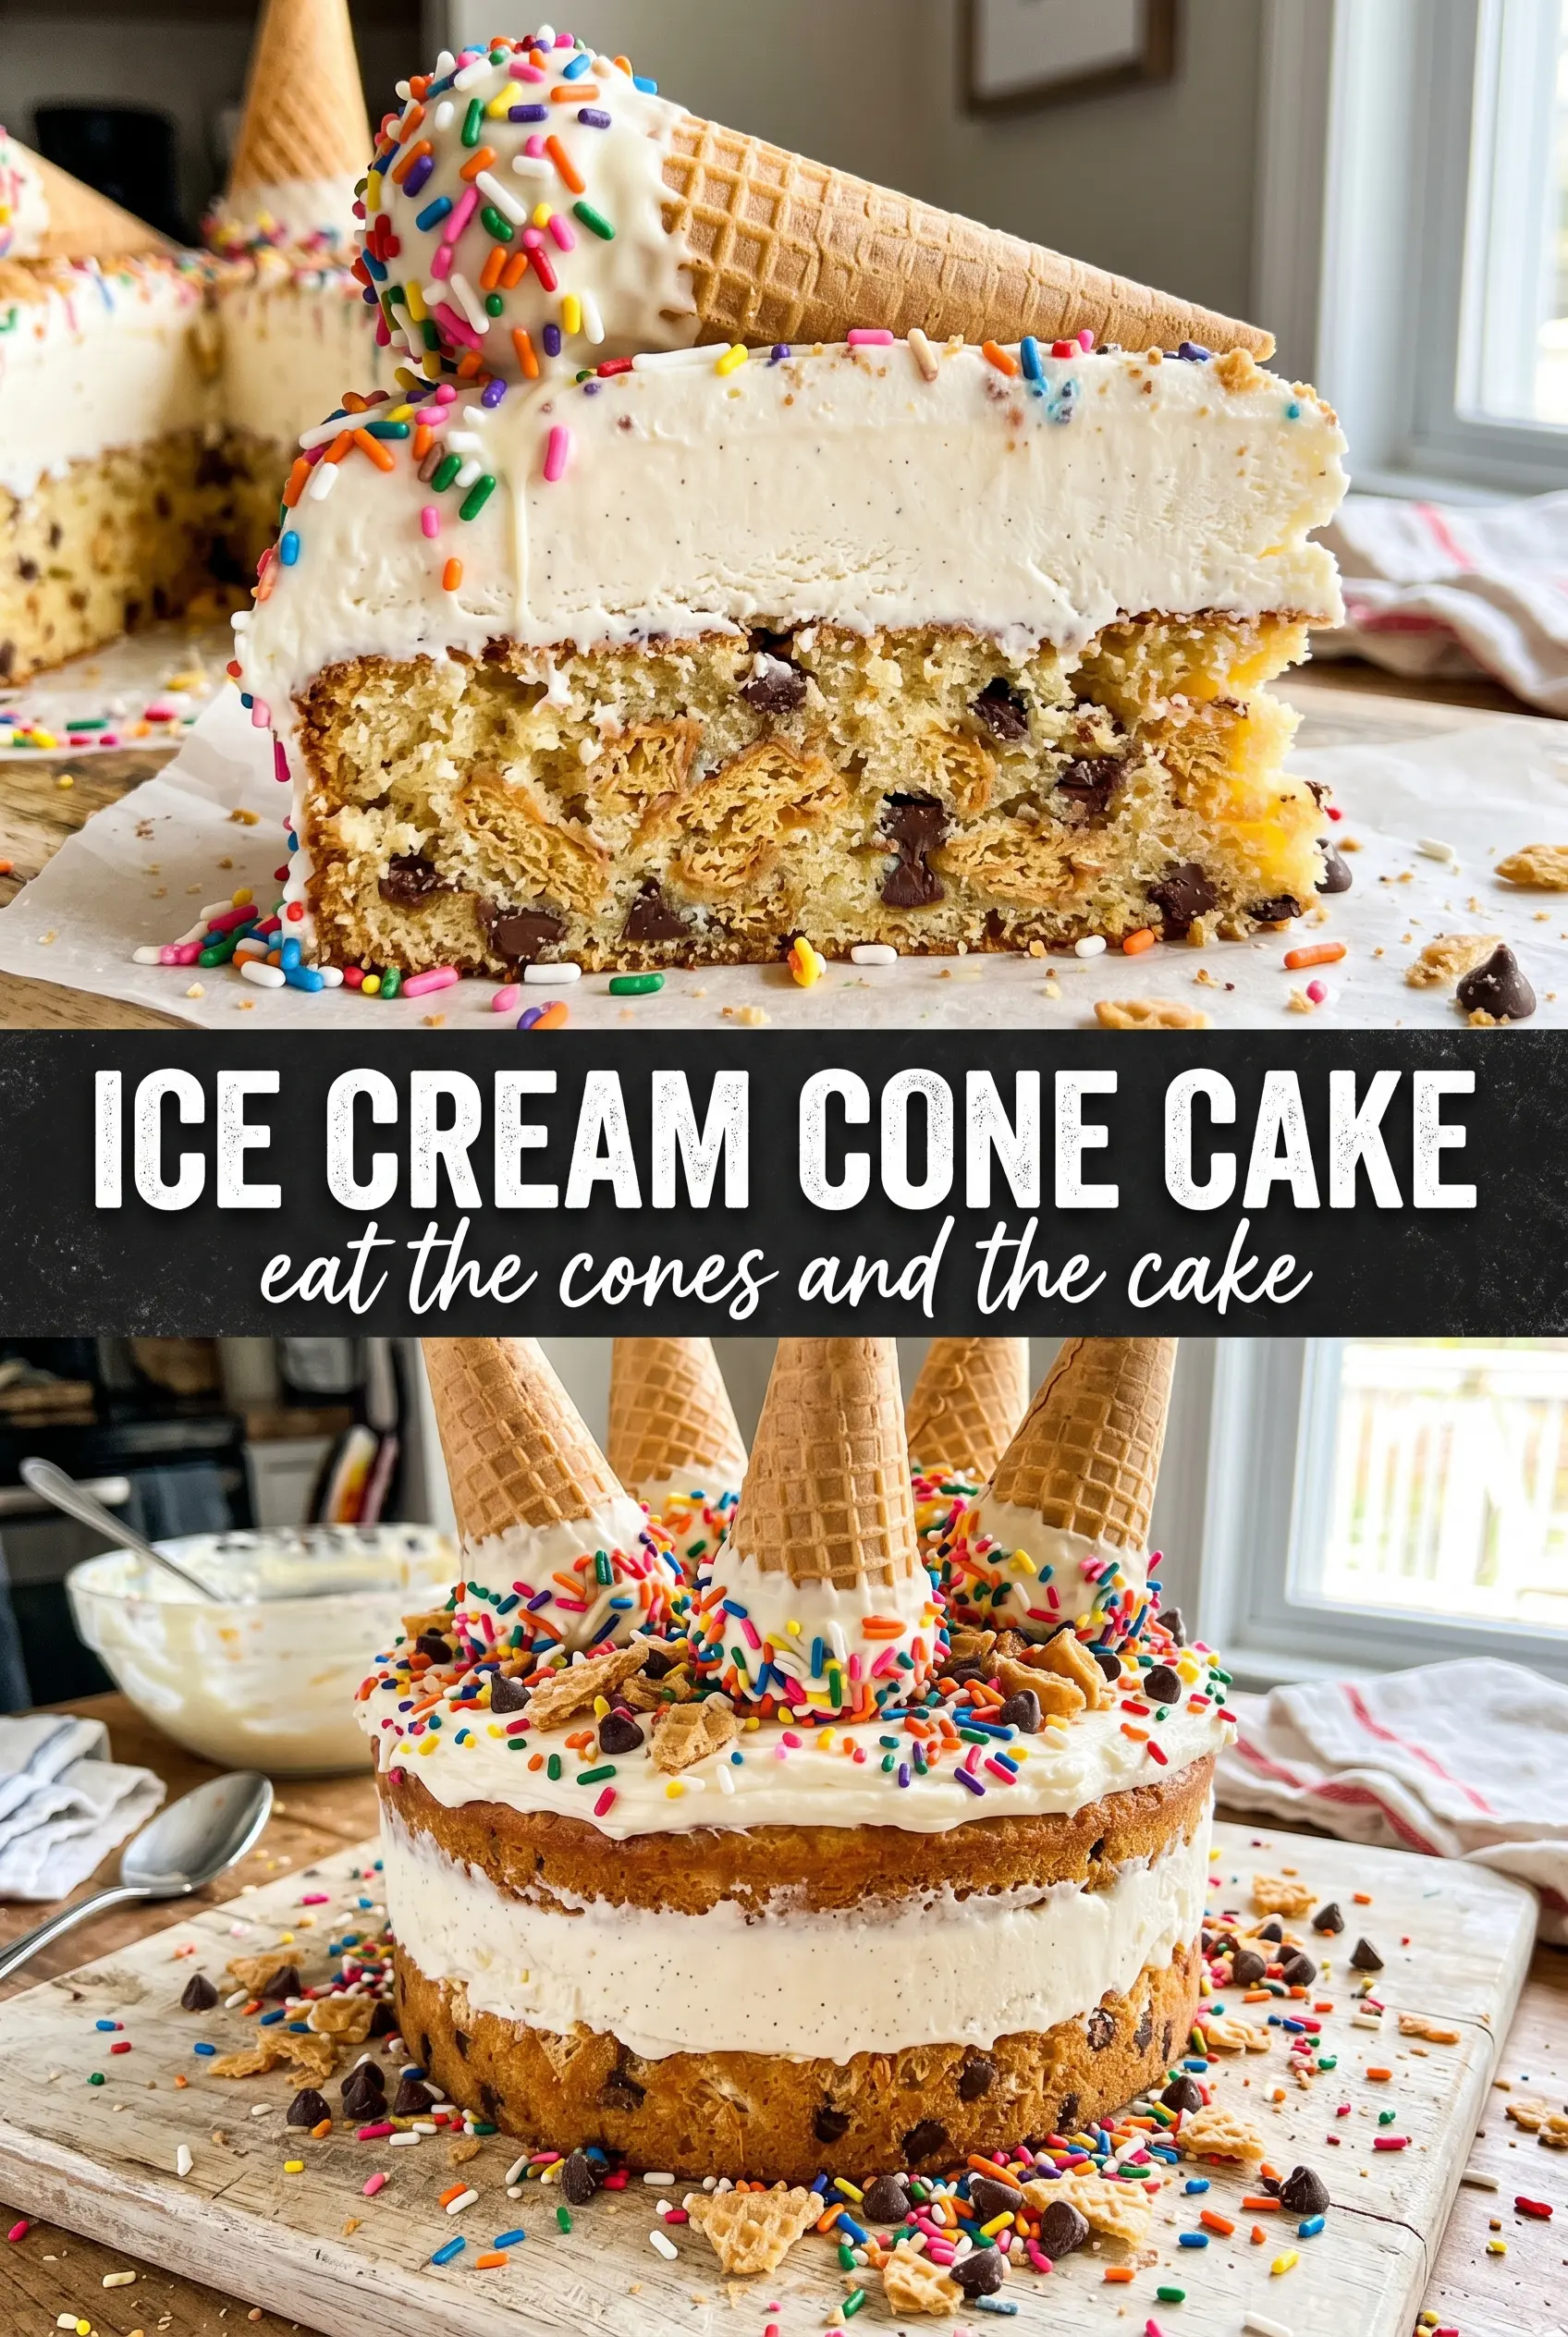
Crunchy cone crust, cold swirls of ice cream, and a whipped-topping finish make this Ice Cream Cone Cake feel like the kind of birthday dessert people remember. The best part is the contrast: the crust stays crisp enough to give each slice structure, while the filling cuts cleanly once it has had time to set. The mini cones on top turn it from a simple frozen cake into a full party moment.
This version works because the crushed sugar cones are mixed with just enough melted butter to hold together without turning greasy. That matters. Too much butter and the crust goes dense and hard; too little and it crumbles when you slice it. Softened ice cream spreads smoothly and freezes into a firm layer, and the final two-hour freeze after decorating gives the whipped topping a chance to set so the cones stay put.
Below, I’ve included the one timing detail that keeps the layers neat, plus a few smart swaps if you want to change the flavor or make it ahead for a birthday party.
The cone crust held together beautifully and the cake sliced cleaner than I expected after freezing. My kids thought the mini cones on top were the best part, and the rainbow sprinkles made it look like a real party cake.
Save this Ice Cream Cone Cake for the birthday party dessert that looks playful, slices cleanly, and stays fun all the way to the last crumb.
The Part That Keeps the Cone Crust from Falling Apart
The crust here needs to behave more like a press-in cookie crust than a loose sprinkle of crumbs. Sugar cones are dry and fragile, so the butter has to coat every bit evenly before you press the mixture into the pan. If the crumbs look sandy and won’t hold shape when you squeeze them, the crust will collapse when you cut the cake. If it looks greasy, you’ve gone too far and the base will set up hard instead of crisp.
The springform pan is doing a lot of the work. Press the crust firmly across the bottom so it forms an even layer, then freeze it before adding the ice cream. That short chill gives the butter a head start on setting, which keeps the crust from mixing into the ice cream layer.
- Sugar cones — These give the cake its signature flavor and the right dry, sweet crumb. Waffle cones work too, but they’re a little deeper in flavor and slightly less sweet, so the crust tastes more toasted.
- Melted butter — This is the binder. Use just enough to dampen all the crumbs; if you add more than needed, the crust becomes dense and greasy instead of crisp.
- Springform pan — A regular cake pan makes serving a headache because frozen layers don’t release cleanly. Springform sides let you unmold the cake without fighting it.
What Each Ingredient Is Actually Doing in This Ice Cream Cake
- Base layer (cookies, cake, or graham cracker) — This provides structure and stability. Crushed and mixed with butter creates a firm foundation.
- Ice cream (the main star) — Use quality ice cream or make homemade. Softness matters for layering.
- Sauce or topping between layers (fudge, caramel, or fruit) — This adds moisture, flavor, and prevents dryness. Don’t skip this layer.
- Frosting or whipped cream (optional outer layer) — This prevents freezer burn and adds creaminess. Stabilized whipped cream works best.
- Freezing time (at least 4-6 hours) — This sets the layers so cake slices cleanly. Longer freezing prevents melting during serving.
- Room temperature before serving (5-10 minutes) — This softens the cake slightly for better texture. Serve immediately after thawing.
- Toppings (chocolate, nuts, cookies, or sprinkles) — These add visual appeal and texture. Add right before serving.
- Storage (in freezer at 0°F or below) — This prevents ice crystal formation and maintains quality. Cover with plastic wrap.
Building the Layers Before the Cake Gets Too Soft
Press the Crust While the Butter Is Still Warm
Mix the crushed sugar cones with the melted butter until every crumb is lightly coated, then press the mixture firmly into the bottom of the springform pan. Use the flat bottom of a measuring cup to pack it in evenly. If the layer is patchy, the ice cream will seep through weak spots and the slices won’t hold together. Freeze the crust for 15 minutes so it firms up before the next layer goes on.
Spread the Ice Cream Before It Melts Past Slushy
Let the ice cream soften just enough that it spreads without tearing the crust underneath. You want pliable, not soupy. Scoop it onto the chilled crust and smooth it into an even layer, pressing into the edges so there aren’t empty pockets. Freeze it for 4 hours until it’s firm all the way through; if you rush this part, the whipped topping will melt into the filling instead of sitting on top.
Finish with the Topping and Decorations Fast
Spread the whipped topping over the frozen ice cream layer in an even blanket, then work quickly with the sprinkles and mini cones. The topping needs to be cold enough to hold the decorations upright, so don’t wait around once it’s on the cake. Press the mini cones in a ring pattern while the topping is still soft, then freeze the cake for 2 more hours so everything sets before you release the springform.
How to Change the Flavor Without Losing the Party Effect
Rainbow sherbet version
Use rainbow sherbet instead of vanilla ice cream if you want a brighter, fruitier cake with a little tang. It freezes a touch softer than ice cream, so give it the full chill time before adding the topping. The slices will taste lighter, and the colors peek through in a fun way once you cut in.
Gluten-free style
Use certified gluten-free ice cream cones if you need a gluten-free dessert. The rest of the recipe stays the same, but you should crush the cones a little finer so the crust packs tightly and doesn’t fall apart when sliced. Check the whipped topping label too, since some brands use thickeners that vary by product.
Chocolate birthday version
Swap the vanilla ice cream for chocolate and use chocolate-dipped mini cones if you want a richer, more dramatic cake. The crust still stays the same, but the finished dessert tastes closer to a frozen sundae. Keep the sprinkle colors bright so the cake still reads as playful, not heavy.
Storage and Reheating
- Refrigerator: Don’t store this in the fridge. It will melt and lose its shape within minutes.
- Freezer: Freeze tightly covered for up to 1 week. After that, the whipped topping and cones can start to pick up freezer flavor and the crust softens.
- Reheating: No reheating needed. Let slices sit at room temperature for 5 to 10 minutes before serving so the knife slides through the frozen layers without cracking the crust.
Answers to the Questions Worth Asking
Ice Cream Cone Cake
Ingredients
Equipment
Method
- Crush the sugar cones and mix them with the melted unsalted butter until evenly coated, then press the mixture firmly into a 9-inch springform pan. Freeze for 15 minutes to set the crust.
- Spread the softened vanilla or rainbow sherbet ice cream over the frozen cone crust and smooth the top into an even layer. Freeze for 4 hours until firm.
- Cover the top and sides with whipped topping, smoothing it so the surface is fully covered. Press a generous amount of rainbow sprinkles all over the whipped topping.
- Press the mini ice cream cones upright into the whipped topping in a ring pattern around the top for an iconic party presentation. Freeze for 2 more hours, then release the springform and serve.