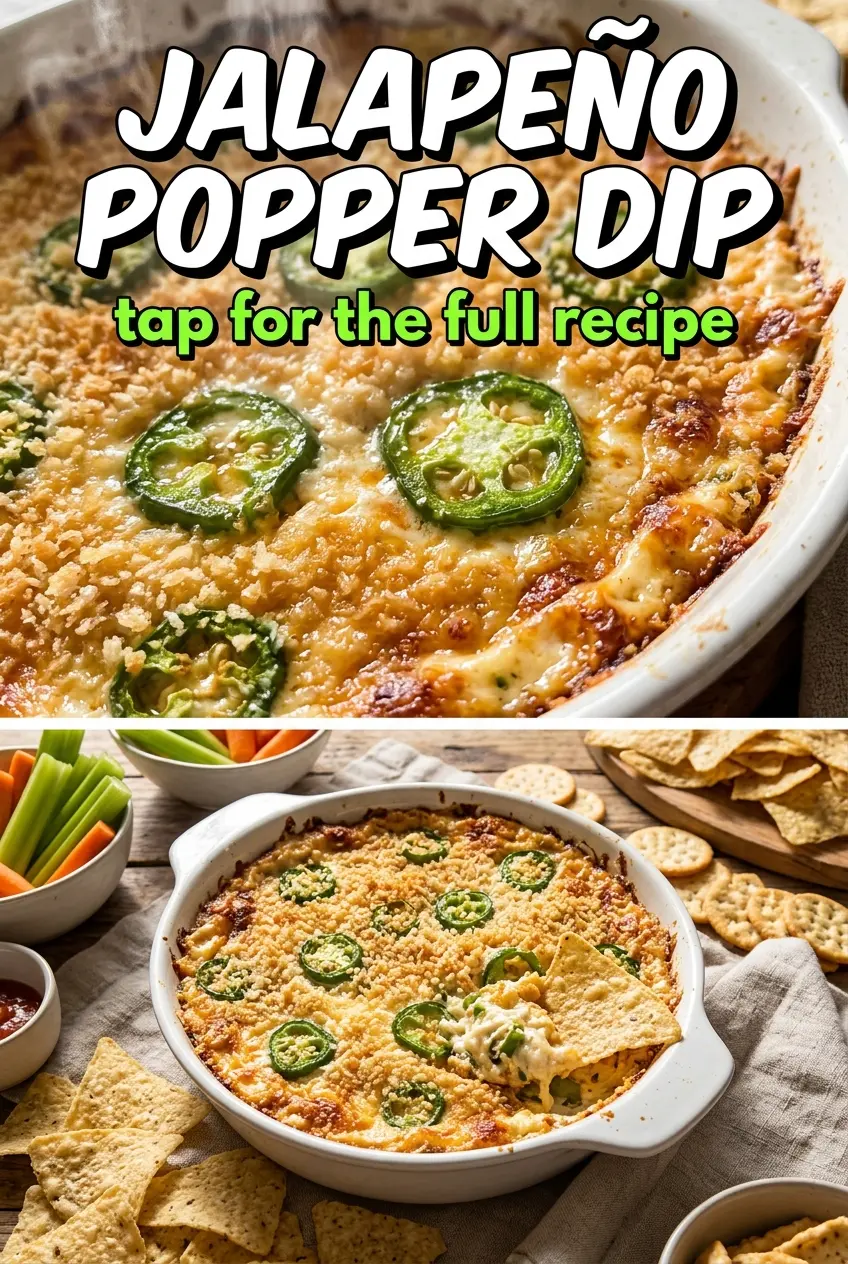
Creamy, smoky, and just sharp enough from the cheddar, jalapeño popper dip disappears fast because it eats like the best part of a stuffed pepper without any of the fiddly work. The top gets hot and bubbly, the center stays rich and scoopable, and every bite lands with a little heat, a little salt, and a lot of cheese. It’s the kind of appetizer people hover over while it’s still warm.
The trick here is balancing the creamy base with enough structure to hold the jalapeños and bacon without turning greasy. Softened cream cheese gives you the body, sour cream and mayonnaise keep it loose enough for dipping, and the Parmesan adds a salty edge that keeps the flavor from going flat. Roasting the jalapeños first is the move that makes this dip taste rounder and less harsh, and it keeps the heat from overpowering everything else.
Below you’ll find the details that matter most: how to keep the dip from breaking, why roasted peppers beat raw ones here, and a few smart swaps if you want to adjust the heat or make it ahead.
The roasted jalapeños made this taste way deeper than the usual version, and the dip stayed thick instead of turning oily after baking. I served it with tortilla chips and it was gone before the main snack board even hit the table.
Save this jalapeño popper dip for the next time you need a hot, cheesy appetizer with real jalapeño bite and a crisp bacon finish.
The Reason the Jalapeños Need Roasting Before They Go In
Raw jalapeños can work in a dip like this, but they bring a sharp, almost grassy heat that cuts through the cheese instead of blending into it. Roasting changes that. The peppers soften, their flavor turns sweeter and rounder, and the heat feels more integrated instead of spiky. That’s what makes this dip taste like a finished dish instead of a pile of ingredients stirred together.
There’s another reason this matters: roasted peppers release less moisture into the dip. Too much water is what makes a baked cheese dip thin out around the edges while the center stays heavy. If you’re using jarred or pre-roasted jalapeños, drain them well and chop them fine so they disappear into the base instead of pooling liquid in the baking dish.
What Each Ingredient Is Actually Doing in This Dip
- Cream cheese — This is the backbone. It gives the dip its body and that thick, scoopable texture once it bakes. Let it soften fully before mixing or you’ll end up chasing lumps forever.
- Sour cream and mayonnaise — These loosen the base just enough so it bakes up creamy instead of dense. Sour cream adds a slight tang, while mayonnaise keeps the texture silky and helps the dip stay rich after it comes out of the oven.
- Cheddar and Parmesan — Cheddar brings the familiar jalapeño popper flavor, but Parmesan keeps the cheese flavor from tasting flat. If you swap the cheddar, use another good melting cheese with some bite, like pepper jack or a sharp white cheddar.
- Roasted jalapeños — These control the heat and add the pepper flavor without making the dip harsh. If you want less heat, scrape out more of the seeds and ribs before roasting. If you want more, leave some of the seeds in.
- Bacon — Bacon adds salt, smoke, and crunch. Cook it until crisp, then crumble it well so every bite gets a little of that savory contrast.
- Garlic and cumin — Garlic gives the dip a sharper edge, and cumin adds a subtle warmth that makes the whole bowl taste more layered. You won’t taste the cumin as a separate note, but you’d miss it if it were gone.
Building the Dip So It Stays Creamy, Not Greasy
Start with a smooth base
Beat the softened cream cheese with the sour cream and mayonnaise until it looks completely even, with no white streaks or cold lumps. If the cream cheese is still firm, the final dip will bake with pockets of dense cheese instead of turning creamy throughout. Room-temperature dairy mixes faster and bakes more evenly.
Fold in the cheese and seasonings before the peppers
Stir in the cheddar, Parmesan, garlic, and cumin first so the seasoning is distributed through the whole bowl. That way the jalapeños and bacon don’t clump in one corner and the cheese doesn’t sink. The mixture should be thick but spreadable at this point.
Use roasted peppers and crisp bacon at the end
Fold the jalapeños and bacon in last so they stay visible and evenly scattered. If the bacon is still soft or the peppers are wet, the dip can turn greasy around the edges as it bakes. Pat the peppers dry and let the bacon cool slightly before mixing it in.
Bake until the edges bubble
Transfer the dip to a baking dish or cast iron skillet and bake until the edges are actively bubbling and the top looks melted all the way across. Don’t wait for deep browning; this dip is best when it’s hot and creamy, not dried out. A little browning at the corners is fine and gives you those toasty spots everyone reaches for first.
Three Ways to Adjust It Without Losing the Point
Make it milder without making it bland
Use fewer jalapeños and remove every seed and rib before roasting. You’ll still get the pepper flavor, but the heat will sit in the background instead of taking over the dip. If you want extra flavor without extra burn, add a little more cheddar or a pinch of smoked paprika.
Make it gluten-free without changing the texture
The dip itself is naturally gluten-free as written, so the only thing to watch is what you serve with it. Stick with certified gluten-free tortilla chips and check the bacon packaging if you’re cooking for someone sensitive. The texture and bake time stay exactly the same.
Skip the bacon and keep it vegetarian
Leave out the bacon and add a handful of finely chopped green onions or a little smoked paprika for depth. You’ll lose the salty crunch, so I’d add an extra pinch of salt and finish with more cheddar on top. It won’t taste exactly the same, but it still bakes into a rich, crowd-pleasing dip.
Make it ahead for a party
Mix the dip up to a day ahead, cover it, and refrigerate it unbaked. Let it sit at room temperature for about 20 minutes before baking so the center doesn’t stay cold while the edges overcook. Add the final bacon and cilantro after baking so they stay fresh and crisp.
Storage and Reheating
- Refrigerator: Store leftovers in an airtight container for up to 4 days. The texture will tighten as it chills, but the flavor holds up well.
- Freezer: It freezes, but the dairy base can turn a little grainy after thawing. If you do freeze it, wrap it tightly and thaw it overnight in the fridge before reheating.
- Reheating: Warm it in a 325°F oven until hot in the center, or reheat small portions in the microwave at 50% power. High heat is what causes the cheese to separate, so go low and slow.
Answers to the Questions Worth Asking
Jalapeño Popper Dip
Ingredients
Equipment
Method
- Preheat the oven to 350°F and set out a baking dish or cast iron skillet for the dip.
- In a large bowl, combine the softened cream cheese, sour cream, and mayonnaise until smooth.
- Stir in the shredded cheddar cheese, grated Parmesan cheese, minced garlic, and cumin until evenly combined.
- Fold in the roasted and diced jalapeños and the crumbled bacon until the mixture is evenly distributed.
- Transfer the mixture to a baking dish or cast iron skillet and bake for 15–20 minutes until heated through and bubbly.
- Top with additional bacon crumbles and fresh cilantro for a finished look.
- Serve warm with tortilla chips for dipping and let guests scoop from the bubbling center.