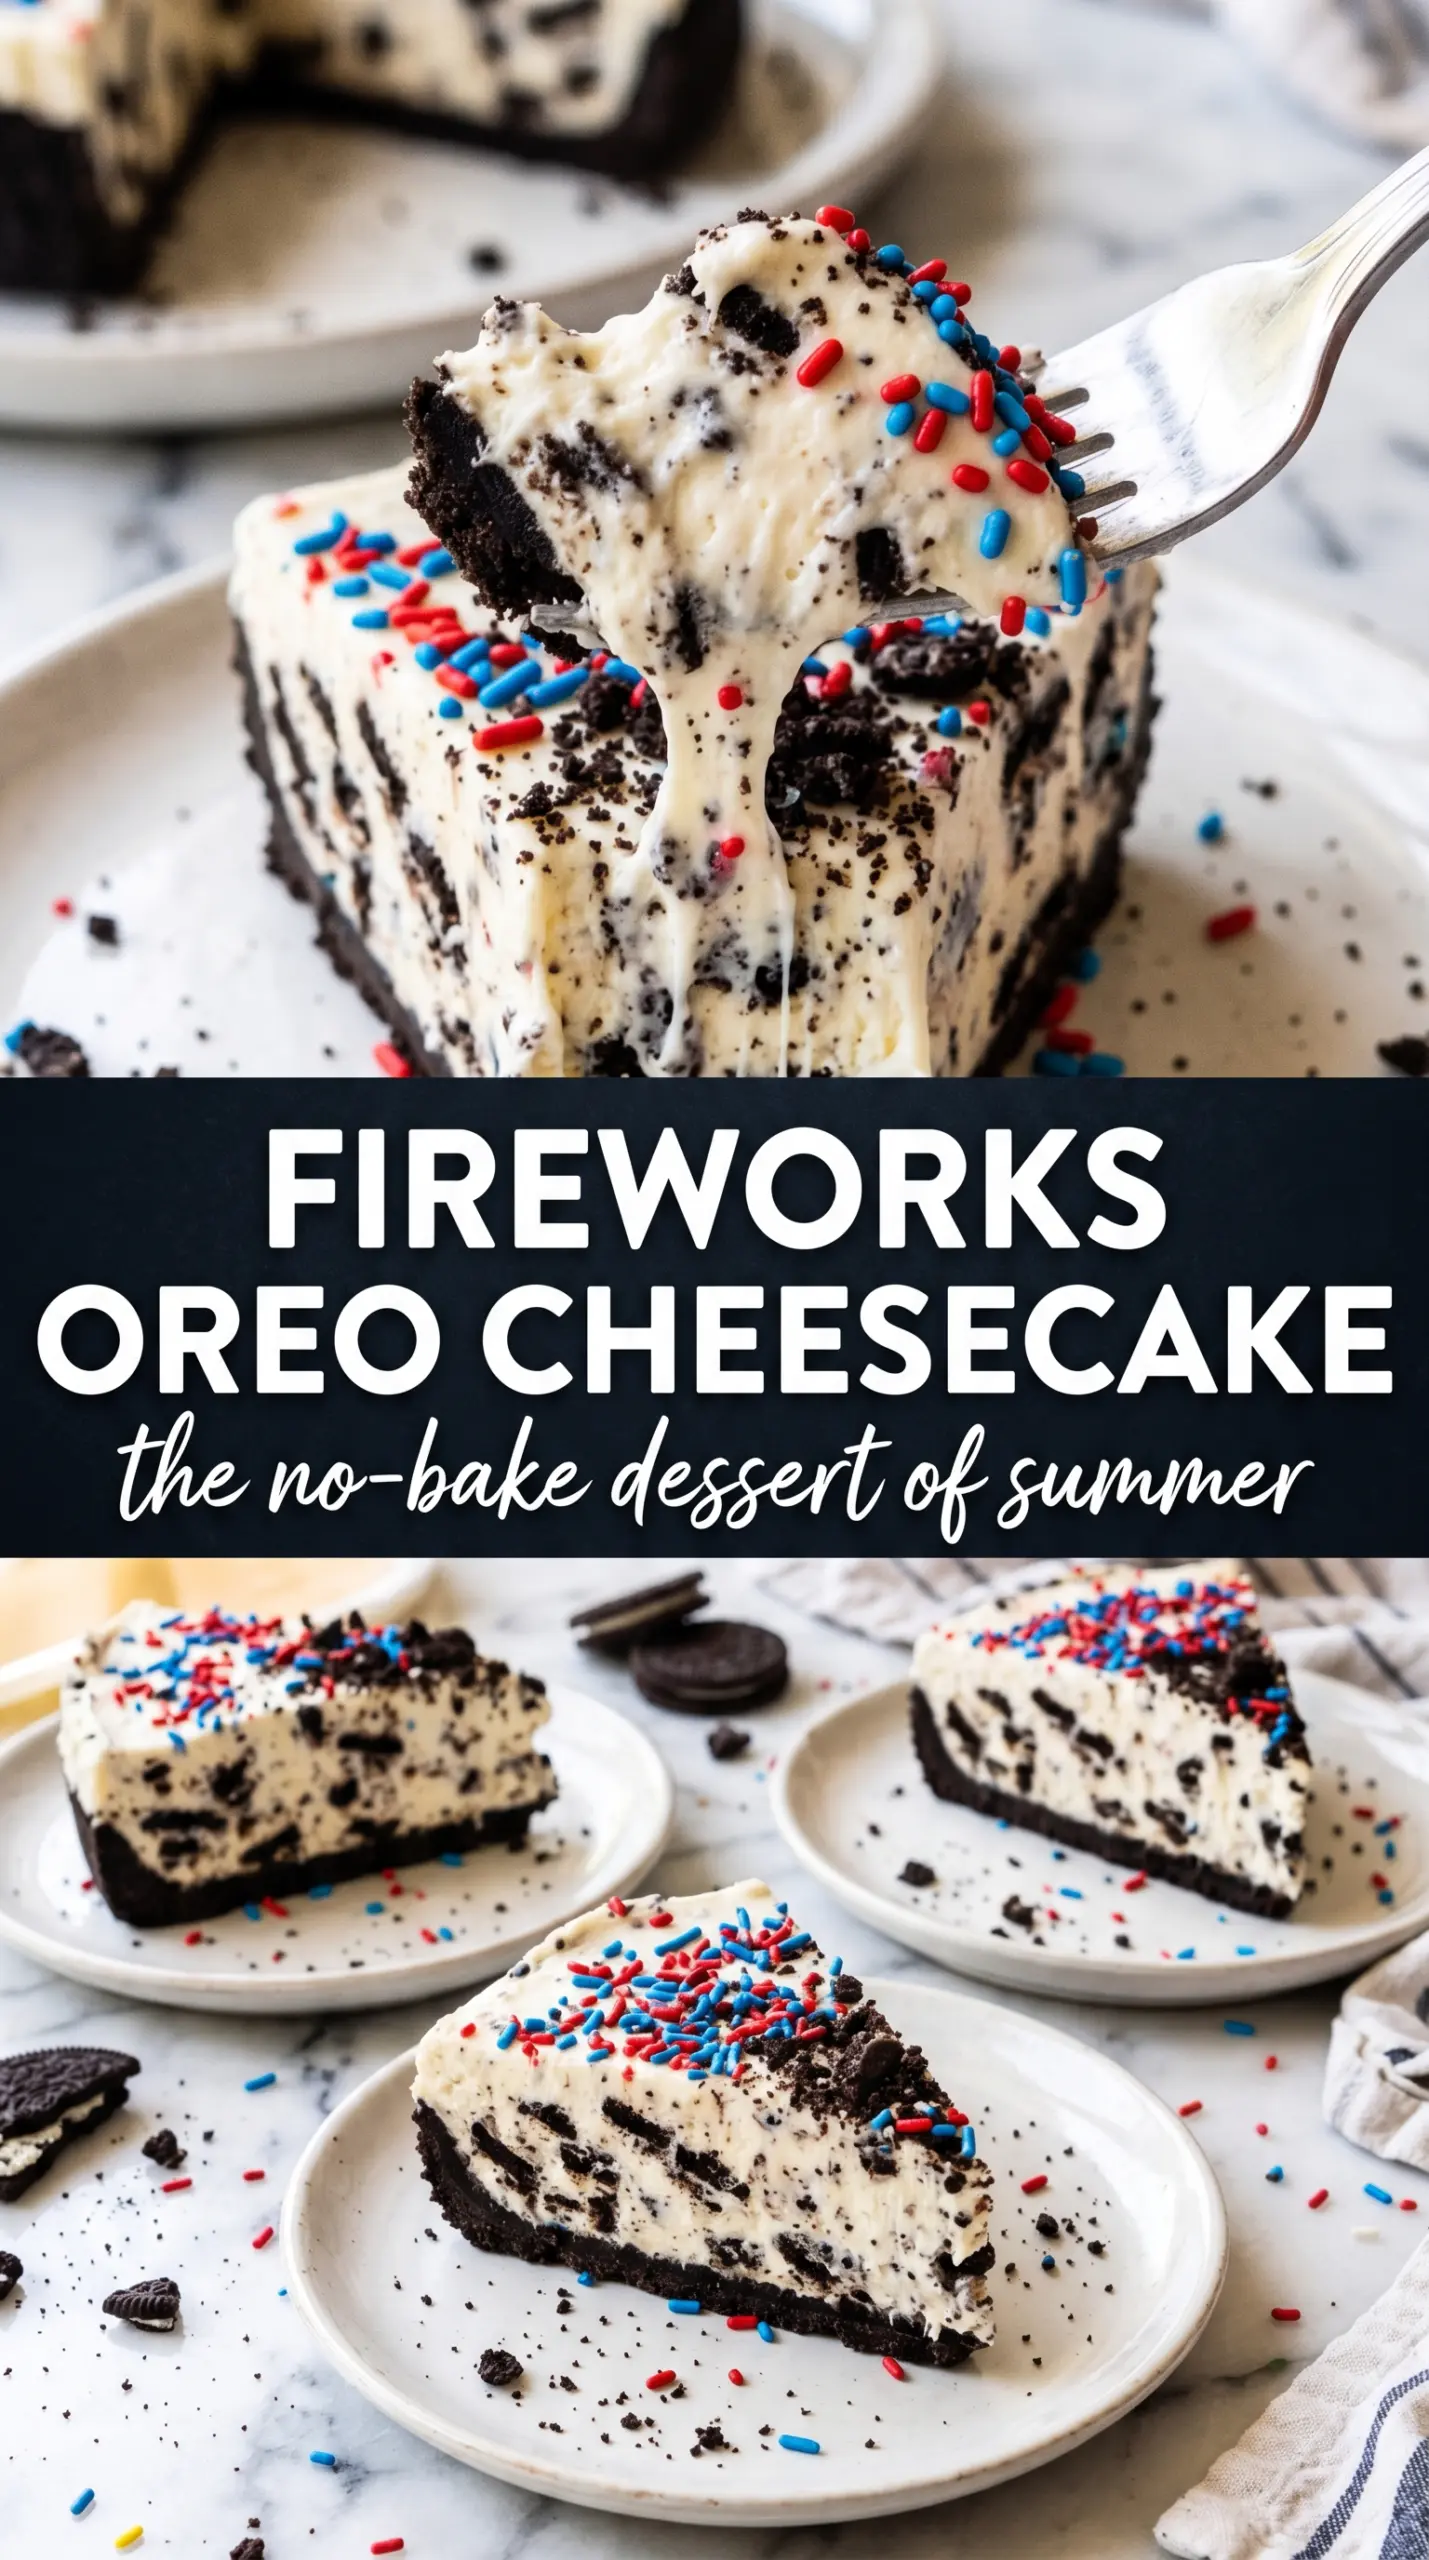
Crushed Oreos, a thick vanilla cheesecake filling, and a chilled set that slices cleanly after a long rest — this is the kind of dessert that disappears fast once it hits the table. The Oreo crust stays firm instead of sandy, and the filling holds its shape without baking, so you get all the payoff of cheesecake without turning on the oven.
The texture comes from two things done right: the cream cheese gets beaten until completely smooth before anything else goes in, and the whipped cream is folded in gently at the end so the filling stays light instead of dense. That combination gives you a cheesecake that tastes rich but still feels airy enough for a warm-weather dessert spread. The decorations are fun, but the real win is the balance between the bitter chocolate crust and the sweet, vanilla-forward filling.
Below you’ll find the little details that matter most — how to press the crust so it holds together, what stiff peaks look like, and the easiest way to get those clean slices when it’s time to serve.
The filling set up beautifully overnight, and the Oreo crust stayed crisp enough to slice cleanly. I loved how the whipped cream and sprinkles made it look like a fireworks burst without being fussy.
This Fireworks Oreo Cheesecake keeps its thick, creamy layers and that crisp chocolate crust — perfect for making ahead before the sprinkles and whipped cream go on.
Why the Oreo Crust Holds Up Instead of Crumbling
The crust in a no-bake cheesecake has one job: stay compact enough to support a soft filling without turning muddy at the first slice. The butter-to-crumb ratio matters here. Too little butter and the base falls apart; too much and it turns greasy and dense. Pressing it firmly into the pan and chilling it before the filling goes in gives the fat time to set, which is what keeps the slices neat.
The other common mistake is using crumbs that are too coarse. Finely crushed Oreos pack together better and make a cleaner bite. If your crust has a few larger bits, it still works, but the finer texture gives you that classic cheesecake base that cuts like it belongs there.
What the Cream Cheese and Whipped Cream Are Really Doing
- Cream cheese — This is the backbone of the filling, so full-fat brick-style cream cheese matters. Tub-style cream cheese can be looser and give you a softer set. Let it soften fully before beating, or you’ll chase lumps forever.
- Powdered sugar — It sweetens the filling without adding graininess. Granulated sugar won’t dissolve the same way here and can leave the cheesecake a little sandy.
- Heavy whipping cream — This is what gives the filling its lifted, mousse-like texture. Whip it to stiff peaks before folding it in; underwhipped cream leaves the cheesecake loose, and overwhipped cream can make the mixture grainy.
- Oreos — Regular Oreos give the crust its structure and that familiar chocolate contrast. You don’t need to remove the filling for the crust, and honestly, that cream helps the crumbs bind.
- Whipped cream for piping — This is for the finish, not the set. Use it after the cheesecake is fully chilled so the decoration stays sharp and doesn’t melt into the top.
Building the Filling Without Losing the Light Texture
Smooth the Cream Cheese First
Beat the softened cream cheese, powdered sugar, and vanilla until the mixture looks completely smooth and glossy. Stop to scrape the bowl a couple of times, especially around the bottom and edges where little lumps like to hide. If the cream cheese starts out cold, the filling stays speckled no matter how long you mix it, so room temperature matters more here than speed.
Whip the Cream to Real Stiff Peaks
In a separate bowl, whip the heavy cream until the peaks stand straight up when you lift the beaters. You want it firm enough to hold shape, but not dry or clumpy. If it looks grainy, you went too far; if it slumps over, it’s not ready and the cheesecake will set softer than you want.
Fold, Don’t Beat
Add the whipped cream to the cream cheese mixture in two additions and fold it in gently with a spatula. The goal is to keep the air in the whipped cream, because that air is what gives this cheesecake its plush, sliceable texture. Stirring or beating at this stage knocks the filling flat and makes it heavier than it should be.
Let the Chill Time Do the Work
Pour the filling over the cold crust, smooth the top, and refrigerate for at least 6 hours. Overnight is even better if you’ve got the time. If you cut it too early, the center will slump and the slices won’t hold their edges, no matter how good it tastes.
Small Swaps That Still Keep the Cheesecake Working
Make it gluten-free with certified gluten-free sandwich cookies
Swap in gluten-free chocolate sandwich cookies for the crust. The texture and flavor stay close to the original, though some brands crumble a little more easily, so press the crust firmly and chill it well before filling.
Make it lighter with a plain whipped topping finish
If you want a softer, less rich topping, use whipped topping for the decoration instead of fresh whipped cream. Don’t use it in the filling unless that’s the texture you want, because fresh whipped cream gives a cleaner cheesecake set and a better flavor.
Turn it into a chocolate cheesecake
Fold a few tablespoons of cocoa powder into the cream cheese mixture if you want a deeper chocolate note. That makes the filling less vanilla-forward and a little firmer, so keep the cocoa modest unless you want to lose some of the classic Oreo contrast.
Storage and Reheating
- Refrigerator: Store covered for up to 4 days. The crust softens a little over time, but the cheesecake stays sliceable and creamy.
- Freezer: This freezes well if you skip the final whipped cream and sprinkles until serving. Freeze slices or the whole cheesecake tightly wrapped, then thaw overnight in the refrigerator.
- Reheating: No reheating needed. Serve it cold straight from the refrigerator, and let it sit 10 to 15 minutes before slicing so the knife moves cleanly through the filling.
Answers to the Questions Worth Asking

No-Bake Fireworks Oreo Cheesecake
Ingredients
Equipment
Method
- Mix the finely crushed Oreo cookies with melted unsalted butter until the texture resembles wet sand, then press firmly into the bottom of a 9-inch springform pan.
- Refrigerate the crust to firm up while you prepare the filling.
- Beat the softened cream cheese, powdered sugar, and vanilla extract until completely smooth with no lumps.
- Whip the heavy whipping cream to stiff peaks in a separate bowl.
- Fold the whipped cream gently into the cream cheese mixture in two additions until no white streaks remain.
- Pour the filling over the chilled crust and smooth the top with an offset spatula.
- Cover and refrigerate for at least 6 hours (or overnight) until fully set.
- Before serving, pipe whipped cream around the edge in a starburst pattern.
- Scatter red and blue star sprinkles across the center in a fireworks-burst look and dust with crushed Oreos to finish the pattern.