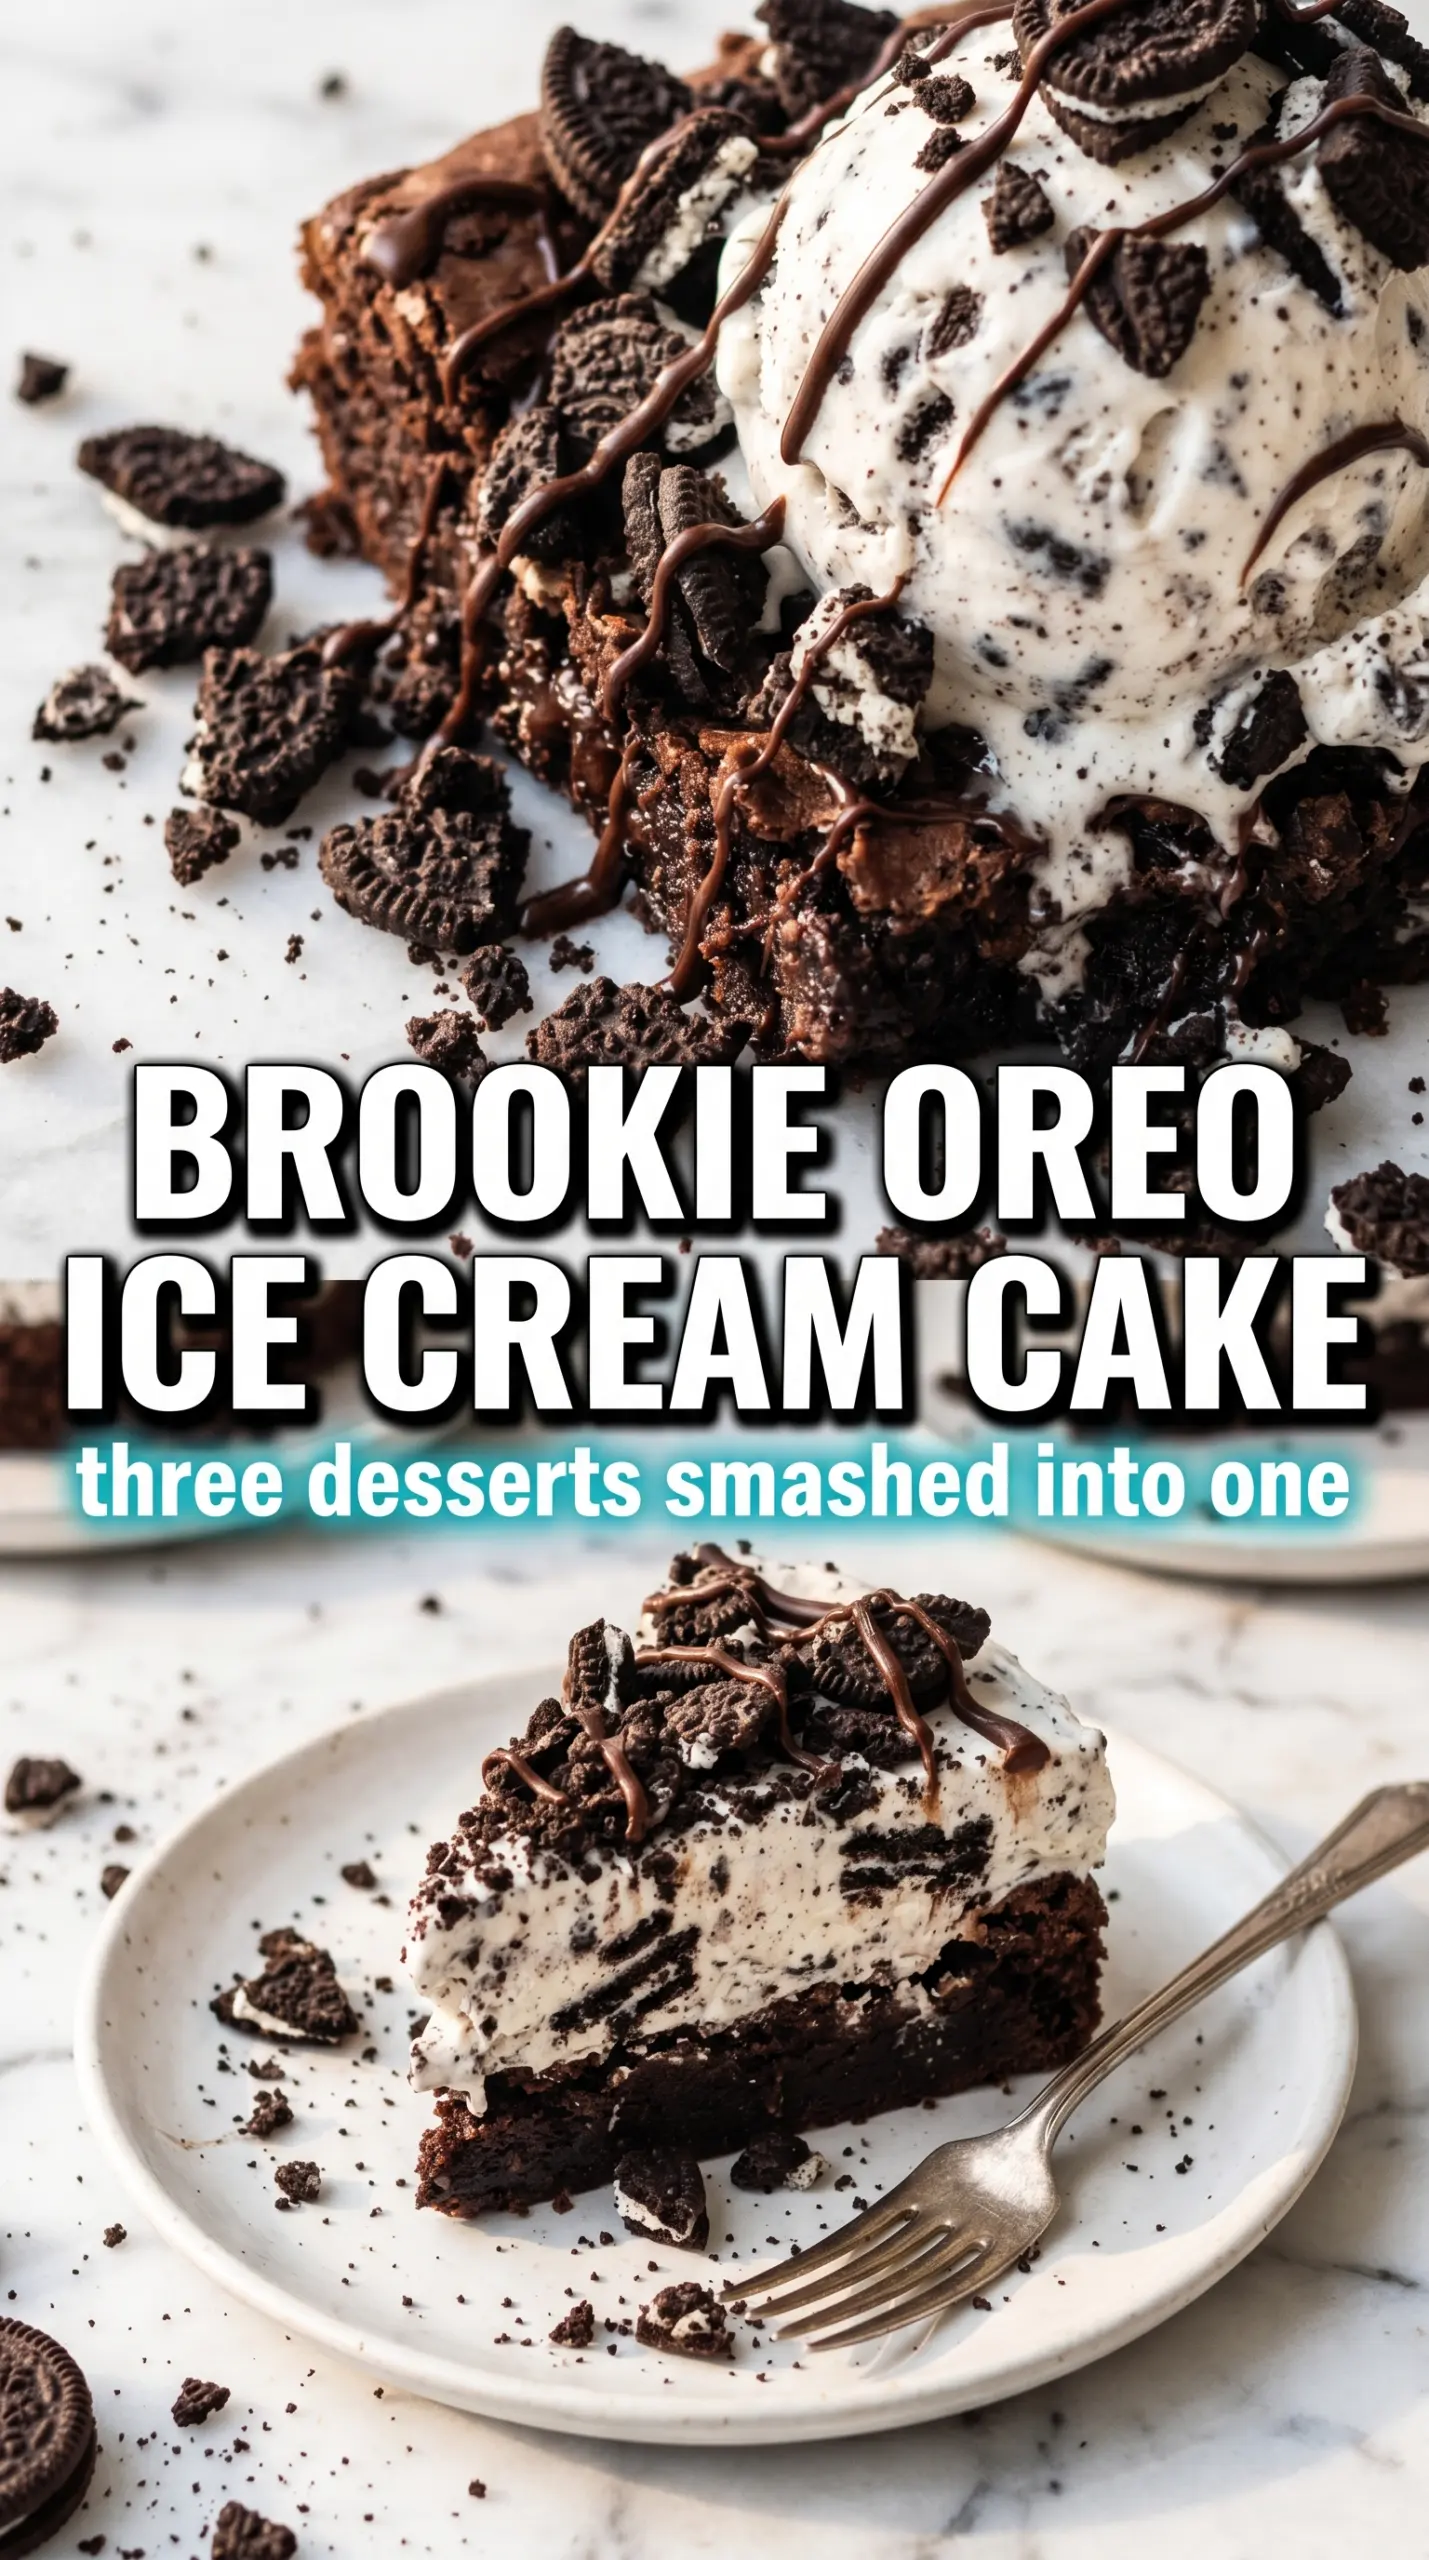
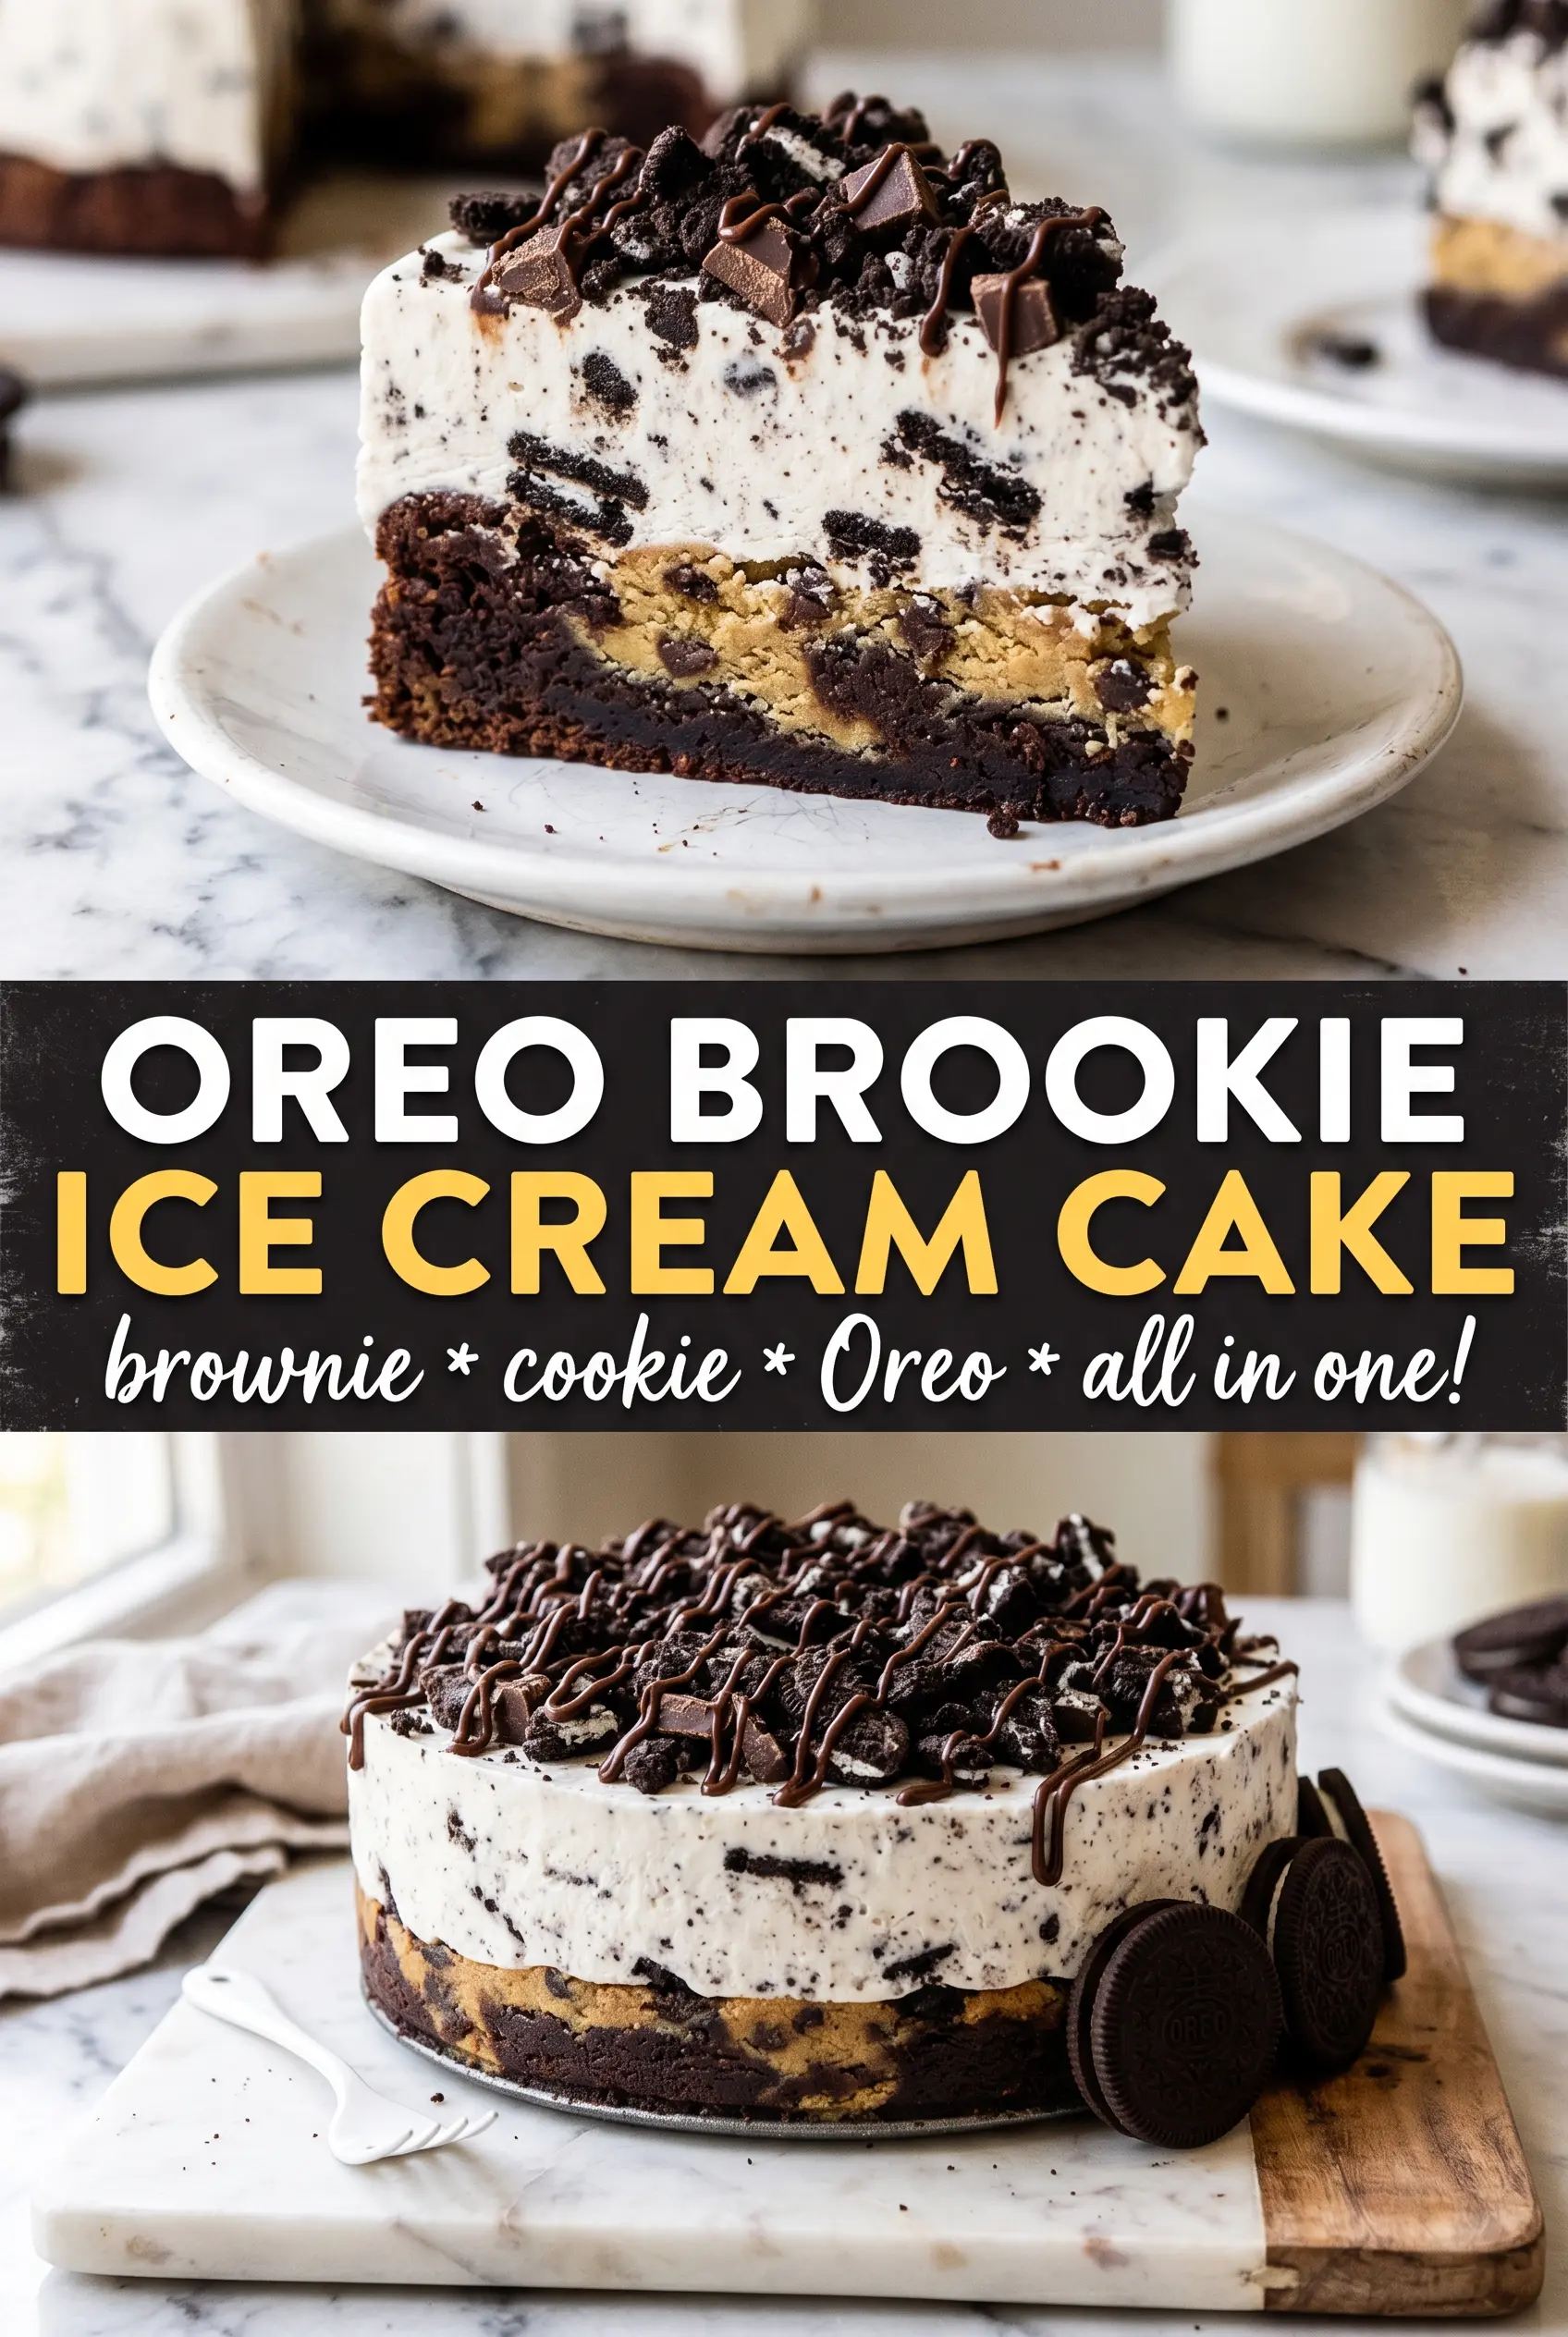
Oreo brookie ice cream cake is the kind of dessert that disappears slice by slice because every layer does something different. You get a fudgy brownie side, a chewy chocolate chip cookie side, cold cookies-and-cream ice cream in the middle, then a glossy chocolate ganache finish and an Oreo crown on top. The contrast is the whole point: soft, creamy, chewy, and crisp all in one chilled slice.
What makes this version work is the base. Baking the brownie batter and cookie dough together in the same springform pan gives you a sturdy foundation that still tastes like two separate desserts. Once that layer is fully cooled, the softened ice cream spreads without dragging crumbs through it, and the ganache sets into a clean, sliceable shell instead of soaking in. The freezer time matters here. Rushing it is how you end up with slumping layers and a messy cut.
Below, I’m walking through the little details that keep the layers neat, the ganache smooth, and the cake easy to slice straight from the freezer. If you’ve ever had an ice cream cake crack, lean, or melt faster than you could serve it, this one gives you a better way.
The brookie base baked up perfectly even, and the ice cream layer spread without melting into the cookie side. I let it freeze overnight and the slices came out clean with the ganache staying glossy.
Love the brownie-cookie layers and Oreo ice cream center? Save this brookie ice cream cake for birthdays and make-ahead dessert nights.
The Brookie Base Needs to Be Fully Cool Before the Ice Cream Goes On
The biggest mistake with a frozen cake like this is layering ice cream over a base that still has warmth trapped in the middle. Even if the surface feels cool, residual heat turns the ice cream soft fast, and that’s when the top starts sliding into the brownie side. Bake the brownie batter and cookie dough until the center is set, then let the pan cool all the way before you build anything on it.
Because the brookie base is made from two different doughs, it can look done unevenly if you’re not paying attention. The brownie side should look matte and no longer shiny in the center, while the cookie side should be golden at the edges and set through the middle. If one side finishes a little sooner, that’s normal. The important thing is that the whole base is firm enough to support a thick layer of ice cream without sinking.
- Brownie batter — This gives you the fudgy side of the brookie. Use a batter that bakes into a dense, sliceable layer rather than a cakey one, or the finished cake will crumble when you cut it.
- Chocolate chip cookie dough — The cookie side adds chew and a little structure. A standard dough works fine here, but don’t use one that spreads too thin, or it won’t stand up next to the brownie layer.
- Springform pan — This matters more than it looks like it does. The removable sides let you build the cake cleanly and release it without tearing the ice cream edges when it’s frozen solid.
- Cookies and cream ice cream — Softer ice cream spreads into a smoother layer. Let it sit just until it’s pliable, not melted, or you’ll lose the clean line between the brookie base and the ice cream.
What Each Ingredient Is Actually Doing in This Ice Cream Cake
- Base layer (cookies, cake, or graham cracker) — This provides structure and stability. Crushed and mixed with butter creates a firm foundation.
- Ice cream (the main star) — Use quality ice cream or make homemade. Softness matters for layering.
- Sauce or topping between layers (fudge, caramel, or fruit) — This adds moisture, flavor, and prevents dryness. Don’t skip this layer.
- Frosting or whipped cream (optional outer layer) — This prevents freezer burn and adds creaminess. Stabilized whipped cream works best.
- Freezing time (at least 4-6 hours) — This sets the layers so cake slices cleanly. Longer freezing prevents melting during serving.
- Room temperature before serving (5-10 minutes) — This softens the cake slightly for better texture. Serve immediately after thawing.
- Toppings (chocolate, nuts, cookies, or sprinkles) — These add visual appeal and texture. Add right before serving.
- Storage (in freezer at 0°F or below) — This prevents ice crystal formation and maintains quality. Cover with plastic wrap.
Building the Layers Without Letting the Cake Slip
Mixing the Pan Half-and-Half
Line the springform pan and spread the brownie batter on one side, then the chocolate chip cookie dough on the other. Use the back of a spoon or an offset spatula to keep the split clean, but don’t stress over a perfect line — once it bakes, the two sides settle into their own distinct layers. The key is keeping both batters at the same thickness so one side doesn’t dry out before the other sets.
Baking the Brookie Base
Bake at 350°F until the center is set and the top no longer looks wet. If the brownie side still jiggles in the middle, give it more time, because soft centers collapse later under the weight of the ice cream. Cool the pan completely before removing the sides, and don’t try to speed that up in the freezer while the cake is still warm or you’ll trap steam underneath the base.
Spreading the Ice Cream Layer
Work with softened ice cream that can be spread, not poured. Dollop it over the cooled brookie base, then smooth it into an even layer with a spatula, pressing gently into the corners so there are no air pockets. If the ice cream starts to melt around the edges, pause and freeze the pan for 10 to 15 minutes before finishing the top.
Finishing With Ganache and Oreo Toppings
Pour the chocolate ganache over the frozen ice cream and tilt the pan so it coats the surface in one even layer. The ice cream needs to be firm here so the ganache sets on top instead of mixing in. After the ganache has frozen, pipe whipped cream around the edge and press Oreo halves into each rosette while the top is still cold enough to hold them in place.
Make It Gluten-Free With the Right Dough Swap
Use a gluten-free brownie batter and a gluten-free chocolate chip cookie dough with a texture that bakes thick, not cakey. The finished cake still has the same layered effect, but the cookie side needs enough body to slice cleanly after freezing. Thin, spready gluten-free doughs won’t hold up as well here.
Dairy-Free and Still Creamy
Choose a dairy-free cookies-and-cream style frozen dessert that softens similarly to ice cream, then use dairy-free whipped topping and a dairy-free ganache made with coconut cream or a plant-based cream substitute. The flavor stays rich, but the texture can freeze a touch firmer, so let the cake sit at room temperature for a few extra minutes before slicing.
What to Do If You Need a Taller Birthday Cake
Double the whipped cream topping and add a second, thinner layer of ganache if you want more height and a more dramatic finish. Keep the ice cream layer no thicker than the pan can support, or the cake gets harder to slice neatly. A taller top is fine; a thicker frozen center gets unstable fast.
Storage and Reheating
- Refrigerator: Not a good storage method for this cake. It needs the freezer to hold the layers and keep the ice cream firm.
- Freezer: Store tightly wrapped for up to 1 week for the best texture. After that, the ice cream can pick up freezer flavor and the brownie-cookie base gets drier at the edges.
- Reheating: Don’t reheat it. For clean slices, let the cake sit at room temperature for 10 to 15 minutes before cutting, then use a hot knife wiped dry between cuts.
Questions I Get Asked About This Recipe
Oreo Brookie Ice Cream Cake
Ingredients
Equipment
Method
- Heat oven to 350F and line a 9-inch springform with parchment so the brownie-cookie halves bake cleanly.
- Spread brownie batter on one half of the lined springform and spread chocolate chip cookie dough on the other half.
- Bake at 350F for 30-35 minutes, until the surface looks set and the center holds its shape when gently pressed.
- Cool completely, then reattach the springform sides to keep the base intact for layering.
- Spread the softened cookies-and-cream ice cream over the cooled brookie base and smooth the top into an even layer.
- Freeze for 4 hours so the ice cream firms up before adding ganache.
- Pour the chocolate ganache over the top and tilt the pan to help it coat evenly.
- Freeze for 1 hour until the ganache sets to a glossy, sliceable top.
- Pipe whipped cream rosettes around the edge and press each Oreo half into a rosette.
- Freeze for 2 hours before serving so the cake slices cleanly.