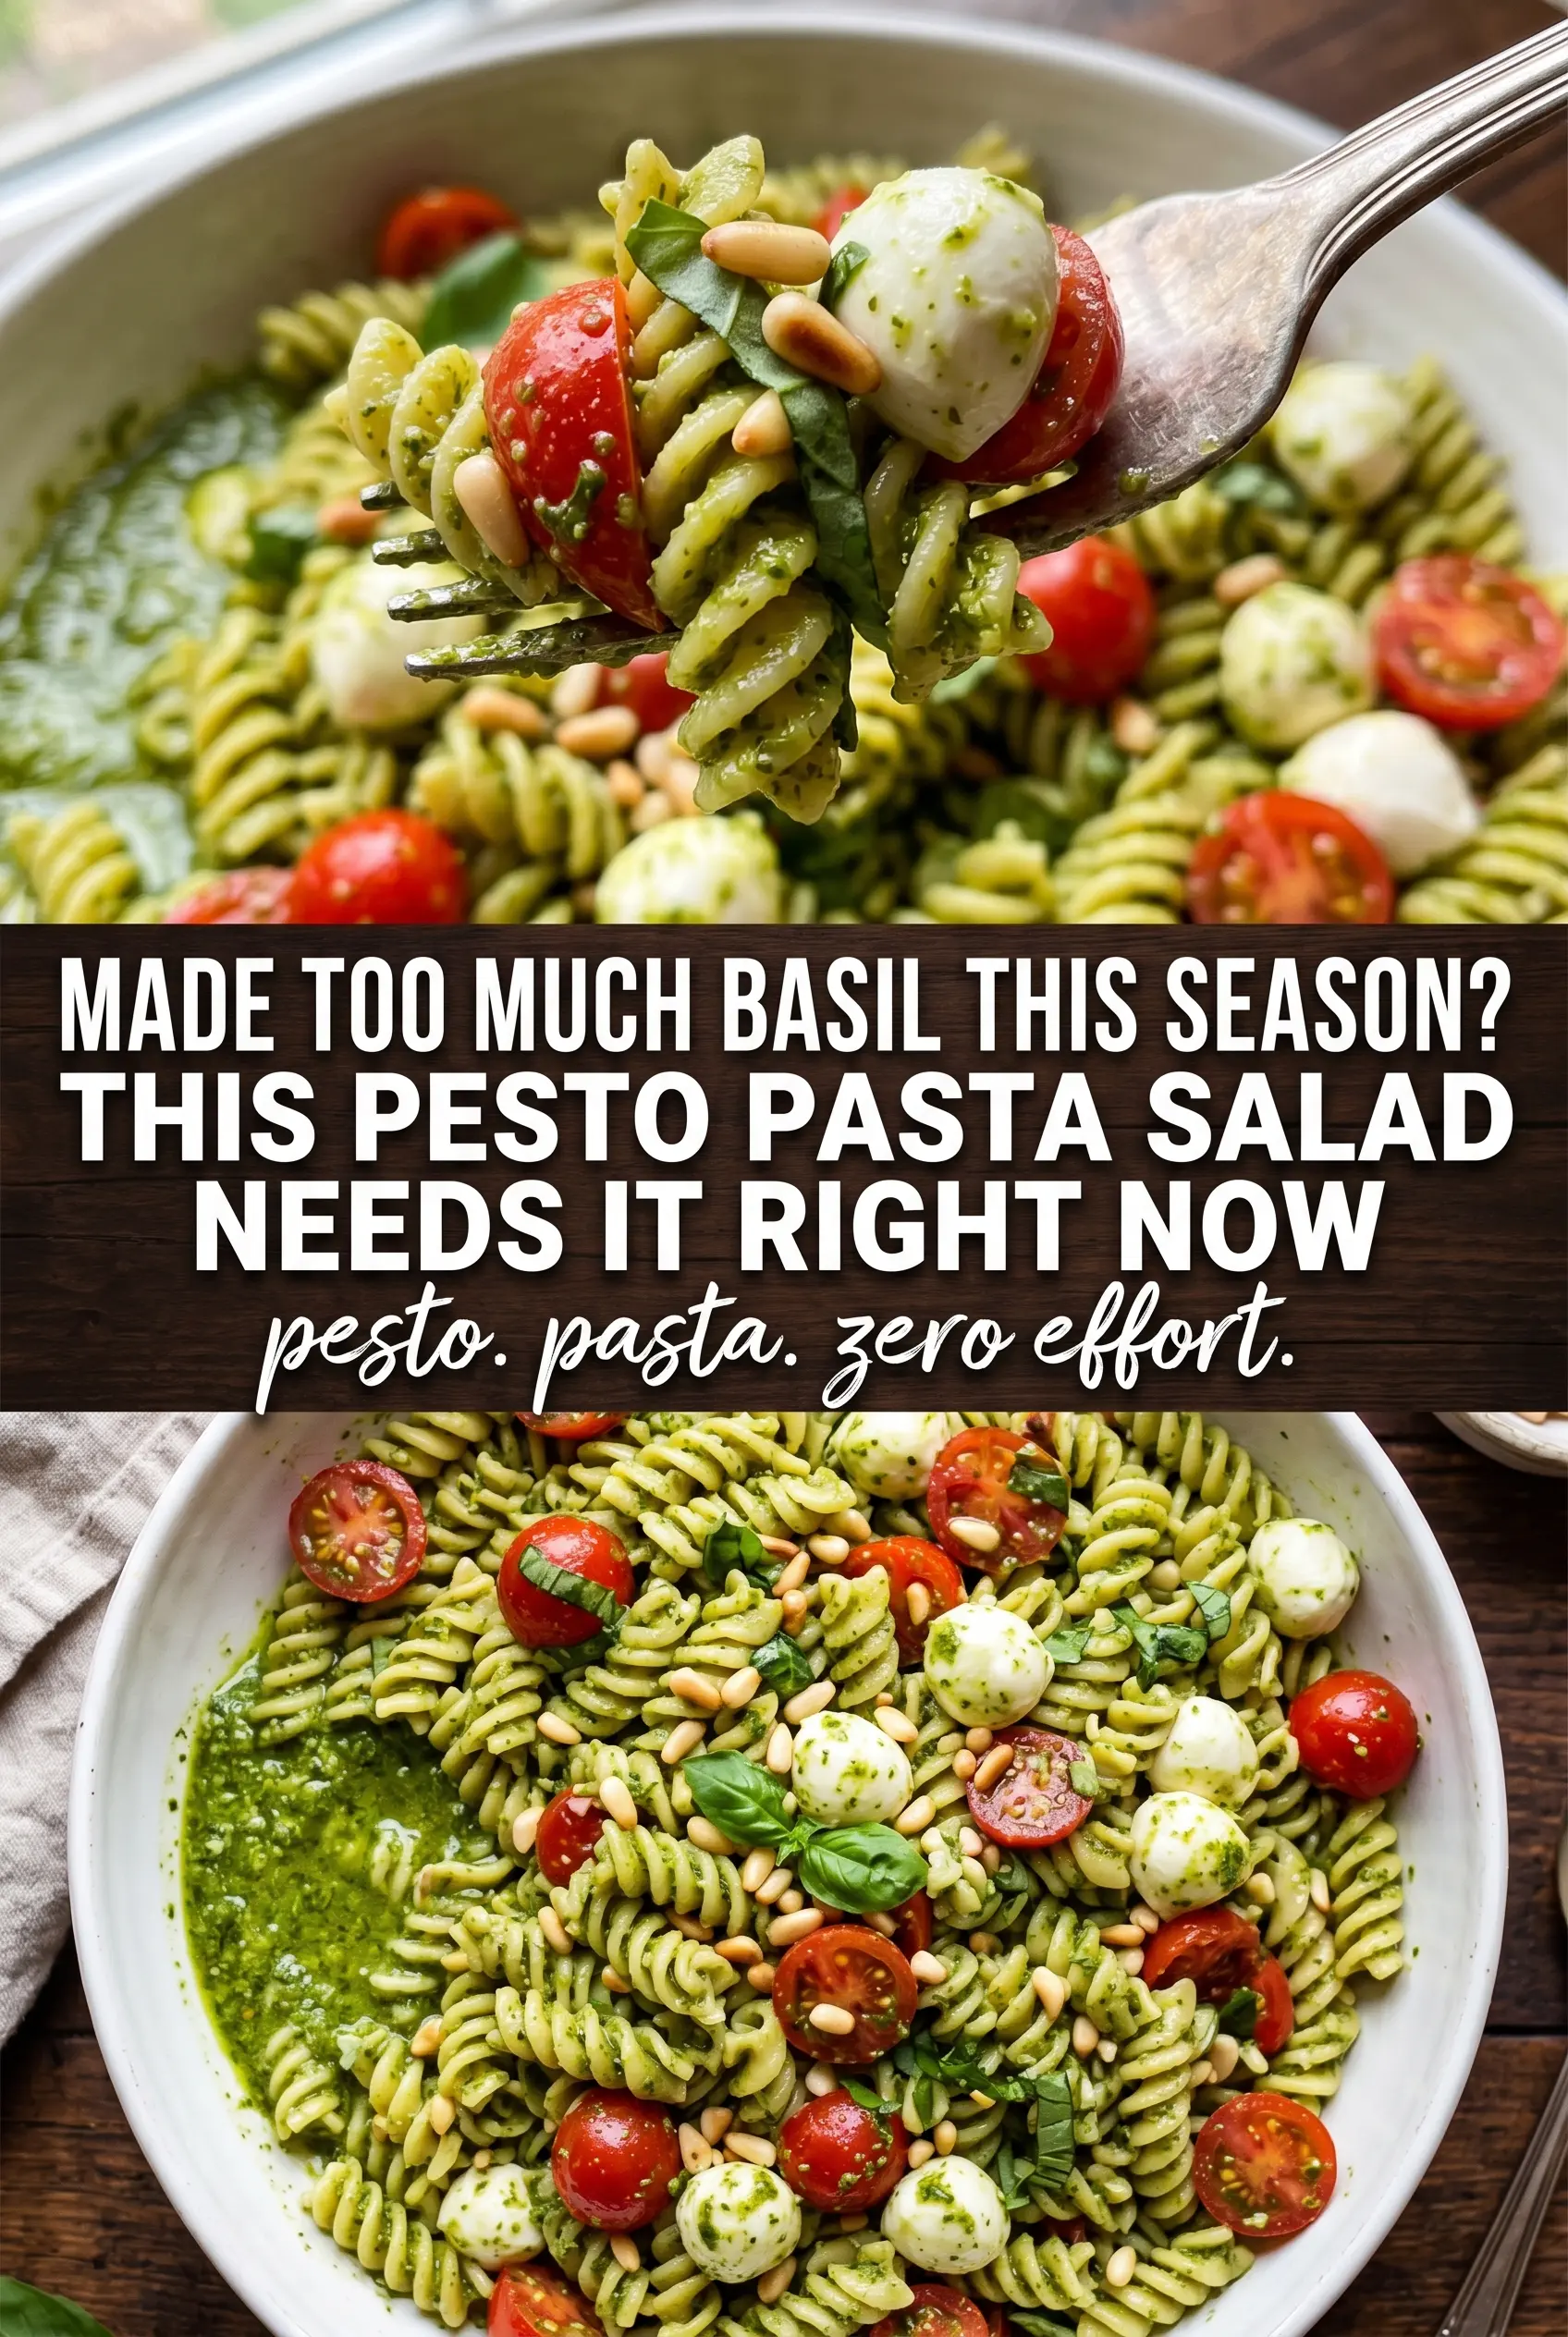
Pesto pasta salad lands in that sweet spot between bright and filling, with coated noodles, juicy tomatoes, and cool mozzarella in every forkful. The pesto clings to the pasta instead of sliding off, and after a short chill the whole bowl tastes more integrated, like the basil, garlic, cheese, and lemon were meant to be there together.
The trick is tossing the pasta with pesto while it’s still warm. That helps the sauce spread evenly before the noodles cool down, and it keeps the salad from tasting like plain pasta with dressing dumped on top. A quick rinse after boiling stops the cooking and keeps the texture clean, while the lemon juice wakes everything up so the salad doesn’t taste flat once it’s chilled.
Below, you’ll find the little details that matter most: how to keep the pesto from getting heavy, which pasta shapes hold up best, and what to change if you need a dairy-free version or want to make it ahead for a cookout.
I tossed the pesto with the pasta while it was still a little warm, and it coated every piece instead of clumping. After an hour in the fridge, the tomatoes were juicy and the mozzarella stayed creamy. My husband took the leftovers for lunch the next day.
Love the fresh basil and mozzarella in this pesto pasta salad? Save it to Pinterest for an easy make-ahead side that tastes even better after chilling.
The Small Trick That Keeps Pesto Pasta Salad Fresh Instead of Heavy
Most pesto pasta salads go wrong in one of two ways: the pesto turns oily and slick, or the whole bowl tastes muted after chilling. The fix is to coat the pasta while it’s still warm, then cool it down after the pesto has had a chance to cling. Warm pasta loosens the sauce just enough to spread it evenly, and once it chills, the flavor settles into every bite instead of sitting on the surface.
The other thing that matters is balance. Pesto brings fat and salt, mozzarella adds creaminess, and Parmesan deepens the savory note, but without lemon juice and juicy tomatoes, the salad can taste dense. That little bit of acid keeps the bowl lively, which is what makes this work as a side dish instead of just a pasta dish that happens to be cold.
What Each Ingredient Is Actually Doing in This Bowl
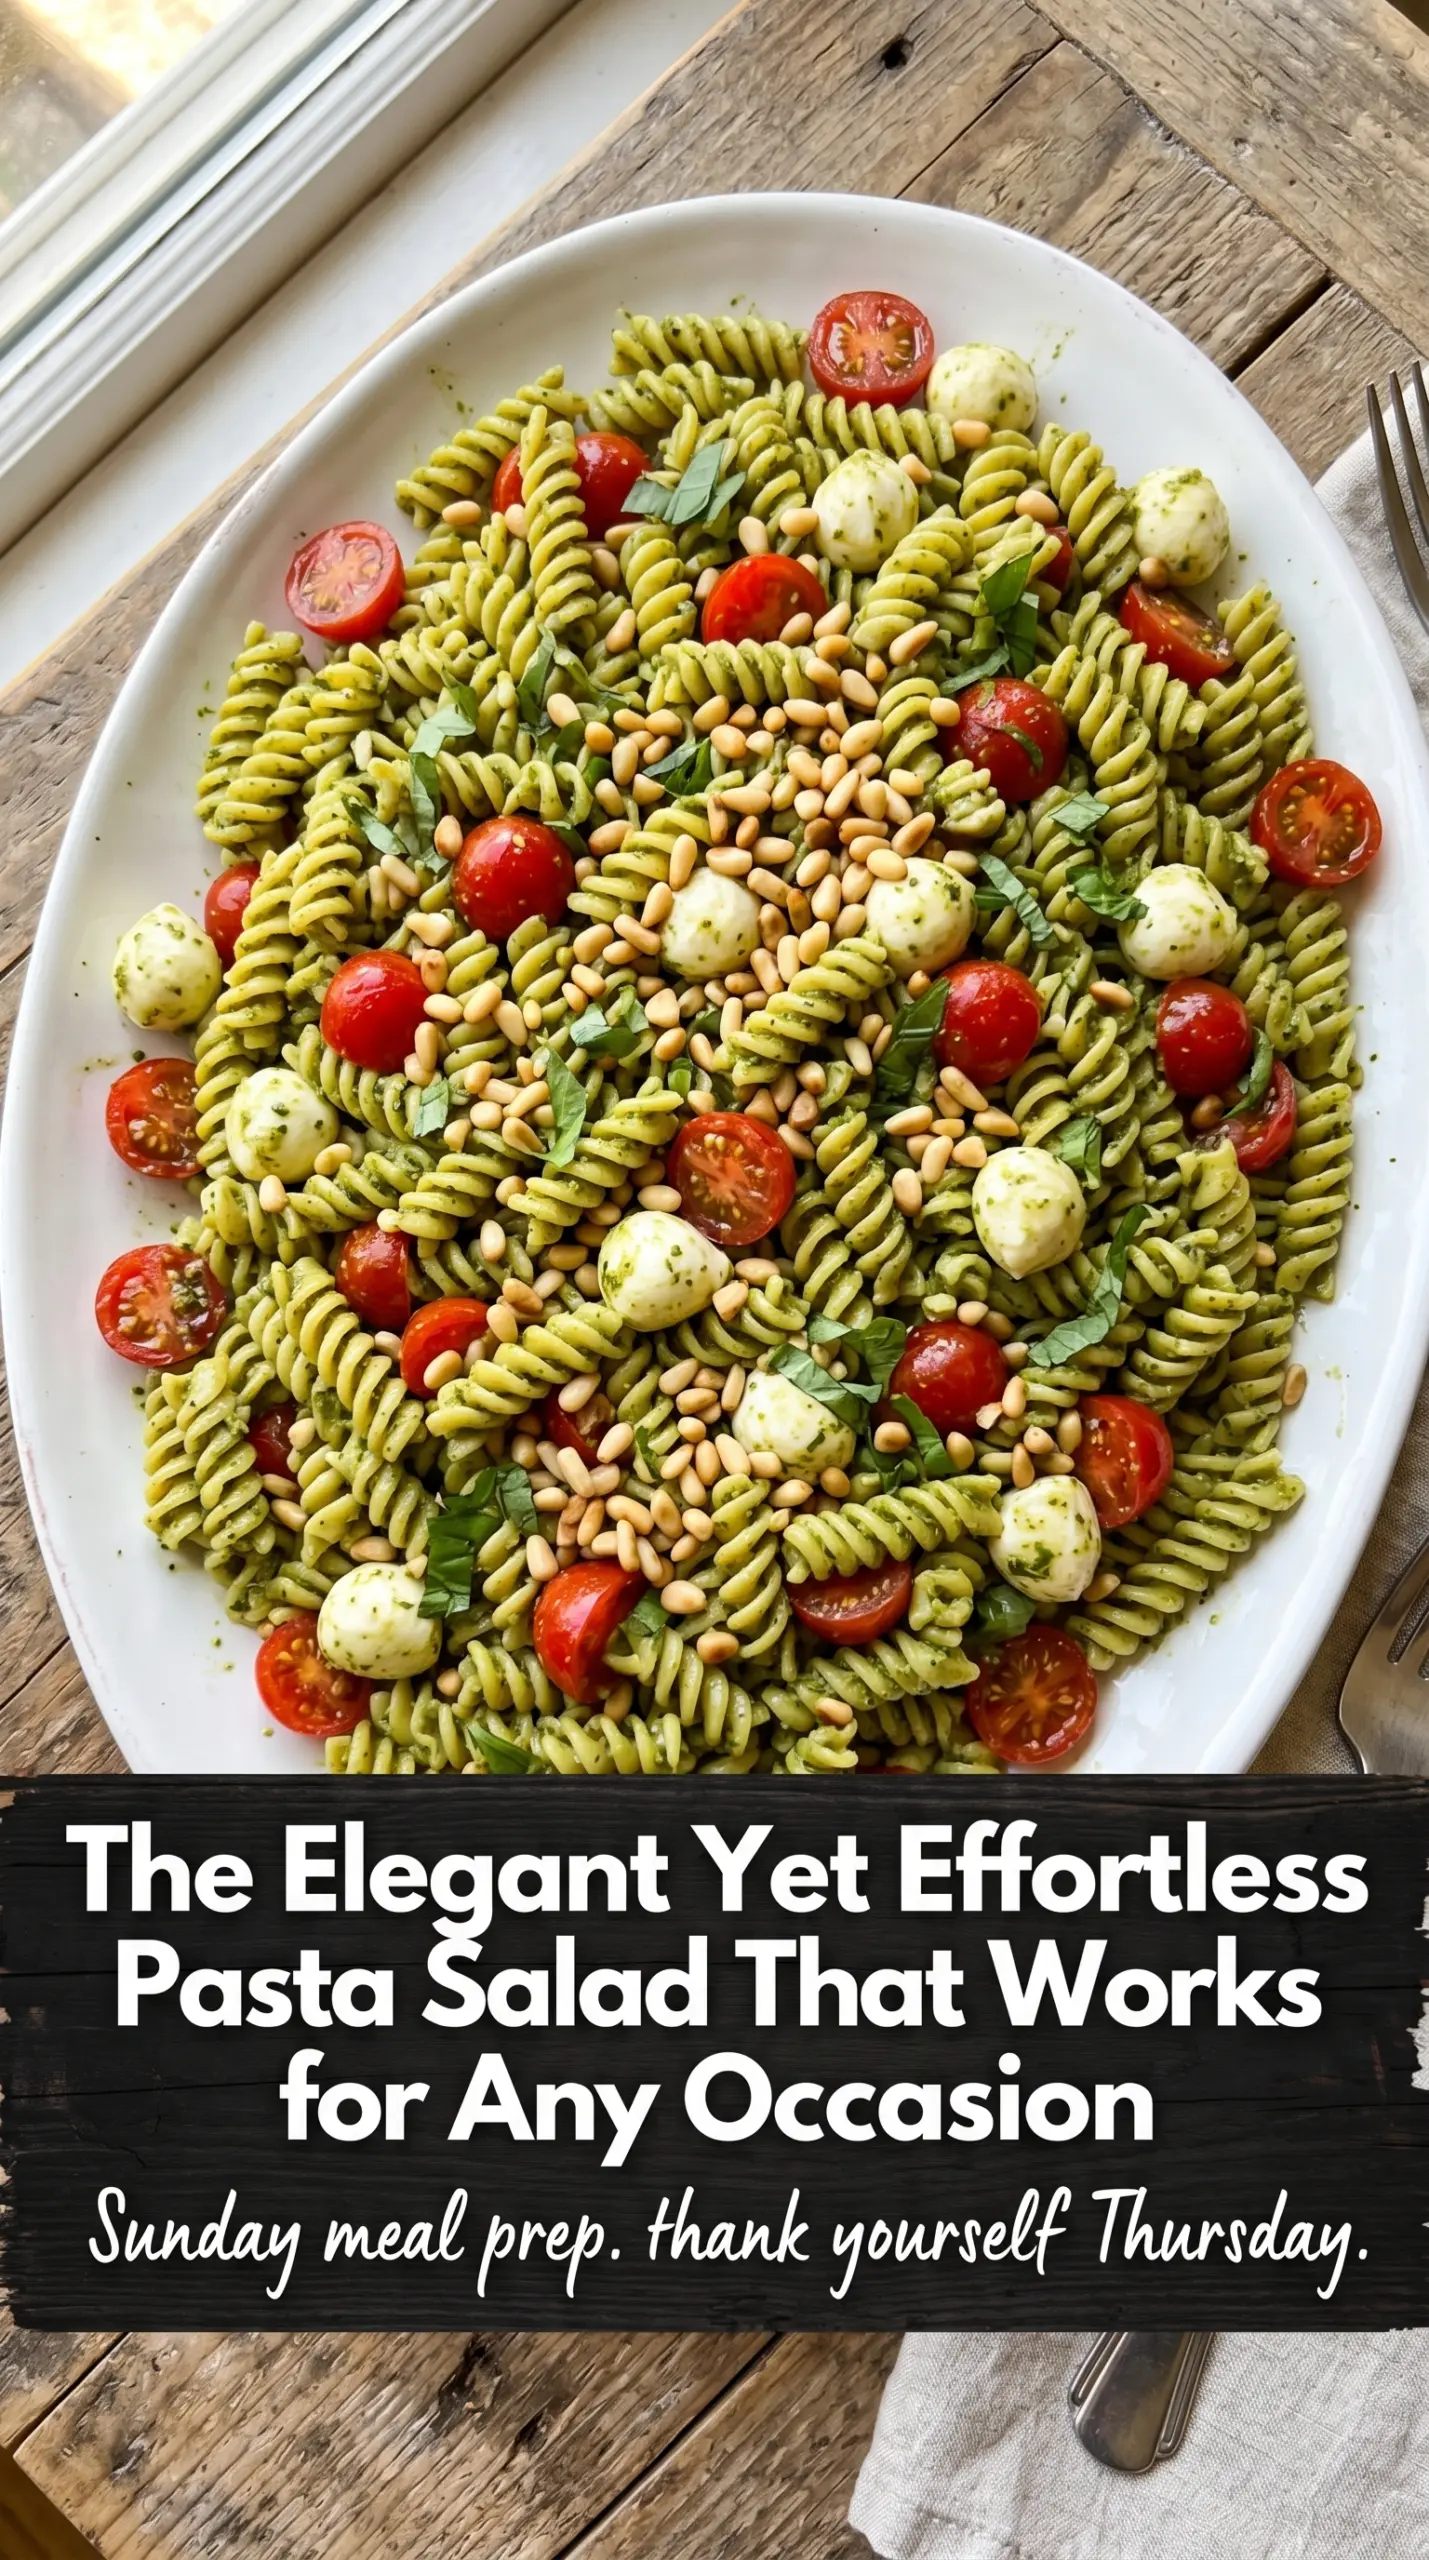
- Fusilli or penne — Either shape holds pesto well, but fusilli gives you more ridges and curls for catching sauce. Long, slippery pasta won’t hold the salad together as neatly, especially after chilling.
- Basil pesto — This is the backbone of the whole dish, so use a pesto you actually like eating on its own. Store-bought works fine here, but if it’s very thick, loosen it with a splash of olive oil or a spoonful of pasta water before tossing.
- Cherry tomatoes — These bring the juicy pop that keeps each bite from feeling heavy. Halve them so their juices release into the bowl, but don’t use watery slicing tomatoes unless you want the salad to turn soupy.
- Fresh mozzarella pearls — Their soft texture gives you creamy contrast without needing any extra prep. If you use a block of mozzarella instead, cut it into small pieces so it distributes evenly instead of clumping.
- Toasted pine nuts — Toasting changes them from mild and soft to fragrant and crisp, which adds a lot for very little effort. If pine nuts are expensive or hard to find, toasted slivered almonds are the closest swap in texture.
- Lemon juice — This is the ingredient that keeps the pesto from tasting flat after it chills. Fresh lemon is worth using here because bottled juice can taste dull in a salad this simple.
Building the Salad So the Pesto Stays Coating, Not Clumpy
Cook the Pasta Past the Point of Firmness
Boil the pasta in well-salted water until it’s just tender, then drain it and rinse it under cold water right away. You want the noodles cooled and the cooking stopped before they go into the bowl. If the pasta is still steaming hot when the pesto goes on, the sauce can turn greasy instead of glossy.
Dress the Pasta While It’s Still Warm
Toss the drained pasta with pesto in a large bowl before adding anything else. The heat from the noodles helps the pesto spread into an even coating, and that first toss does most of the work for you. If the pasta is completely cold, the pesto tends to sit in little green patches instead of coating every piece.
Add the Fresh Ingredients Gently
Fold in the tomatoes, mozzarella, pine nuts, Parmesan, and lemon juice after the pasta is coated. Use a light hand so the mozzarella stays intact and the tomatoes don’t get crushed. The bowl should look glossy and evenly dressed, not wet or mashed, and a final pinch of salt and pepper right at the end sharpens everything.
Let the Chill Time Do Its Job
Refrigerate the salad for at least an hour before serving. That resting time matters because the pasta absorbs some of the pesto and the flavors settle together. If it tastes a little too tight after chilling, a small drizzle of olive oil or another squeeze of lemon brings it right back.
Three Ways to Adapt This Pesto Pasta Salad Without Losing What Makes It Work
Dairy-Free Version
Use a dairy-free pesto and skip the Parmesan and mozzarella, or replace them with a plant-based Parmesan and a firm vegan cheese cut into small cubes. You’ll lose a little creaminess, so add an extra spoonful of olive oil and a touch more lemon to keep the salad balanced.
Gluten-Free Swap
Use your favorite gluten-free short pasta and cook it just until tender, because GF pasta can get soft fast once it’s chilled. Rinse it well and toss it with the pesto while it’s still warm so it doesn’t stick together in the fridge.
Make It Heartier for a Main Dish
Add diced grilled chicken, chickpeas, or salami if you want this to eat like lunch instead of a side. The pesto still carries the dish, but you’ll need a little extra lemon and perhaps another spoonful of pesto to keep the bigger batch from tasting stretched.
Storage and Reheating
- Refrigerator: Store covered for up to 3 days. The pasta will absorb more pesto as it sits, so expect the salad to look a little drier by day two.
- Freezer: I don’t recommend freezing this one. The tomatoes, mozzarella, and pesto all change texture after thawing, and the salad turns soft instead of fresh.
- Reheating: This salad is meant to be served cold or cool. If it tightens up in the fridge, let it sit at room temperature for 15 to 20 minutes and stir in a small splash of olive oil or lemon juice rather than heating it.
Answers to the Questions Worth Asking
Pesto Pasta Salad
Ingredients
Equipment
Method
- Cook the fusilli or penne pasta according to package directions until tender, then drain and rinse with cold water to stop the cooking and keep it firm.
- Spread the pine nuts on a sheet pan and toast until fragrant and lightly golden, about 3 to 5 minutes for a deeper nut flavor.
- In a large bowl, toss the warm pasta with basil pesto until every piece is evenly coated and glossy.
- Add the cherry tomatoes, mozzarella pearls, toasted pine nuts, and Parmesan, and stir gently so the cheese stays intact and the tomatoes don’t break.
- Drizzle in the lemon juice and season with salt and pepper to taste, tossing lightly again to distribute the bright citrus flavor.
- Refrigerate the pesto pasta salad for at least 1 hour so the flavors meld and the pesto thickens to cling to the pasta.
- Just before serving, garnish with fresh basil leaves for a vivid green finish and a fresh herb aroma.