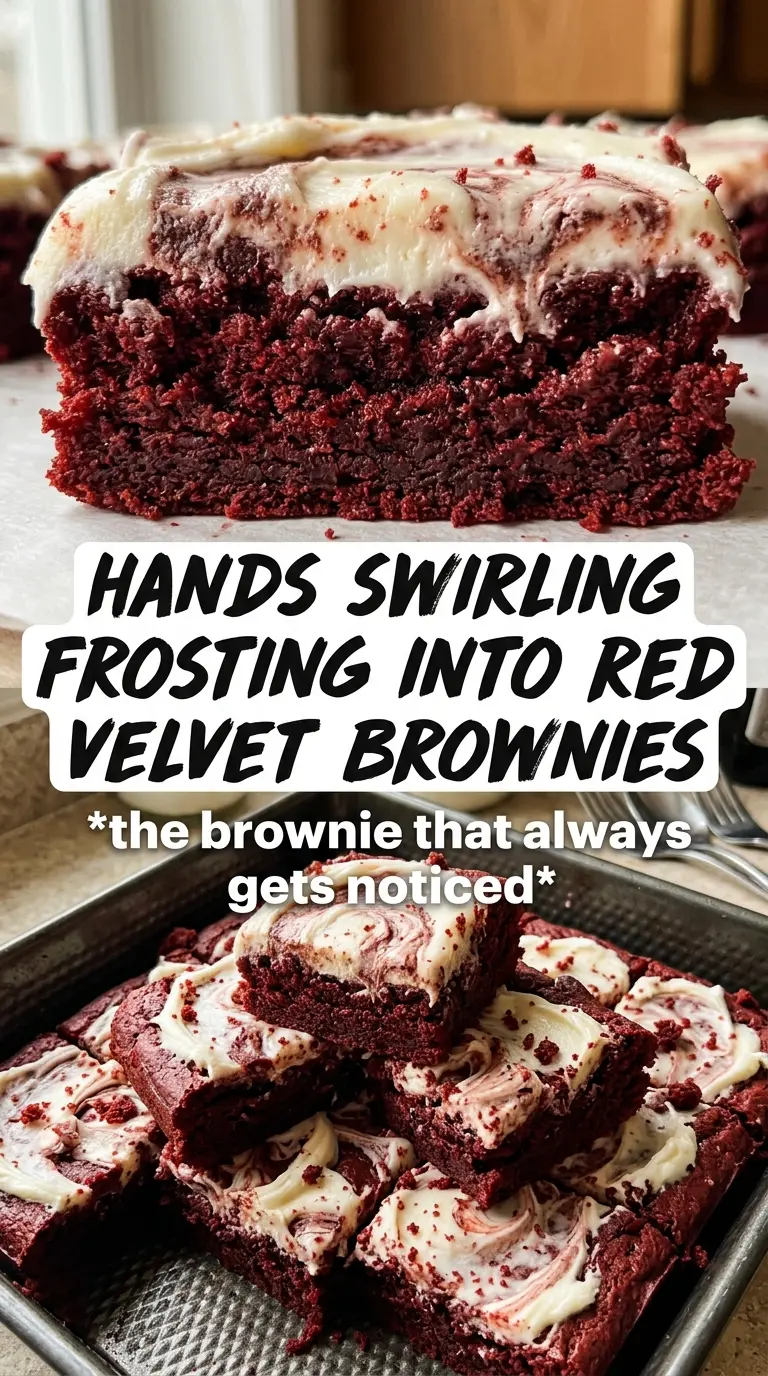
Fudgy red velvet brownies with a cream cheese swirl hit that sweet spot between a rich brownie and a slice of red velvet cake. The edges bake up set and a little chewy, the center stays soft and dense, and the tangy swirl runs through every square instead of sitting on top like an afterthought.
What makes this version work is the balance. Melted butter gives the batter a glossy, dense base, while a small amount of vinegar sharpens the cocoa and keeps the flavor tasting like red velvet instead of plain chocolate bars with dye. The cream cheese mixture needs to be smooth before it goes on, and the batter should be swirled lightly, not stirred through, so you get those dramatic marbled streaks in the finished pan.
Below you’ll find the little details that matter most: how to keep the brownies fudgy, how to swirl the top without overmixing it, and how to cut clean squares once they’ve cooled.
The brownies came out fudgy in the middle with that perfect crackly edge, and the cream cheese swirl stayed distinct instead of disappearing into the batter. I chilled them overnight and they sliced into clean, bakery-style squares.
Save these red velvet brownies for when you want fudgy bars, a tangy cream cheese swirl, and clean-cut squares from a 9×13 pan.
The Swirl Needs to Sit on Top, Not Disappear Into the Batter
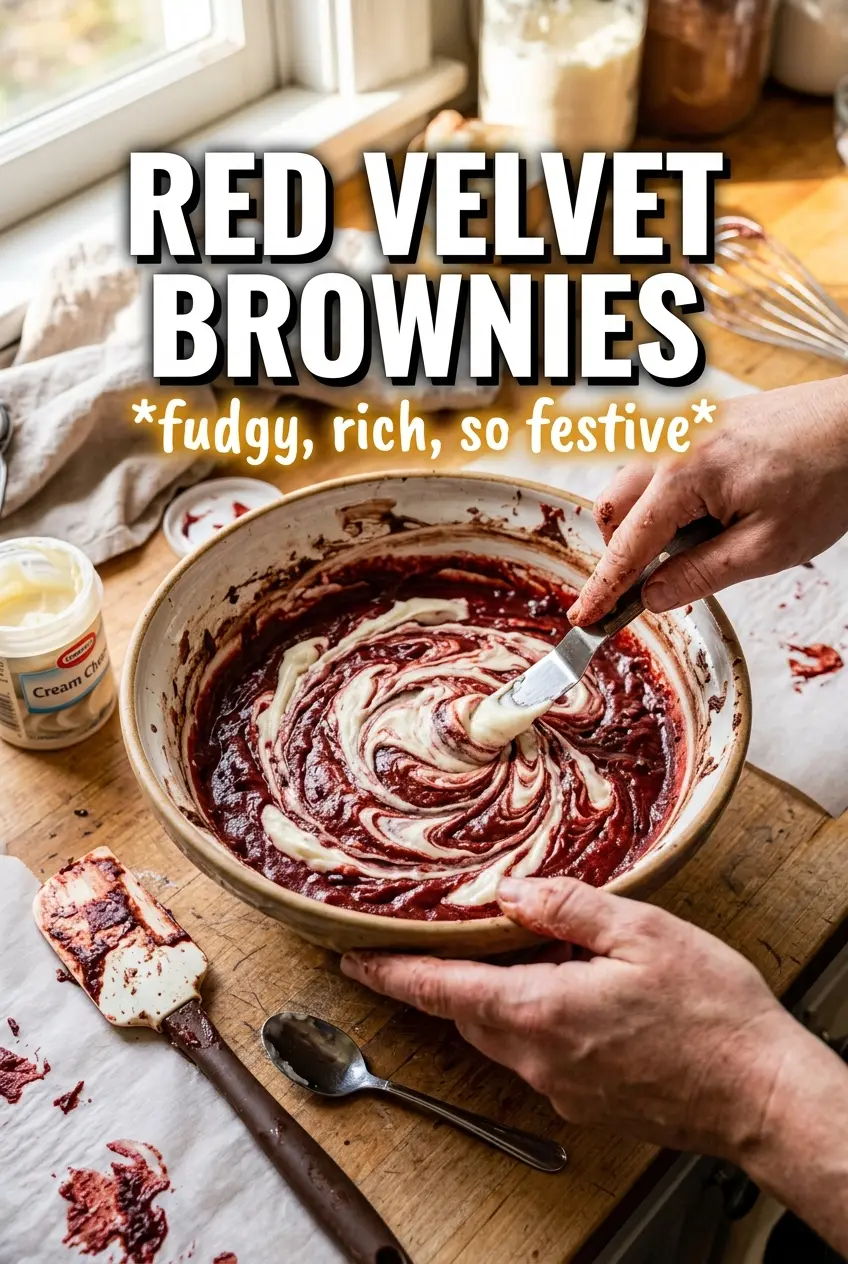
Red velvet brownies can turn muddy fast if the cream cheese mixture gets stirred too deeply into the batter. The goal is a marbled top with pockets of tangy cream cheese, not a uniform pink batter that tastes flat and loses the contrast that makes this dessert worth baking. Dolloping the swirl over the brownie base and dragging a knife through it just a few times keeps the layers distinct.
The other thing that matters here is bake time. Pull the pan when the center is set but still soft; if you wait for a completely firm middle, the brownies dry out as they cool. These are best treated like fudgy brownies, not cake bars.
- Vinegar — This small addition sharpens the cocoa and gives the batter that classic red velvet tang. Lemon juice can step in if needed, but vinegar is cleaner and less distracting.
- Cream cheese — Use full-fat cream cheese for the swirl. Reduced-fat versions hold more water and can bake up loose instead of silky.
- Butter — Melted butter keeps the crumb dense and chewy. Softened butter won’t give you the same texture here.
- Food coloring — Gel coloring gives a stronger red with less liquid, but standard liquid coloring works too. Add enough to get the shade you want without thinning the batter too much.
What Each Ingredient Is Actually Doing in These Brownies
- Unsalted butter — Melted butter creates that dense, glossy brownie base. If you only have salted butter, use it and trim back a pinch of the added salt.
- Granulated sugar — Sugar sweetens and helps the top develop that thin, shiny crust. Brown sugar would make them softer and more molasses-heavy, which pulls them away from the red velvet flavor.
- Eggs — Three eggs give the brownies structure without making them fluffy. Beat them in until the batter looks thick and smooth, but don’t whip in extra air.
- Cocoa powder — Use natural cocoa powder here for the classic red velvet taste and color contrast. Dutch-process cocoa can work, but it softens the tang and deepens the flavor in a different direction.
- Cream cheese — The swirl should be beaten until no lumps remain. Cold cream cheese leaves little bits behind that don’t melt out evenly in the oven.
Building the Batter, Swirling the Top, and Knowing When to Stop Baking
Mixing the Brownie Base
Start by whisking the melted butter and sugar until the mixture looks thick and glossy. Add the eggs one at a time if you want a smoother batter, then stir in the vanilla and food coloring until the color is even. Fold in the flour, cocoa, vinegar, and salt just until the dry streaks disappear. If you keep mixing after that point, the brownies turn tougher and lose the dense, fudgy bite you want.
Making the Cream Cheese Swirl
Beat the cream cheese, sugar, egg, and vanilla until the mixture is smooth and pourable. Stop and scrape the bowl if you see any lumps, because lumps don’t melt away later. The swirl should sit in soft dollops on top of the brownie batter, not sink in immediately. If it looks too loose, the cream cheese was too warm or the egg was overbeaten.
Baking Until Just Set
Spread the brownie batter in a parchment-lined 9×13 pan, then spoon the cream cheese mixture over the top and drag a knife through it in broad figure-eight motions. Bake at 350°F for 25 to 30 minutes, watching for the edges to set and the center to lose its wet shine. A toothpick should come out with moist crumbs, not raw batter. Let the pan cool completely before cutting, or the swirl will smear and the middle will collapse.
Gluten-Free Version
Swap the all-purpose flour for a cup-for-cup gluten-free blend. The texture will still be fudgy, but the top crust may be a little less crisp than the original.
Extra-Deep Red Color
Use gel food coloring instead of liquid if you want a darker, more vivid red with less added moisture. It gives a stronger visual contrast against the cream cheese swirl and keeps the batter from thinning out.
Dairy-Free Direction
Use a dairy-free butter substitute and a plant-based cream cheese that bakes well. The brownies will still set, but the swirl may be softer and a little less tangy.
Storage and Reheating
- Refrigerator: Store in an airtight container for 4 to 5 days. The cream cheese swirl firms up, so the texture gets slightly denser after chilling.
- Freezer: These freeze well. Wrap individual squares tightly and freeze for up to 2 months, then thaw in the refrigerator so the swirl doesn’t weep.
- Reheating: Warm a square for 10 to 15 seconds in the microwave if you want the center a little softer. Don’t overheat them or the cream cheese layer can separate and turn greasy.
Questions I Get Asked About This Recipe
Red Velvet Brownies
Ingredients
Equipment
Method
- Preheat oven to 350F and line a 9x13 pan with parchment so the brownies lift out cleanly.
- Whisk melted unsalted butter and granulated sugar until smooth, then beat in the eggs, vanilla, and red food coloring until evenly colored.
- Fold in all-purpose flour, cocoa powder, white vinegar, and salt just until no dry streaks remain.
- Spread the batter evenly in the lined pan.
- Beat cream cheese, sugar, egg, and vanilla until smooth, then dollop the mixture over the brownie batter.
- Swirl the cream cheese into the batter with a gentle motion to create marbled ribbons.
- Bake at 350F for 25–30 minutes until the center looks set and a toothpick comes out with moist crumbs.
- Cool completely before cutting so the brownies hold their shape and the swirl firms up.