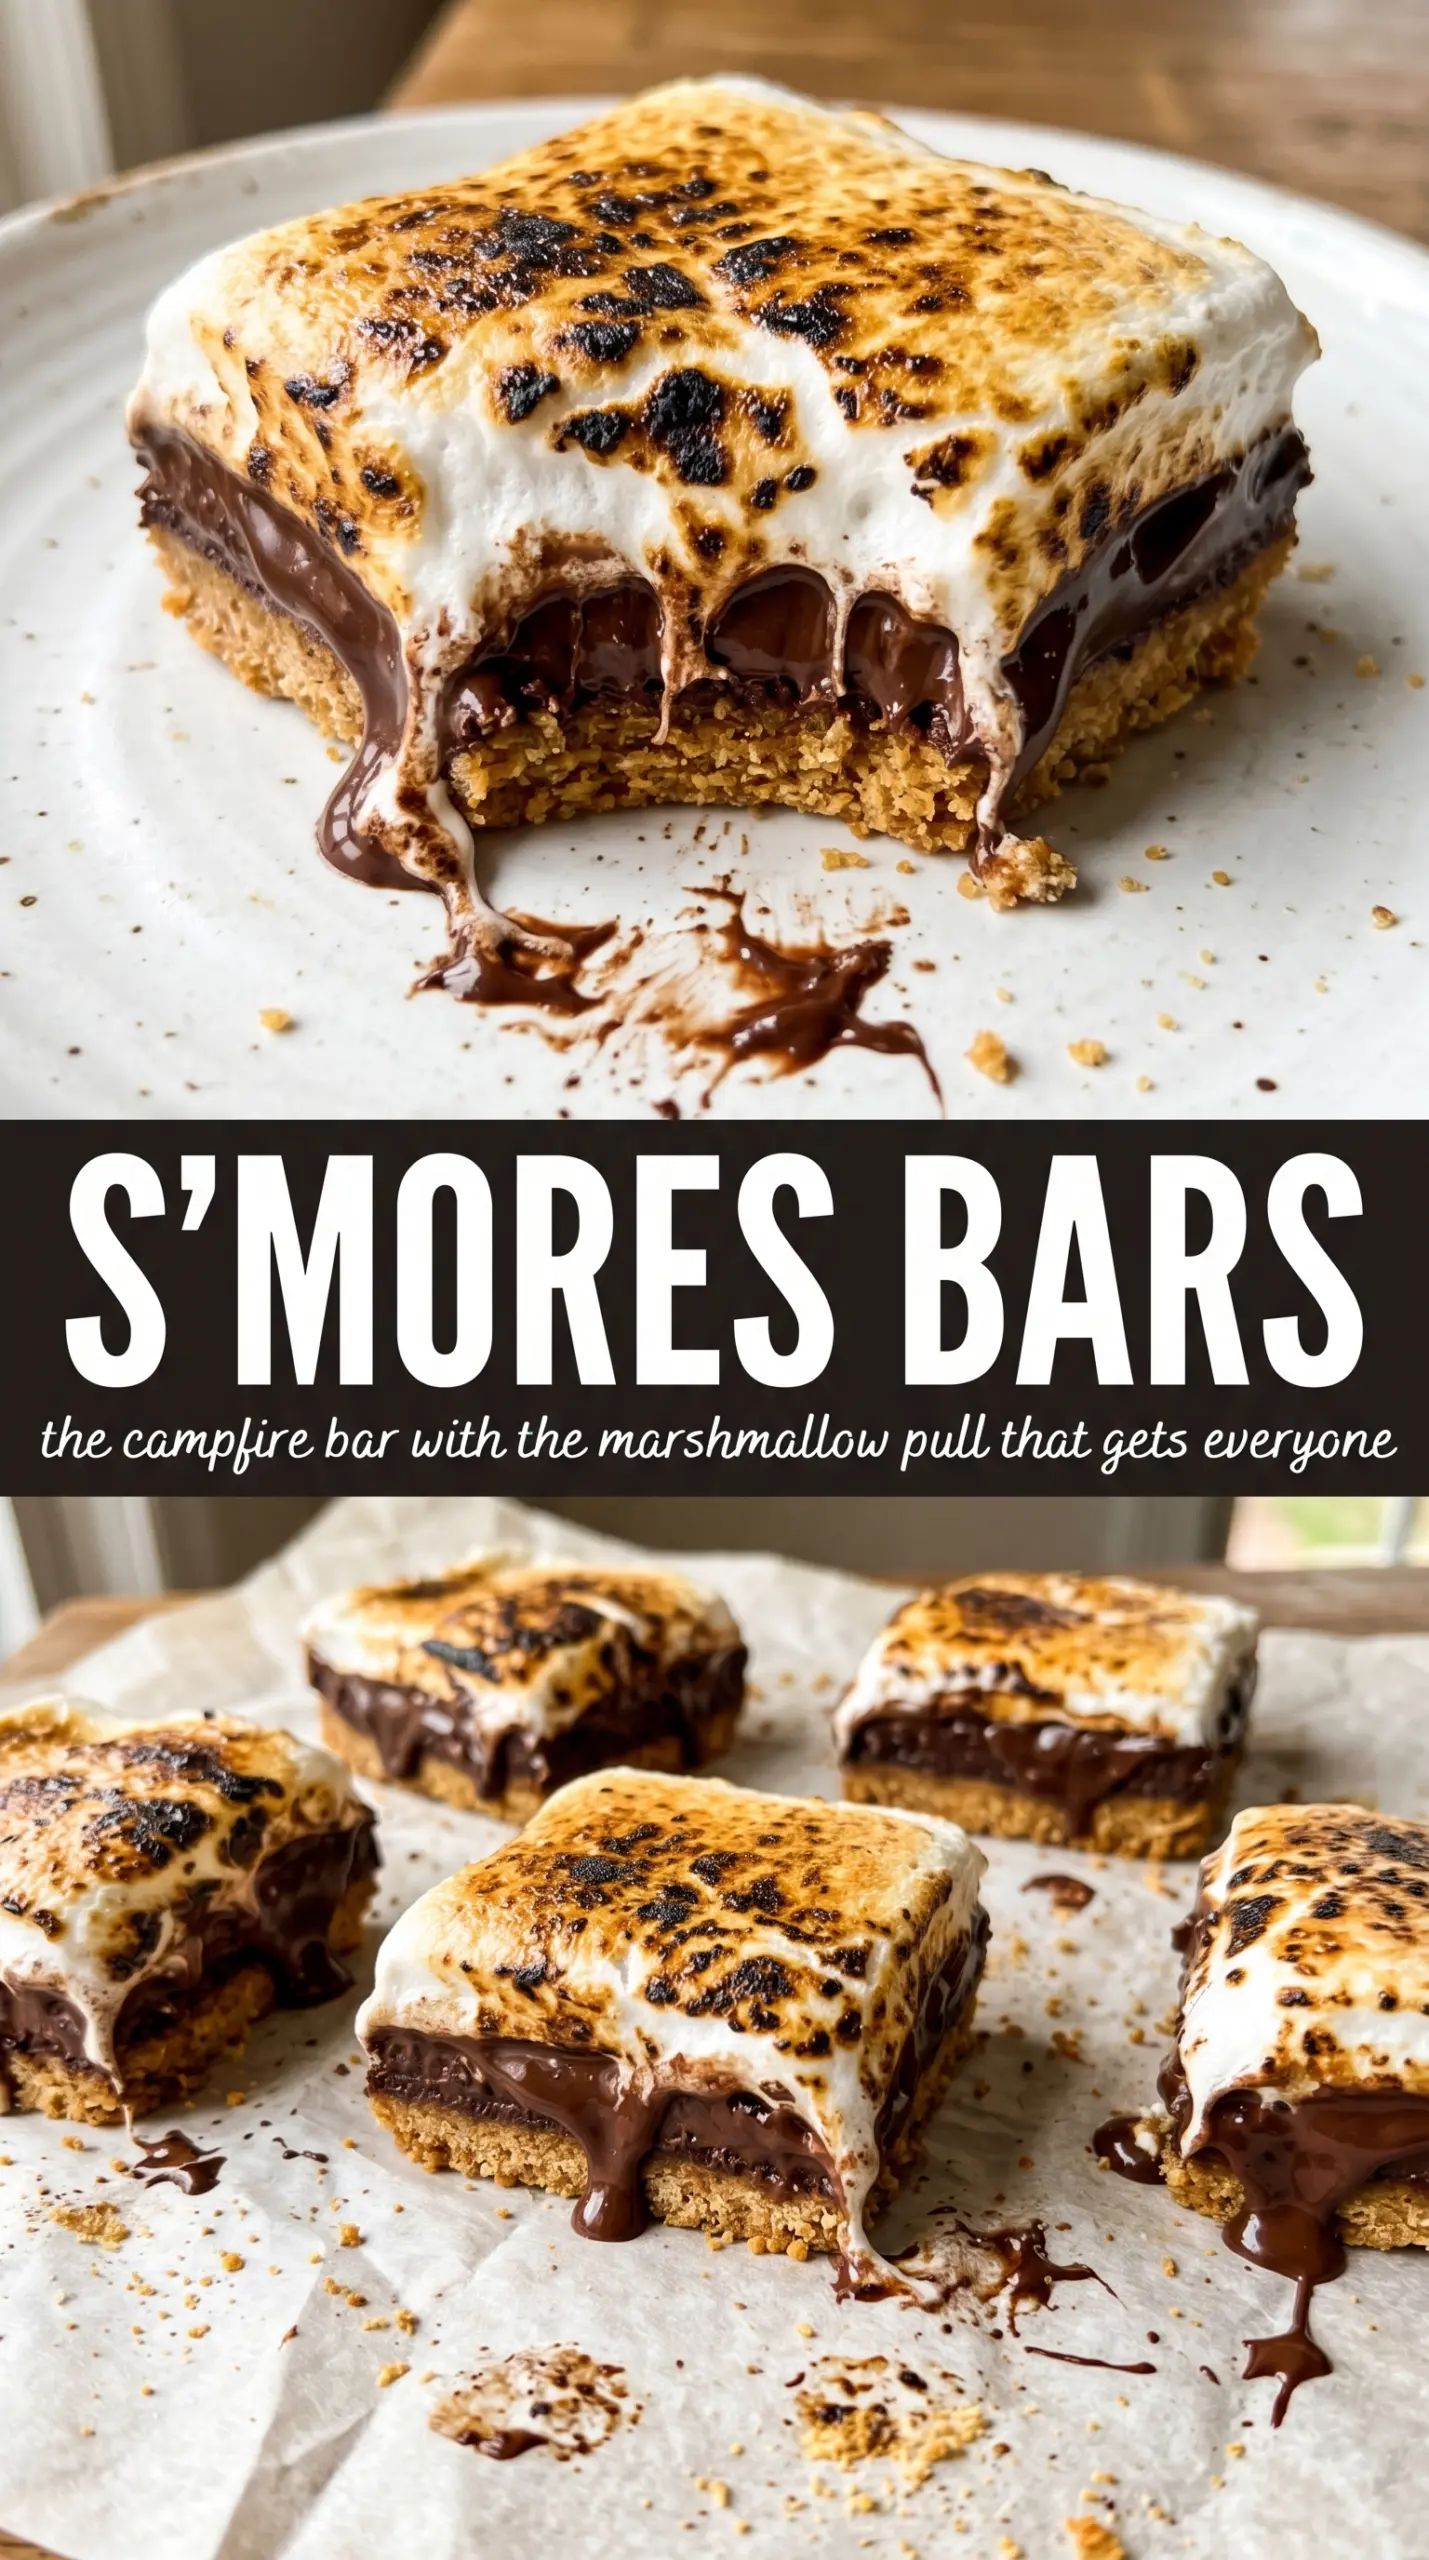
Thick s’mores bars hit the sweet spot between a campfire treat and a proper dessert bar: a buttery graham cracker base, a dense chocolate middle, and a marshmallow top that turns golden and sticky without turning the whole pan into a mess. What makes them worth making is the contrast. The crust stays crisp enough to support the bars, the center bakes up fudgy instead of cakey, and the marshmallows toast into that glossy top layer people always go after first.
The trick is keeping each layer in its lane. The crust gets a quick pre-bake so it doesn’t soften under the chocolate batter. The chocolate layer is built on melted butter, which gives the bars that rich, dense texture instead of a crumbly brownie feel. Then the marshmallows go on at the very end, just long enough to puff and brown. If you wait too long or broil too aggressively, they go from toasted to scorched fast.
Below you’ll find the small details that matter most, including the exact moment to add the marshmallows and the best way to cut clean squares without dragging the topping off the bars.
The graham cracker base stayed crisp and the marshmallows browned up in minutes. I cut them after they cooled and the layers held together perfectly.
Like these s’mores bars? Save them to Pinterest for the nights when you want a fudgy chocolate center and a toasted marshmallow top in one pan.
The Reason the Marshmallow Layer Goes on Last
The marshmallows are the part that can go sideways if you rush the timing. They don’t belong in the oven for the full bake because they dry out, collapse, and sometimes disappear into the chocolate layer. Adding them after the bars are almost set keeps the top dramatic and fluffy while the chocolate underneath finishes baking gently.
That late addition also protects the texture contrast that makes these bars work. The crust stays firm, the chocolate stays dense, and the marshmallows only need a short blast of heat to melt into each other and turn golden. If the chocolate layer still looks wet in the middle when you add the topping, give it a few more minutes first; the marshmallows are a finishing layer, not a way to hide underbaked batter.
What Each Layer Is Doing in the Pan
- Graham cracker crumbs — These make the base taste like actual s’mores instead of just chocolate bars with a cookie crust. Crush them finely so the crust packs tightly and slices cleanly.
- Butter — Melted butter goes into both the crust and the chocolate layer, and that is what gives the bars their dense, rich bite. There isn’t a true substitute here that gives the same texture; if you swap in oil, the bars get softer and lose some of that classic fudgy feel.
- Cocoa powder — Unsweetened cocoa brings the deep chocolate flavor without making the batter heavy. A natural cocoa works fine, but a good Dutch-process cocoa will make the chocolate taste darker and smoother.
- Mini marshmallows or halved large marshmallows — Minis melt into a fast, even blanket. If you’re using large marshmallows, cut them in half so they cover the top without giant gaps that leave bare chocolate showing through.
- Eggs — These set the chocolate layer so it slices like a bar instead of spooning like brownie batter. Room-temperature eggs blend in more smoothly, which helps the batter stay glossy and even.
Building the Crust, Baking the Center, and Toasting the Top
Pressing the Graham Layer Firmly
Mix the crust until the crumbs look evenly moistened, then press them into the pan with real pressure. A loose crust falls apart under the chocolate layer and makes the bottom crumbly instead of sturdy. The pre-bake gives it a head start and keeps it from going soft once the batter goes on top.
Cooking the Chocolate Layer
Melt the butter in a saucepan, then stir in the sugar, eggs, and vanilla until the mixture looks glossy and smooth. Add the dry ingredients and stop as soon as the batter comes together; overmixing can make the bars tougher than you want. Spread it evenly over the crust, paying attention to the corners so the whole pan bakes at the same rate.
Knowing When to Pull It From the Oven
Bake until the center is just set, not fully firm. The middle should still have a slight wobble when you nudge the pan, because it finishes as it cools. If you wait for the center to look completely dry, the bars lose that fudgy texture and the marshmallow layer can overbake while you’re waiting.
Toasting Without Burning
As soon as the bars come out, blanket the top with marshmallows and return the pan to the oven just long enough for them to puff. Broil only until the tops turn golden, and stay right there with the door open if needed. Marshmallows go from toasted to black in a heartbeat, especially at the edges of the pan where the heat hits hardest.
Make Them Gluten-Free With the Right Crumb Swap
Use certified gluten-free graham crackers for the crust and keep the rest of the recipe the same. The bars will still have the same structure and toasted topping, but the crust may be a little more delicate, so press it firmly and let it cool fully before slicing.
A Deeper Chocolate Version
Swap half of the granulated sugar in the chocolate layer for dark brown sugar and use Dutch-process cocoa if you have it. That gives the bars a richer, less sweet finish and a darker color, but the texture stays the same.
Salted Caramel Upgrade
Drizzle a thin layer of caramel over the baked chocolate base before the marshmallows go on. It adds a sticky, buttery middle that plays well with the graham crust, but keep the layer light or the bars can get messy when you cut them.
Storage and Reheating
- Refrigerator: Store in an airtight container for up to 5 days. The marshmallow top will soften a bit, but the bars still hold their shape well.
- Freezer: Freeze cut bars between layers of parchment for up to 2 months. Thaw in the fridge so the topping doesn’t sweat and slide off.
- Reheating: Warm individual bars for 8 to 10 seconds in the microwave if you want the chocolate center a little softer. Don’t overheat them or the marshmallow turns sticky and the crust loses its bite.
Answers to the Questions Worth Asking

S'mores Bars
Ingredients
Equipment
Method
- Preheat the oven to 350°F and line a 9x13 pan with parchment paper, letting it overhang for easy lifting later.
- Mix the graham cracker crumbs, granulated sugar, and melted butter, then press firmly into the bottom of the pan for a tight, even layer.
- Bake the crust for 8 minutes at 350°F, then cool slightly so the chocolate layer won’t soak in too fast.
- Melt the butter in a saucepan, then stir in the granulated sugar, eggs, and vanilla until smooth.
- Mix in the cocoa powder, all-purpose flour, baking powder, and salt until the batter is smooth and thick.
- Spread the chocolate batter over the baked graham cracker crust and bake for 18-20 minutes at 350°F until just set in the center.
- Remove the pan from the oven and immediately cover the entire top with marshmallows in an even layer so they melt reliably.
- Return to the oven for 3-4 minutes at 350°F until the marshmallows puff and start to turn golden.
- Switch to broil for 1-2 minutes until the marshmallows are golden brown and visibly toasted.
- Cool the bars for 30 minutes before cutting with a buttered knife so the fudgy center holds together.