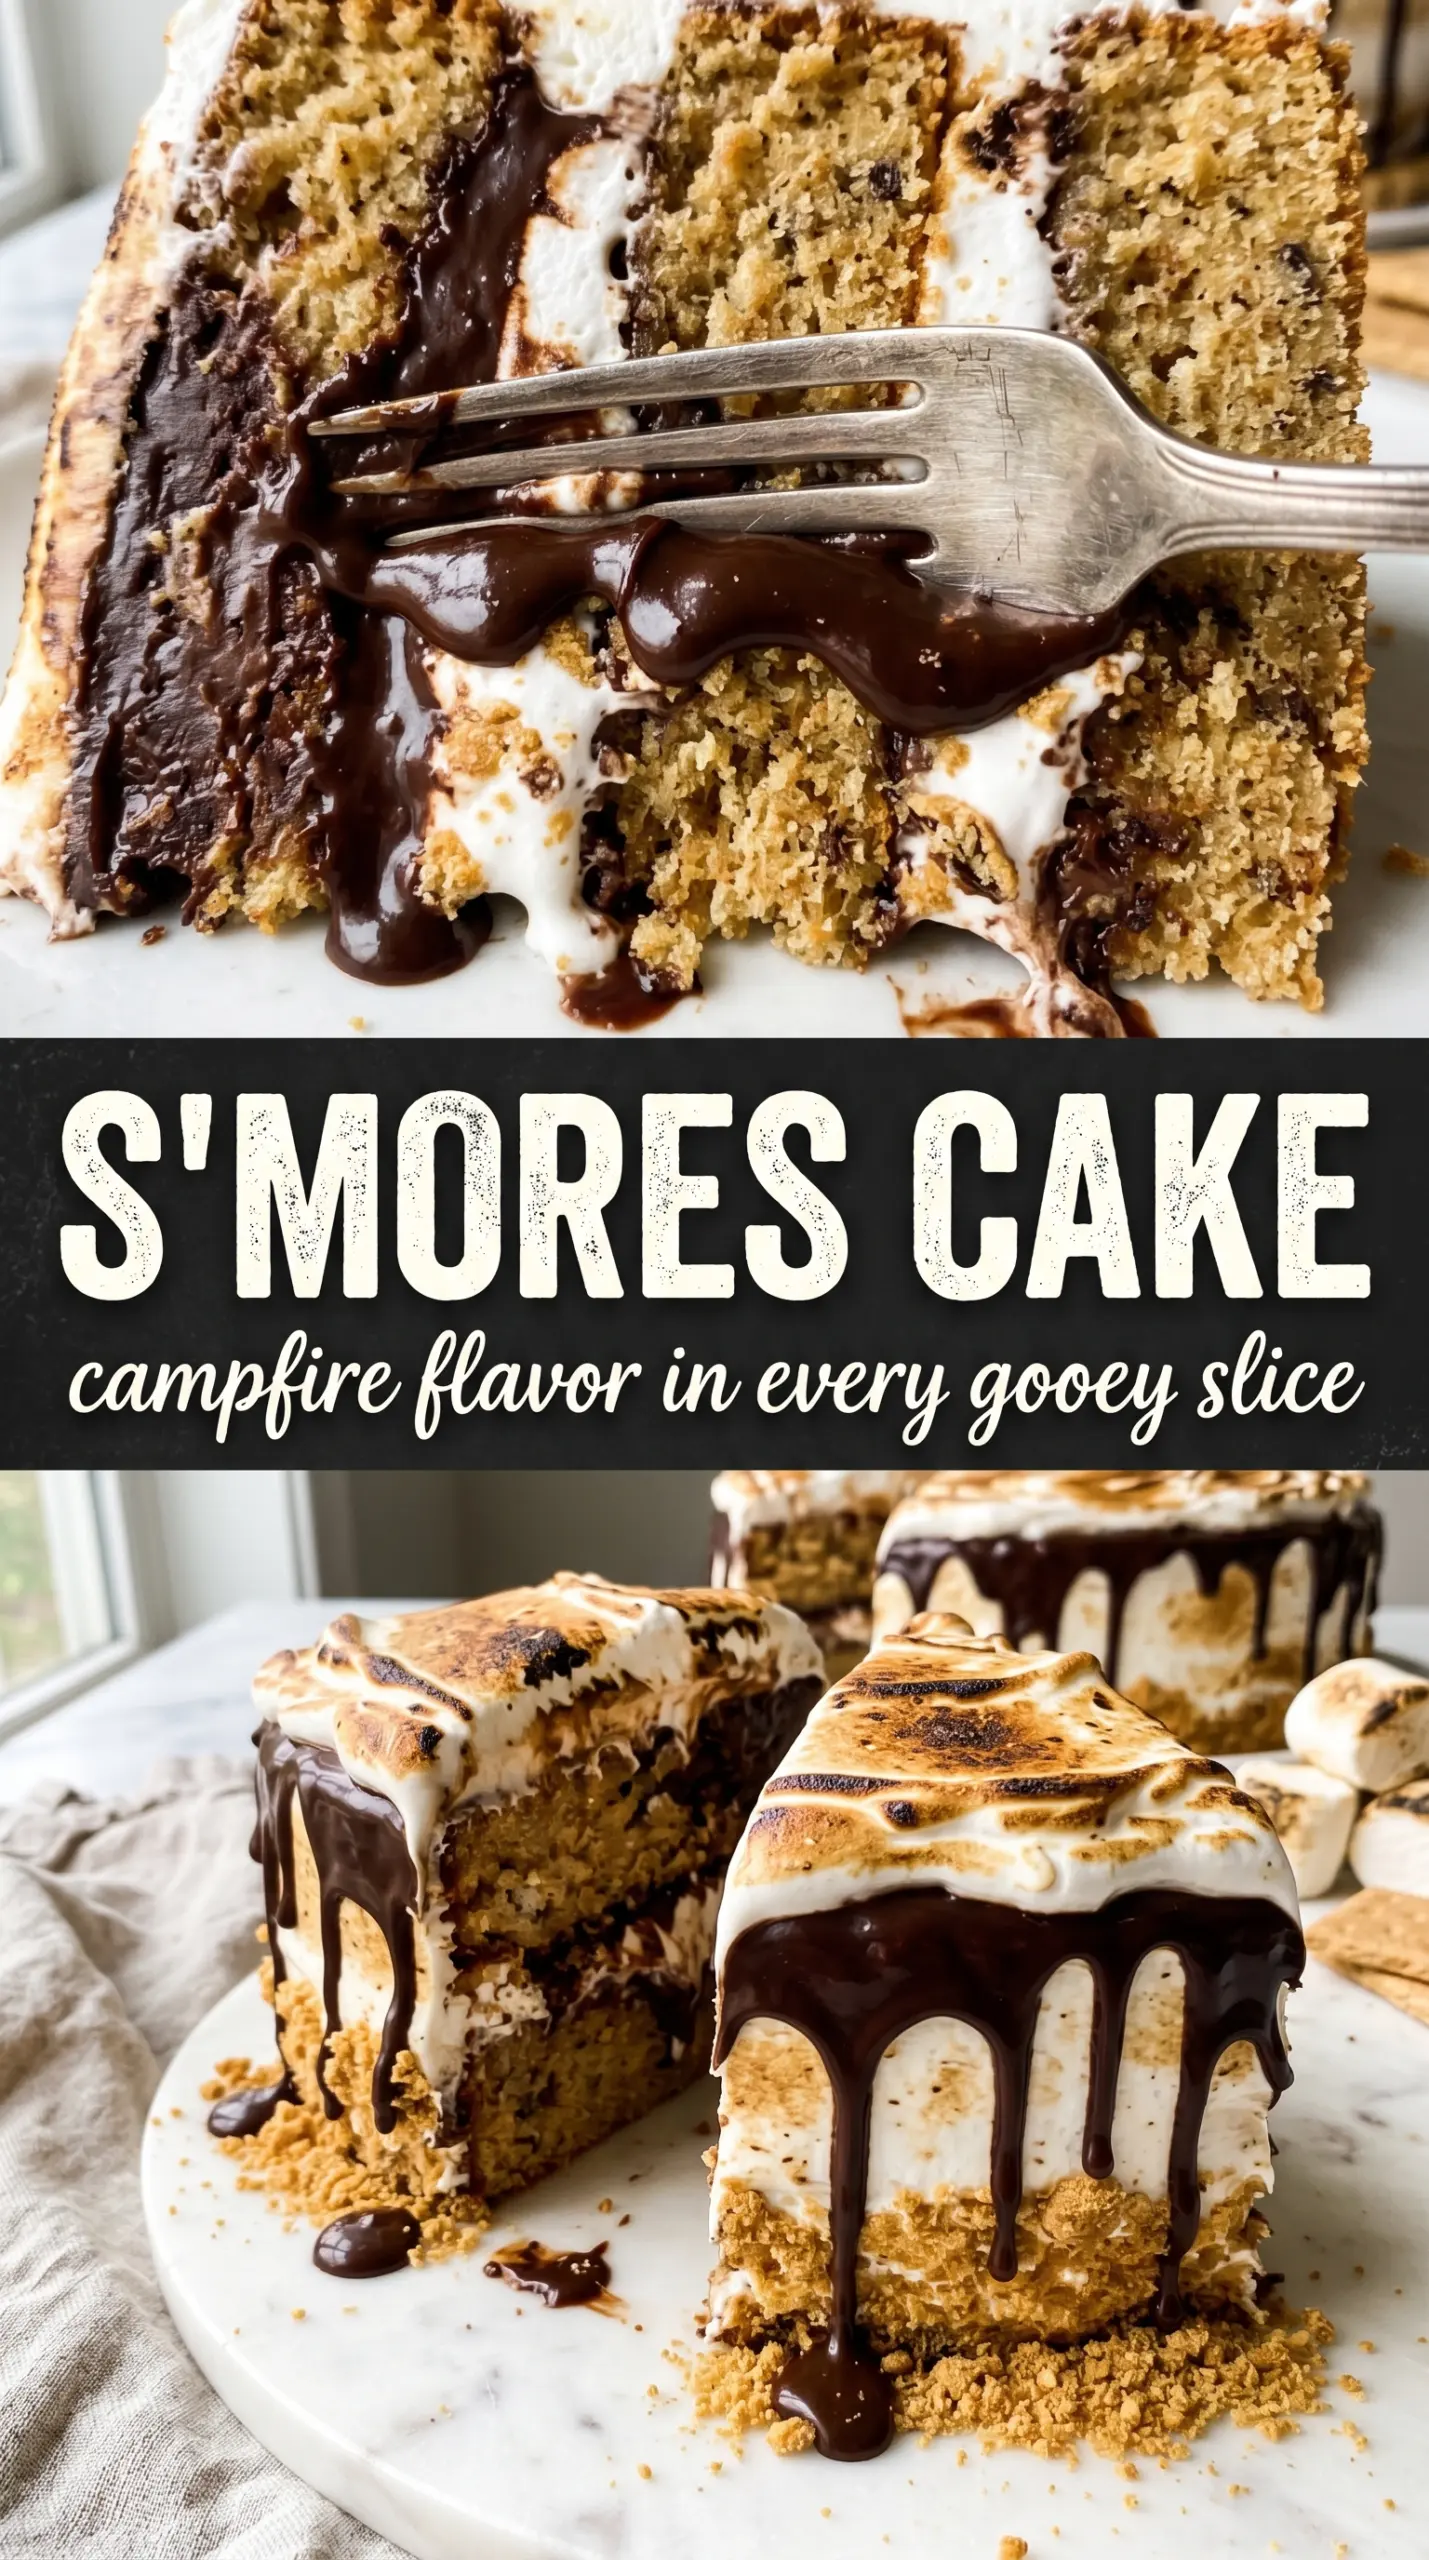
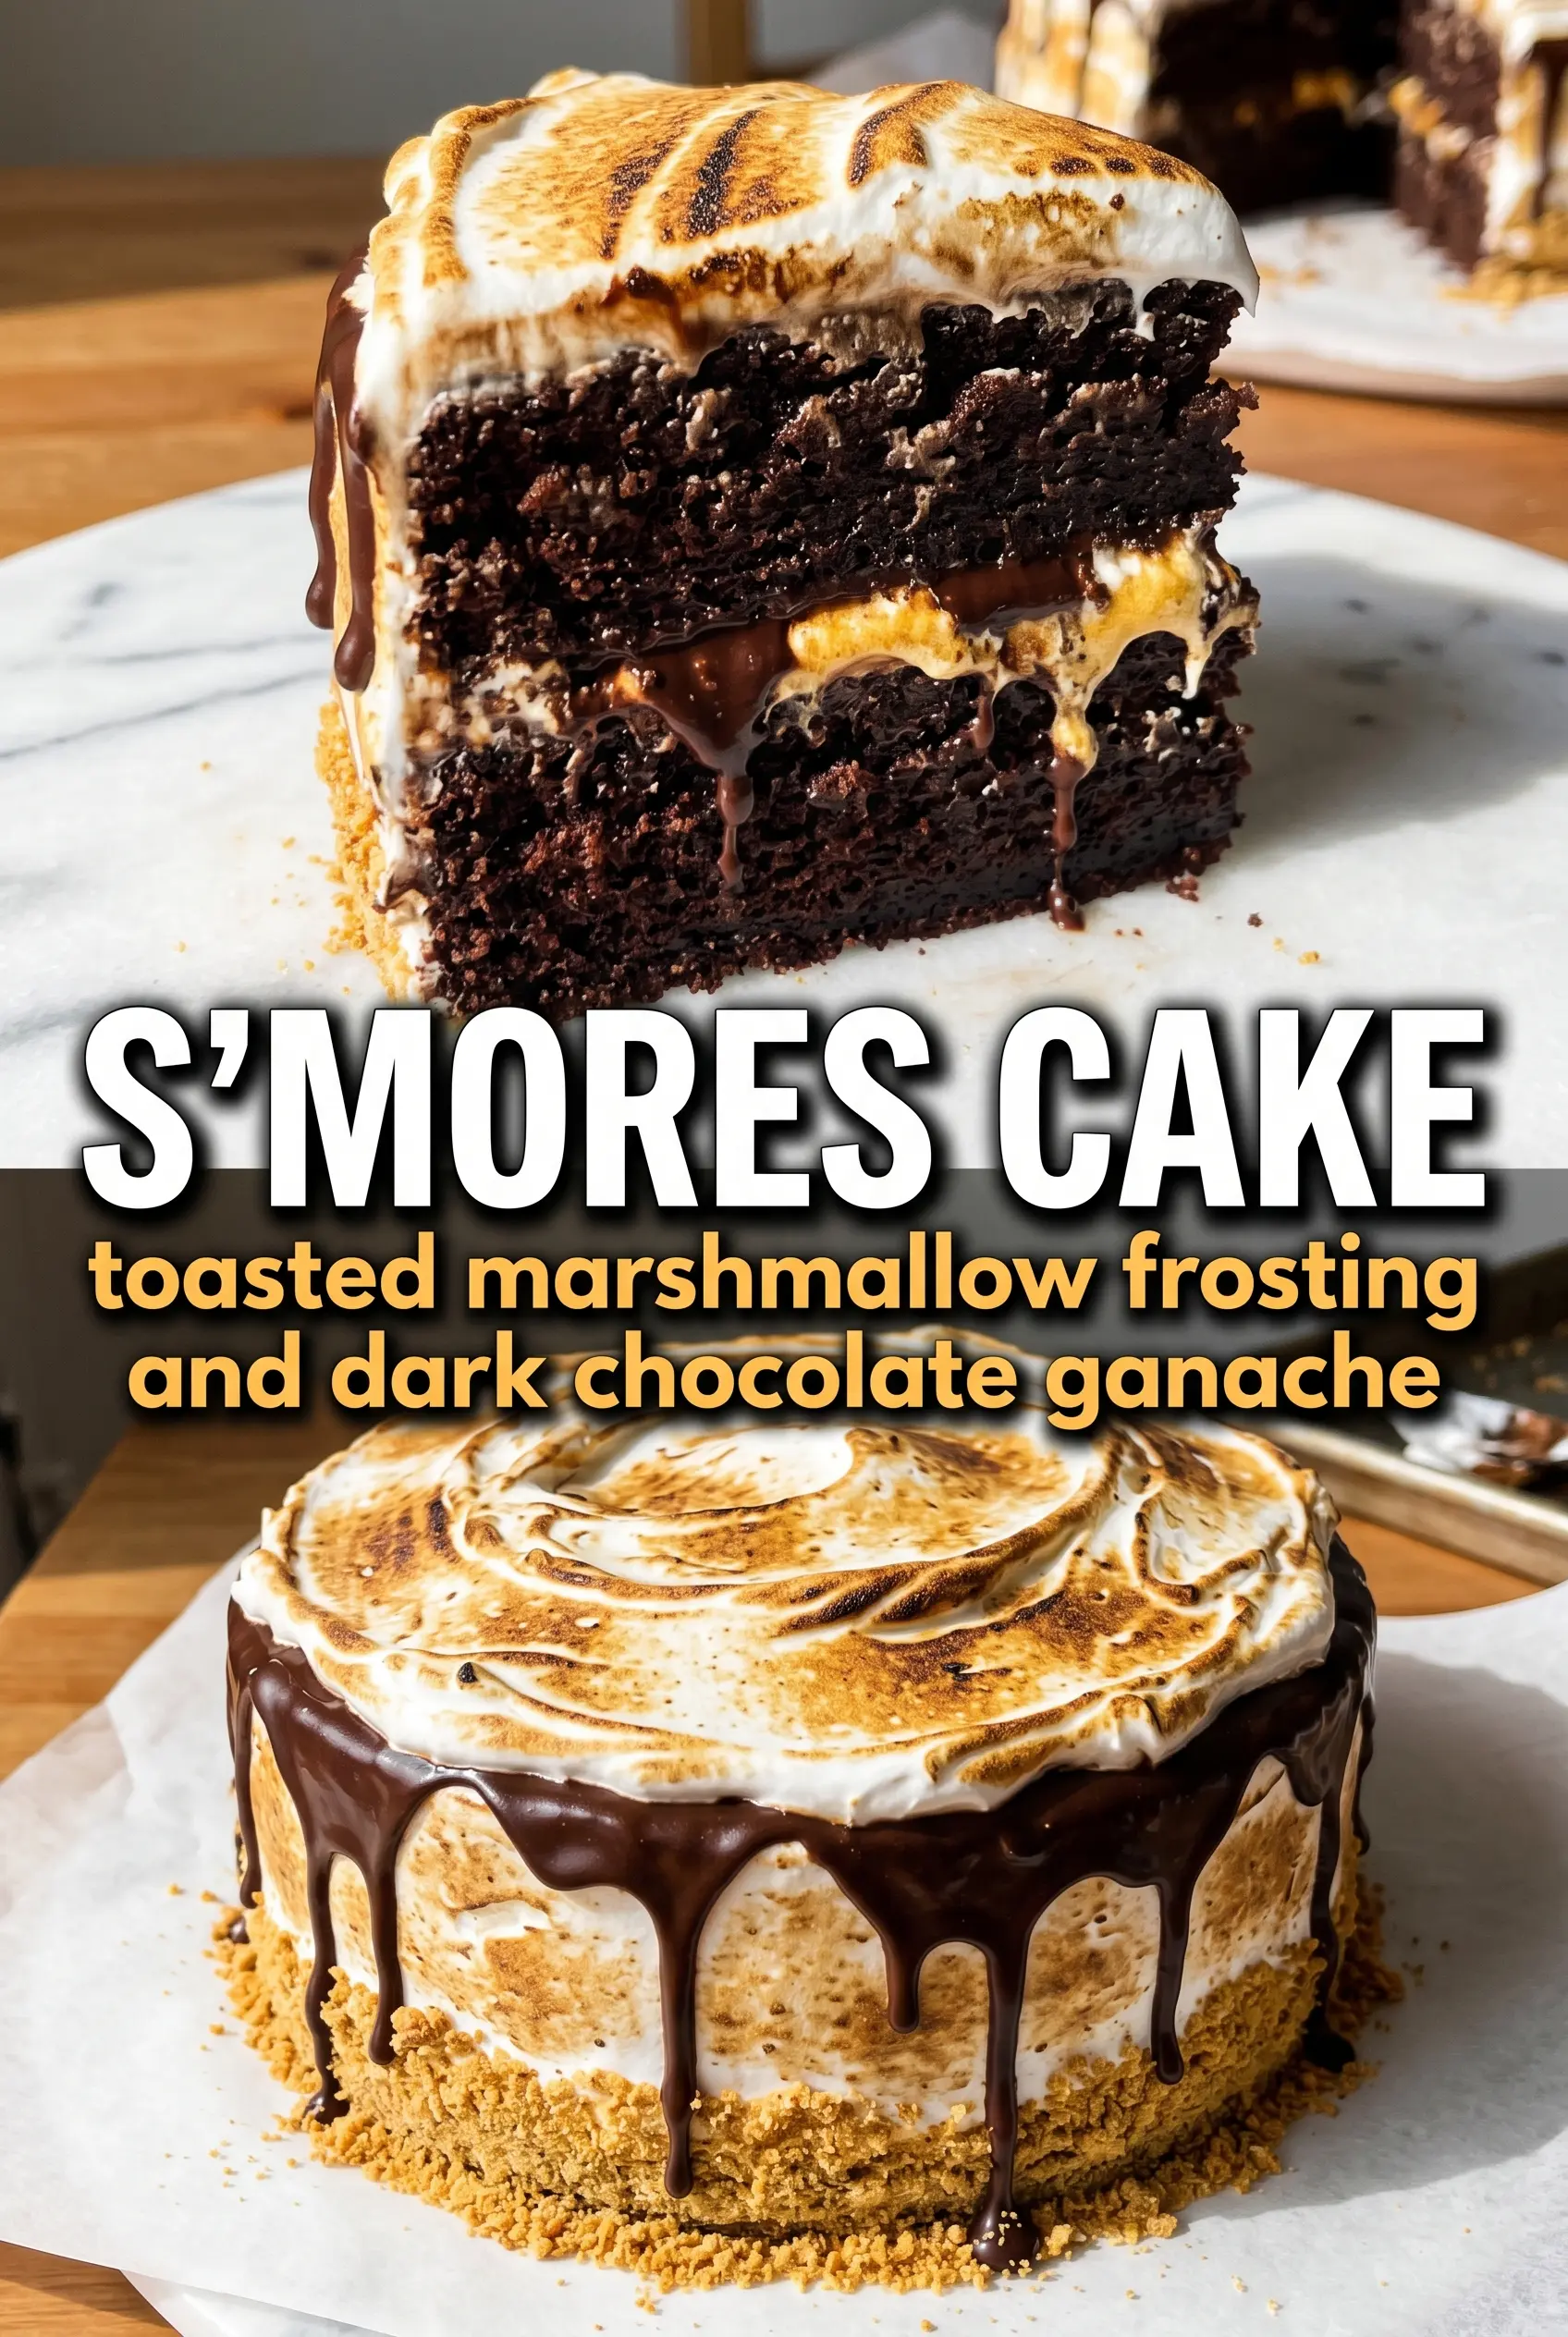
All the best parts of a campfire treat show up here in cake form: deep chocolate layers, a silky ganache filling, toasted marshmallow peaks, and graham cracker crumbs for that unmistakable snap at the base. It looks dramatic on the table, but the flavor is what keeps people coming back for another slice. The chocolate stays rich without turning heavy, and the meringue gives you that glossy, marshmallow-like finish without needing a bag of store-bought frosting.
The key is building each layer with contrast. Strong brewed coffee pushes the chocolate cake toward a darker, fuller taste without making it taste like coffee, and buttermilk keeps the crumb tender. The meringue is cooked over a double boiler before it’s whipped, which helps the sugar dissolve completely so the frosting turns smooth instead of gritty. That little bit of patience pays off the second you slice into it.
Below, I’ve included the details that matter most: how to keep the ganache pourable, how to get the meringue glossy and stable, and what to do if you want to make this cake ahead without losing the toasted finish.
The cake layers came out tender and the ganache stayed just soft enough to spread without squishing the cake. Toasting the meringue at the end made it look like something from a bakery.
Pin this s’mores cake for the nights when you want chocolate layers, glossy marshmallow peaks, and a graham cracker finish all in one dessert.
The Part That Keeps the Chocolate Layers from Turning Flat
The biggest mistake with a cake like this is treating the chocolate batter like a basic vanilla layer cake batter. This one depends on hot coffee, oil, and buttermilk working together: the coffee deepens the cocoa, the oil keeps the crumb soft even after chilling, and the buttermilk gives the baking soda enough acid to lift the layers cleanly. If the batter looks thin, that’s normal. Thick batter here would give you a heavier cake and a tighter crumb.
Mix only until the dry ingredients disappear. Overmixing wakes up the gluten in the flour and makes the layers dense instead of tender. The cake is done when the center springs back lightly and a tester comes out with a few moist crumbs, not wet batter. Let the layers cool all the way before filling them or the ganache will slide and the meringue will weep.
What Each Layer Is Doing in This Cake
- Unsweetened cocoa powder — This is the backbone of the cake’s chocolate flavor. Use a good, fresh cocoa if you can; stale cocoa tastes dusty and flat. There isn’t a swap that gives the same deep color and flavor, so this is one place where quality matters.
- Strong brewed coffee — It doesn’t make the cake taste like coffee. It sharpens the chocolate and makes it taste fuller. If you need a substitution, use hot water, but the cake will lose some depth.
- Buttermilk — This keeps the crumb tender and helps the baking soda do its job. If you don’t have it, stir 1 tablespoon lemon juice or vinegar into 1 cup milk and let it sit for 5 minutes. The texture won’t be exactly the same, but it gets close.
- Egg whites, sugar, and cream of tartar — These make the marshmallow meringue. The double-boiler step matters because it dissolves the sugar before whipping, which is how you get a smooth, glossy frosting instead of a grainy one. Don’t skip the cream of tartar; it helps the whites hold their structure.
- Dark chocolate ganache — This is the rich, fudgy center that keeps the cake from tasting all sweetness. Use chopped chocolate, not chips, because chips often contain stabilizers that make the ganache less silky. If you want a sweeter filling, use semisweet chocolate instead of very dark chocolate.
- Graham cracker crumbs — They add the crunchy edge that makes the cake read as s’mores the second you see a slice. Press them onto the sides and base while the meringue is still tacky so they stick cleanly.
Building the Cake So the Meringue Stays Glossy
Mixing the Chocolate Batter
Whisk the dry ingredients thoroughly before adding the wet ingredients so the baking soda and baking powder are evenly distributed. Once the wet and dry mixtures come together, stop as soon as the batter looks smooth. The batter will be loose and glossy, and that’s exactly what you want for layers that bake up even instead of domed and dry around the edges.
Making the Ganache
Heat the cream until it just begins to simmer, then pour it over the chopped chocolate and leave it alone for two minutes. That pause lets the chocolate melt from the residual heat without scorching. Stir from the center outward until it turns dark, shiny, and smooth. If it looks split, the cream was too hot or the chocolate was stirred too aggressively too soon; keep stirring gently and it usually comes back together.
Whipping the Marshmallow Meringue
Set the egg whites, sugar, and cream of tartar over simmering water and whisk until the sugar fully dissolves and the mixture feels hot to the touch. That step is what gives you a stable meringue that slices cleanly later. Beat it until stiff, glossy peaks hold their shape and the bowl is cool. If the peaks slump, keep beating; if it turns grainy, the sugar didn’t dissolve enough before whipping.
Assembling and Toasting
Spread the ganache between the layers first, then add the meringue so the filling has something rich beneath the fluffy topping. Frost the outside with the remaining meringue and press graham cracker crumbs around the bottom edge right away. Torch the meringue in short passes until the peaks go golden brown in patches. If you hold the torch too close, the surface will blacken before the rest of the frosting has a chance to toast.
Ways to Adjust This S’mores Cake Without Losing the Point
Gluten-Free Version
Use a 1:1 gluten-free baking flour in place of the all-purpose flour. The cake will still be tender, but it may need an extra minute or two in the oven and should be cooled completely before slicing so it sets cleanly.
Dairy-Free Swap
Use unsweetened non-dairy milk with a teaspoon of vinegar in place of the buttermilk, and swap the heavy cream for a full-fat coconut cream in the ganache. The frosting stays dairy-free already, but the ganache will have a light coconut note, so pick that only if you like the flavor pairing.
Make It a Little Less Sweet
Use bittersweet chocolate for the ganache and keep the graham cracker layer light. That keeps the cake balanced without changing the structure. The meringue still brings sweetness, but the darker chocolate keeps each bite from leaning too sugary.
Storage and Reheating
- Refrigerator: Store covered for up to 3 days. The meringue will soften a little, but the cake stays sliceable.
- Freezer: Freeze the unfrosted cake layers for up to 2 months, wrapped well. I don’t recommend freezing the assembled cake because the meringue texture changes after thawing.
- Reheating: This cake is best served cold or at cool room temperature. If it’s been refrigerated, let slices sit out for 20 to 30 minutes before serving so the ganache loosens a bit and the chocolate flavor comes through.
Answers to the Questions Worth Asking
S'mores Cake
Ingredients
Equipment
Method
- Preheat the oven to 350°F and grease two 9-inch round pans. Grease thoroughly so the layers release cleanly.
- Whisk all dry cake ingredients together in a bowl. Mix until the cocoa powder and leaveners are evenly distributed.
- Whisk all wet ingredients together separately in a bowl. Ensure the eggs are fully combined before mixing into the dry ingredients.
- Combine the dry and wet ingredients and mix until smooth. Scrape the sides to remove any dry pockets.
- Divide the batter between the two pans and bake for 30-35 minutes. Bake until the centers spring back and a toothpick comes out with a few moist crumbs.
- Cool the cakes completely. Let them cool fully so ganache and frosting won’t melt or slide.
- Heat the heavy cream until it reaches a simmer. Watch for small bubbles around the edges.
- Pour the hot cream over the chopped dark chocolate and let it sit for 2 minutes. Keep the chocolate submerged for smooth melting.
- Stir until the ganache is smooth. Continue mixing until glossy and uniform.
- Cool the ganache until pourable but still fluid. It should flow off a spoon without thickening.
- Combine egg whites, granulated sugar, and cream of tartar in a double boiler. Keep the bowl over simmering water so the mixture warms gently.
- Whisk over simmering water until the sugar dissolves and the mixture is hot. The texture should look clear and the grains should disappear.
- Beat with a mixer to stiff glossy peaks. Lift the whisk and confirm the peaks hold their shape.
- Fill the cake with ganache and meringue between the layers. Spread to the edges for even stacking.
- Frost the outside with the marshmallow meringue. Cover all sides with a smooth, generous layer.
- Press graham cracker crumbs around the base of the cake. Add a visible crumble ring where the cake meets the plate.
- Use a kitchen torch to toast the meringue to golden in dramatic patches. Torch until you see golden peaks and lightly browned spots.
- Drizzle the remaining ganache over the top. Let it run for a drip effect down the sides.