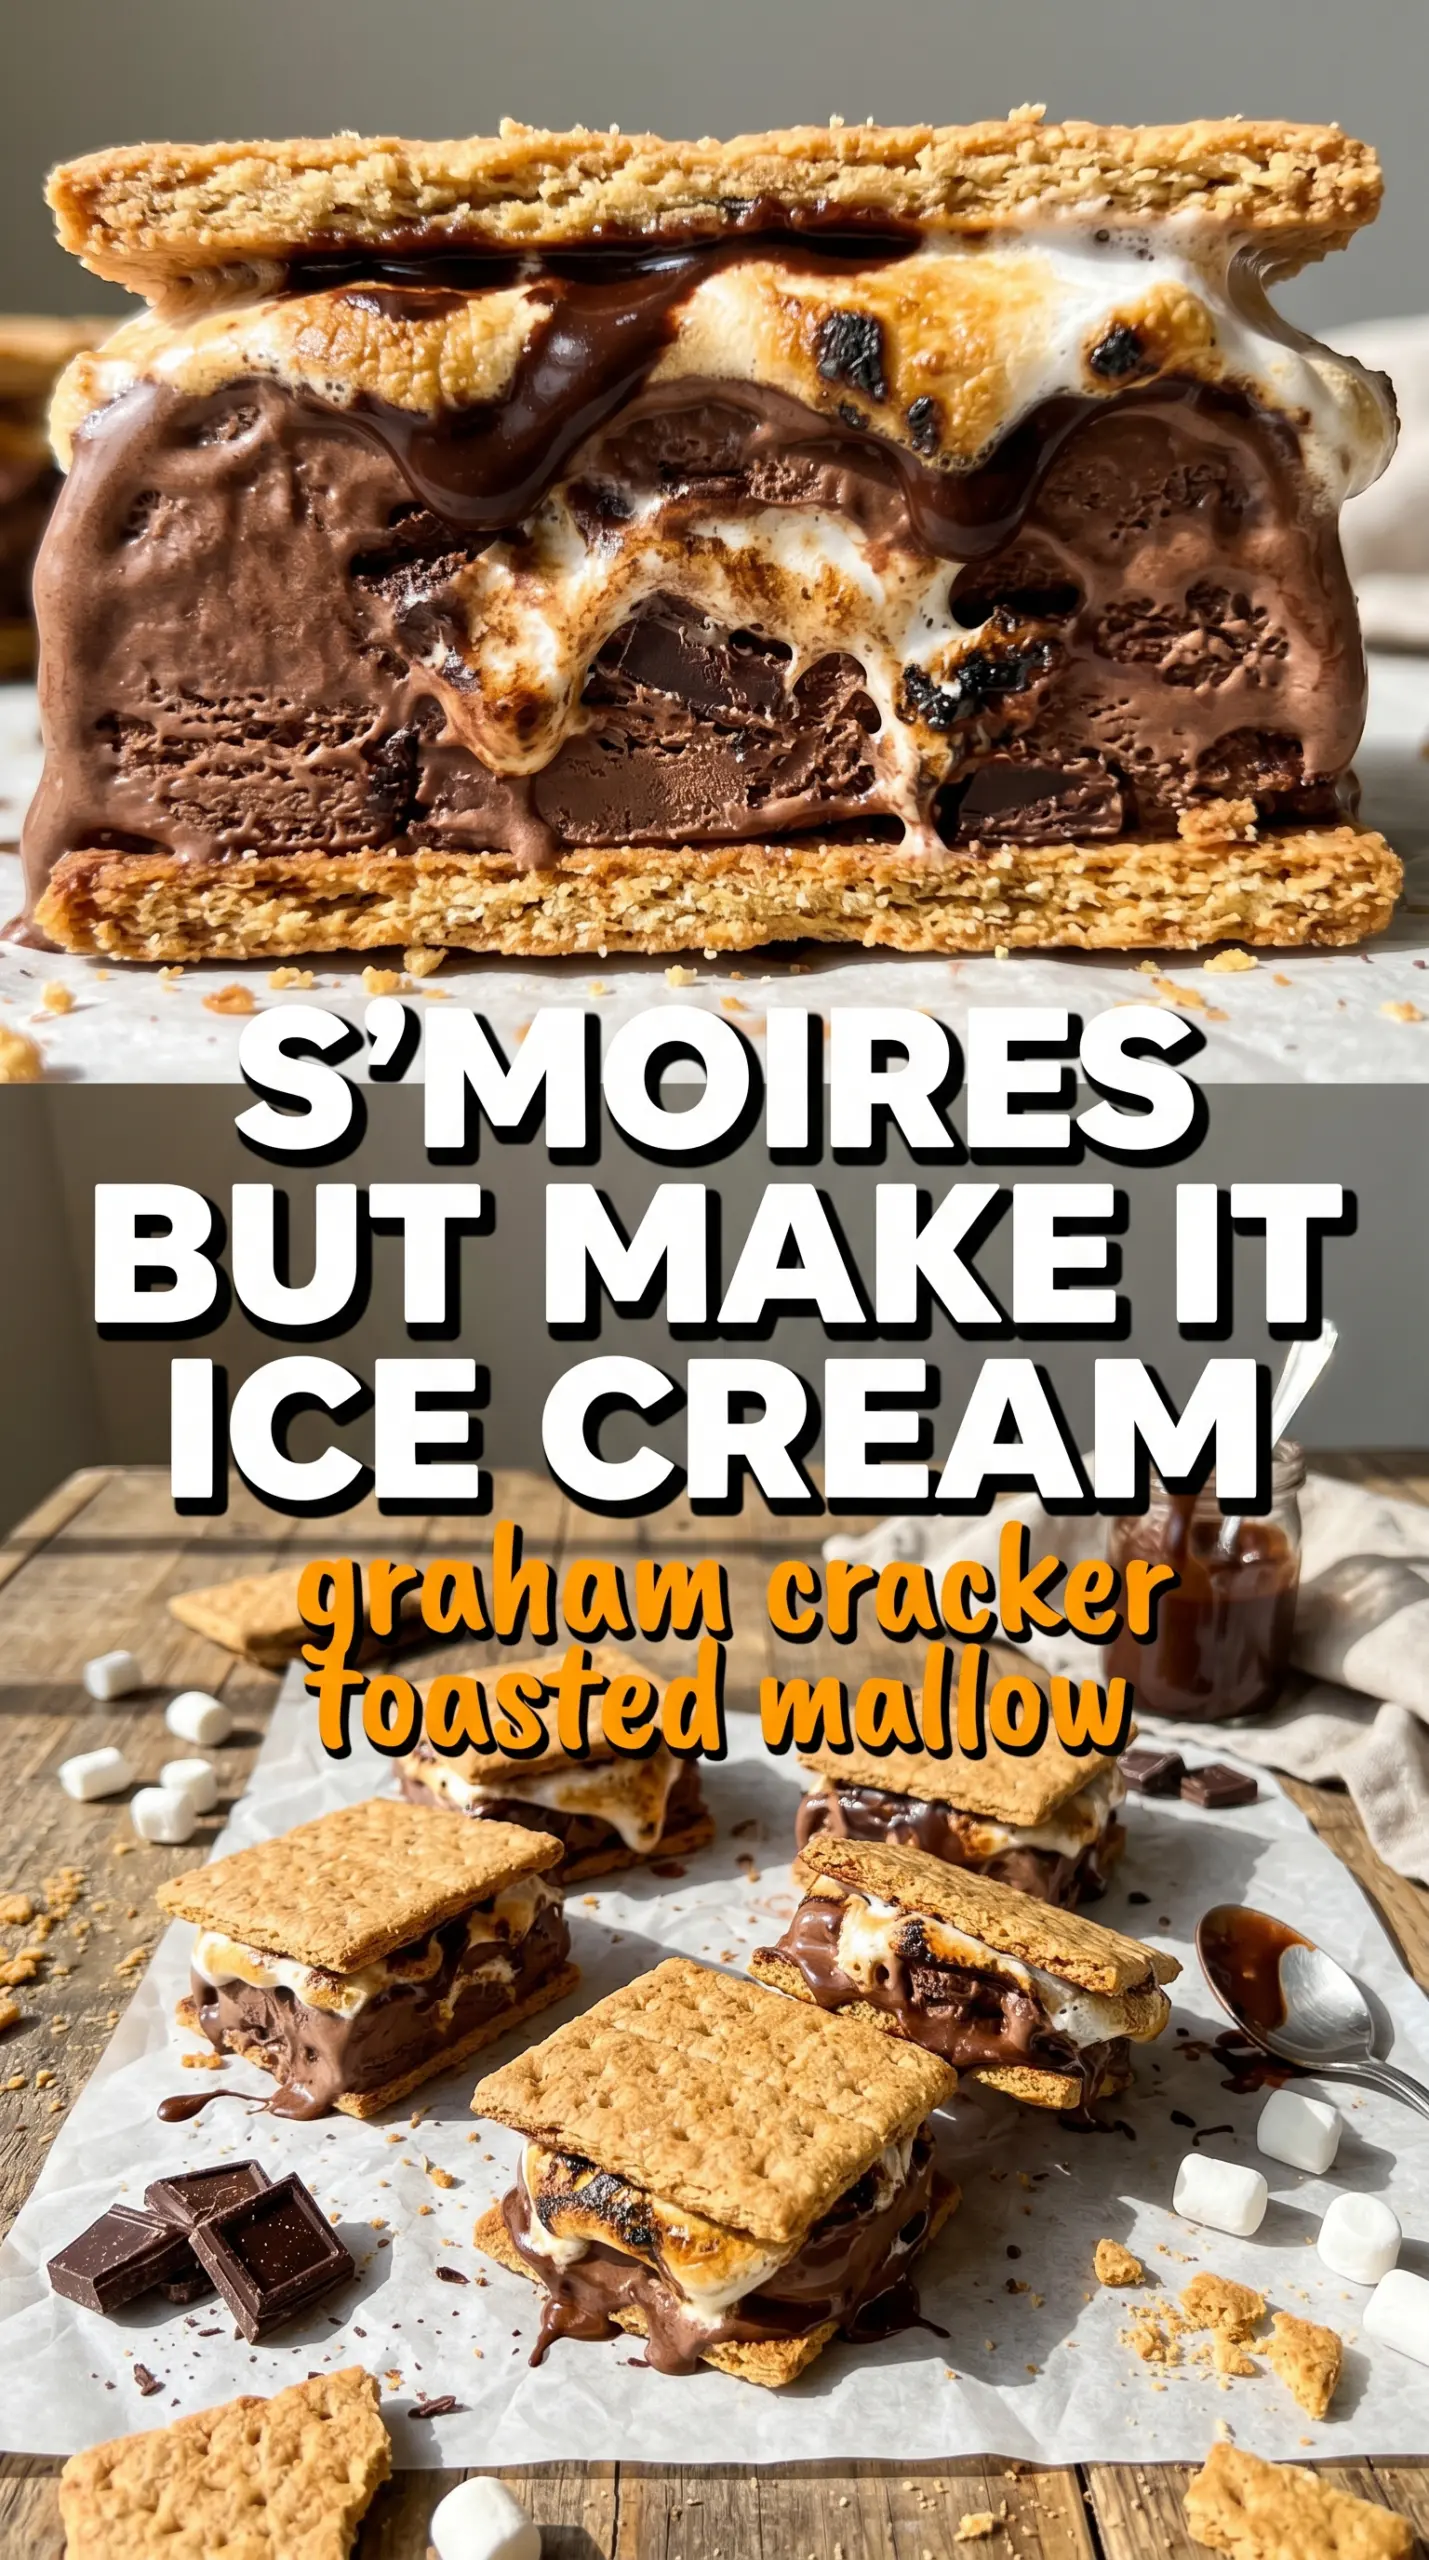
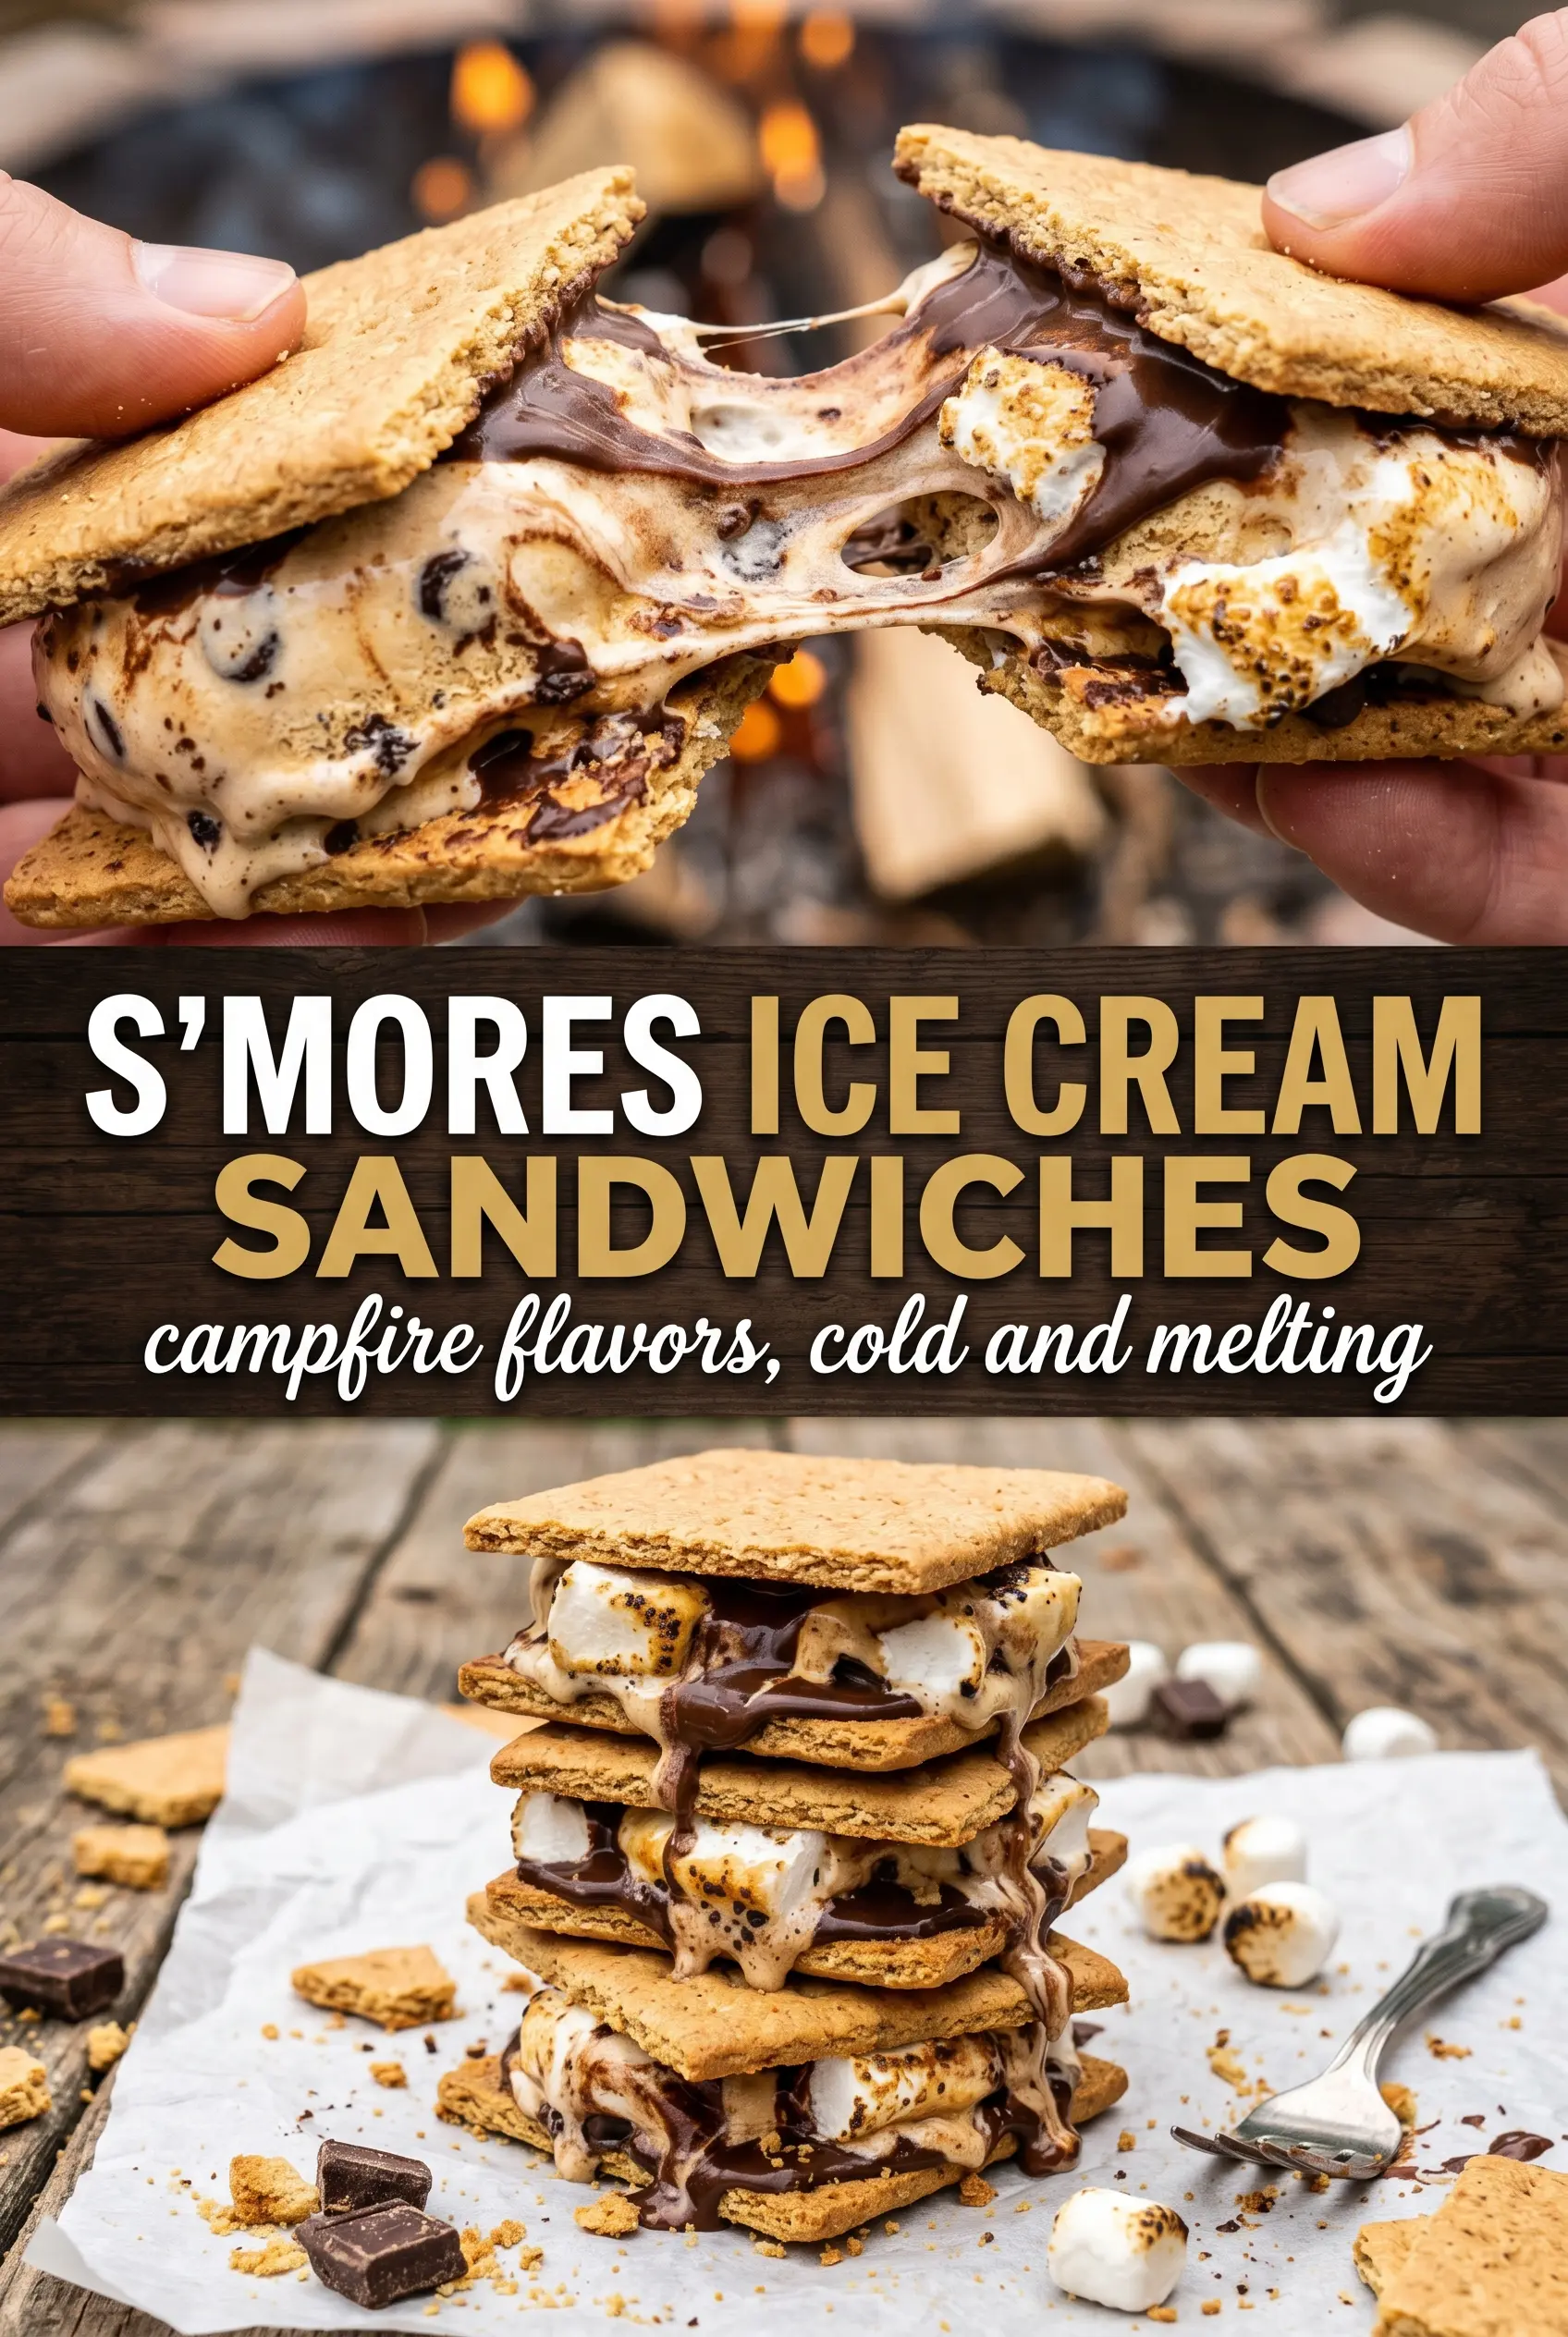
Graham cracker cookies, toasted marshmallow tops, and chocolate ice cream make these s’mores ice cream sandwiches taste like a campfire dessert with the heat taken out of the equation. The cookies stay sturdy enough to hold the filling, but they still soften just enough in the freezer so each bite feels cold, chewy, and creamy at the same time.
The trick is building a cookie that tastes like graham crackers instead of a plain sugar cookie. Whole wheat flour brings that nutty, toasty note, brown sugar and honey keep the texture tender, and the marshmallows go on top after the dough is shaped so they toast without disappearing into the dough. I also like using softened ice cream, not melted ice cream, because it spreads cleanly between the cookies and freezes back into a neat sandwich.
Below, I’ll walk you through the part that matters most: how to toast the marshmallows without burning the cookies, how long to freeze before serving, and the small adjustment that keeps the sandwiches from slipping apart when you bite into them.
The cookies held up beautifully and the torched marshmallows stayed chewy instead of sticky. I let the ice cream soften for about 10 minutes and the sandwiches came together fast, then froze up perfectly without cracking.
Save these s’mores ice cream sandwiches for the chocolate-and-marshmallow dessert that freezes into clean, hand-held layers.
The Reason These Cookies Don’t Turn Into Crumbs in the Freezer
Most ice cream sandwiches fail because the cookie is either too brittle or too soft. A brittle cookie shatters the second you bite down, and a soft one turns mushy once it touches the ice cream. These sit in the middle because the dough uses both all-purpose flour and whole wheat flour, which gives the cookie enough structure without making it taste dry or plain.
The other thing that matters is thickness. Roll or press the dough into large, even rounds so the cookies bake up with a little body. If they’re too thin, they’ll crack when you sandwich them; too thick, and the finished dessert feels heavy instead of nostalgic and easy to eat by hand.
- Whole wheat flour — This is what gives the cookies that graham-cracker edge. You can swap in all-purpose flour in a pinch, but you’ll lose some of the toasted, wheat-heavy flavor that makes these taste like s’mores instead of plain chocolate chip-style sandwiches.
- Honey — Honey brings the graham flavor forward and keeps the cookies from tasting flat. Maple syrup can work, but it pushes the cookies in a different direction and gives a less classic s’mores note.
- Mini marshmallows — Press them into the tops after shaping the dough, not before. That keeps the marshmallow layer on the surface where it can toast and stay visible, instead of melting into the cookie and disappearing.
- Chocolate ice cream — Use a firm, good-quality ice cream with a rich cocoa base. If it’s icy or thin, it won’t hold up as neatly after freezing, and the sandwich will taste more like freezer filler than the center of the dessert.
What Each Ingredient Is Actually Doing in This Ice Cream Sandwich
- Cookies or wafers (the structure) — These need to be sturdy enough to hold ice cream. Soft or brittle cookies crumble or break.
- Ice cream (the filling and star) — Use quality ice cream or make homemade. Slightly softened makes assembly easier.
- Optional coating (chocolate, sprinkles, nuts, or coconut) — This adds flavor and prevents the sandwich from slipping out of hands.
- Speed of assembly — Work quickly so ice cream doesn’t melt. Have everything prepared before you start.
- Temperature control (keep ice cream cold) — Work with ice cream straight from the freezer for best results.
- Pressing technique (gentle pressure) — Don’t squash the ice cream out. Just enough pressure to adhere the cookies.
- Freezing after assembly (at least 2 hours) — This sets the sandwich so it stays together. Longer is better for stability.
- Serving immediately after freezing — Cold ice cream sandwiches taste best. They melt quickly at room temperature.
Building the Dough, Toasting the Tops, and Freezing the Sandwiches Cleanly
Mix the Dry Ingredients First
Whisk the flours, cinnamon, baking soda, and salt together before they touch the butter. That keeps the cinnamon from clumping and gives the baking soda an even chance to disperse, which matters because these cookies need a steady rise, not a domed middle that makes sandwiching awkward. If the dry mix looks streaky, keep whisking a few more seconds; uneven leavening shows up in the oven as lopsided cookies.
Beat the Butter Until It Looks Light
Cream the softened butter with the brown sugar until it turns fluffy and paler in color. That step traps air, which gives the cookies a little lift and keeps them from baking up dense. Add the honey, milk, and vanilla after the butter is fluffy, not before; if you dump everything in at once, the mixture can look split and the dough won’t hold together as smoothly.
Shape for Sandwich Size, Not Cookie Jar Size
Scoop large rounds, then press them flatter than you think you need. These need to be wide enough to cover a scoop of ice cream without looking tiny next to the filling, and they should bake evenly from edge to center. Press the mini marshmallows firmly into the tops so they stick while baking; if they sit loose on the surface, they’ll slide off when you torch them.
Toast, Cool, and Assemble Without Rushing
Bake until the edges are golden and the marshmallows are puffed, then torch them just until they turn golden-brown. Stop there. If you keep going, the sugar in the marshmallows goes from toasted to bitter fast. Let the cookies cool completely before adding the ice cream, because even a little residual warmth will melt the filling and make the sandwiches slip apart at the edges.
Freeze Long Enough to Set the Center
Spread softened chocolate ice cream between two cookies with the marshmallow sides facing out, then press gently until the filling reaches the edges. Freeze the sandwiches for at least an hour so the center firms up enough to cut cleanly. If you serve them too early, the ice cream will squish out the sides and the cookies will feel loose instead of neatly bonded.
How to Adapt These for Different Freezers, Different Crowds, and Different Diets
Gluten-Free Version
Use a 1:1 gluten-free flour blend in place of both flours. The cookies will still work, but they may be a touch more delicate, so cool them completely before handling and don’t overbake them. You’ll lose a little of the graham-like wheatiness, but the marshmallow and chocolate still carry the dessert.
Dairy-Free Swap
Use a plant-based butter and a dairy-free chocolate ice cream that freezes firm. The cookie texture stays close to the original, but the filling matters more here than in most recipes, so choose an ice cream with enough fat to scoop cleanly. Sorbet-style options tend to freeze too hard for this sandwich.
Make Them Smaller for a Crowd
Use a smaller scoop and shorten the bake time by a couple of minutes so the cookies stay soft enough to bite through. Mini versions freeze faster and are easier to serve at a party, but they also need a little extra care when pressing the ice cream in, because the filling reaches the edges quickly.
Storage and Reheating
- Refrigerator: These don’t belong in the fridge once assembled; the ice cream will melt and refreeze in patches, which ruins the texture.
- Freezer: Wrap each sandwich tightly and freeze for up to 1 week for the best texture. After that, the cookies start to dry out and the ice cream can pick up freezer taste.
- Reheating: There’s no reheating here. Let the sandwiches sit at room temperature for 2 to 4 minutes before serving so the cookies soften just enough to bite cleanly without the ice cream collapsing.
Questions I Get Asked About This Recipe
S'mores Ice Cream Sandwiches
Ingredients
Equipment
Method
- Preheat the oven to 350F, then whisk both flours, cinnamon, baking soda, and salt in a bowl.
- Beat the softened butter and packed brown sugar until fluffy, then mix in the honey, whole milk, and vanilla extract.
- Stir the flour mixture into the wet ingredients until a dough forms.
- Scoop the dough into large rounds, press them flat, and press mini marshmallows into the tops.
- Bake for 10-12 minutes at 350F until the edges are golden and the marshmallows are puffed.
- Right after baking, use a kitchen torch to toast the marshmallows golden-brown for a deeper s'mores look.
- Cool the cookies completely before assembling.
- Sandwich the softened chocolate ice cream between two cookies with the marshmallow sides facing outward.
- Freeze the assembled sandwiches for at least 1 hour, then serve once firm.