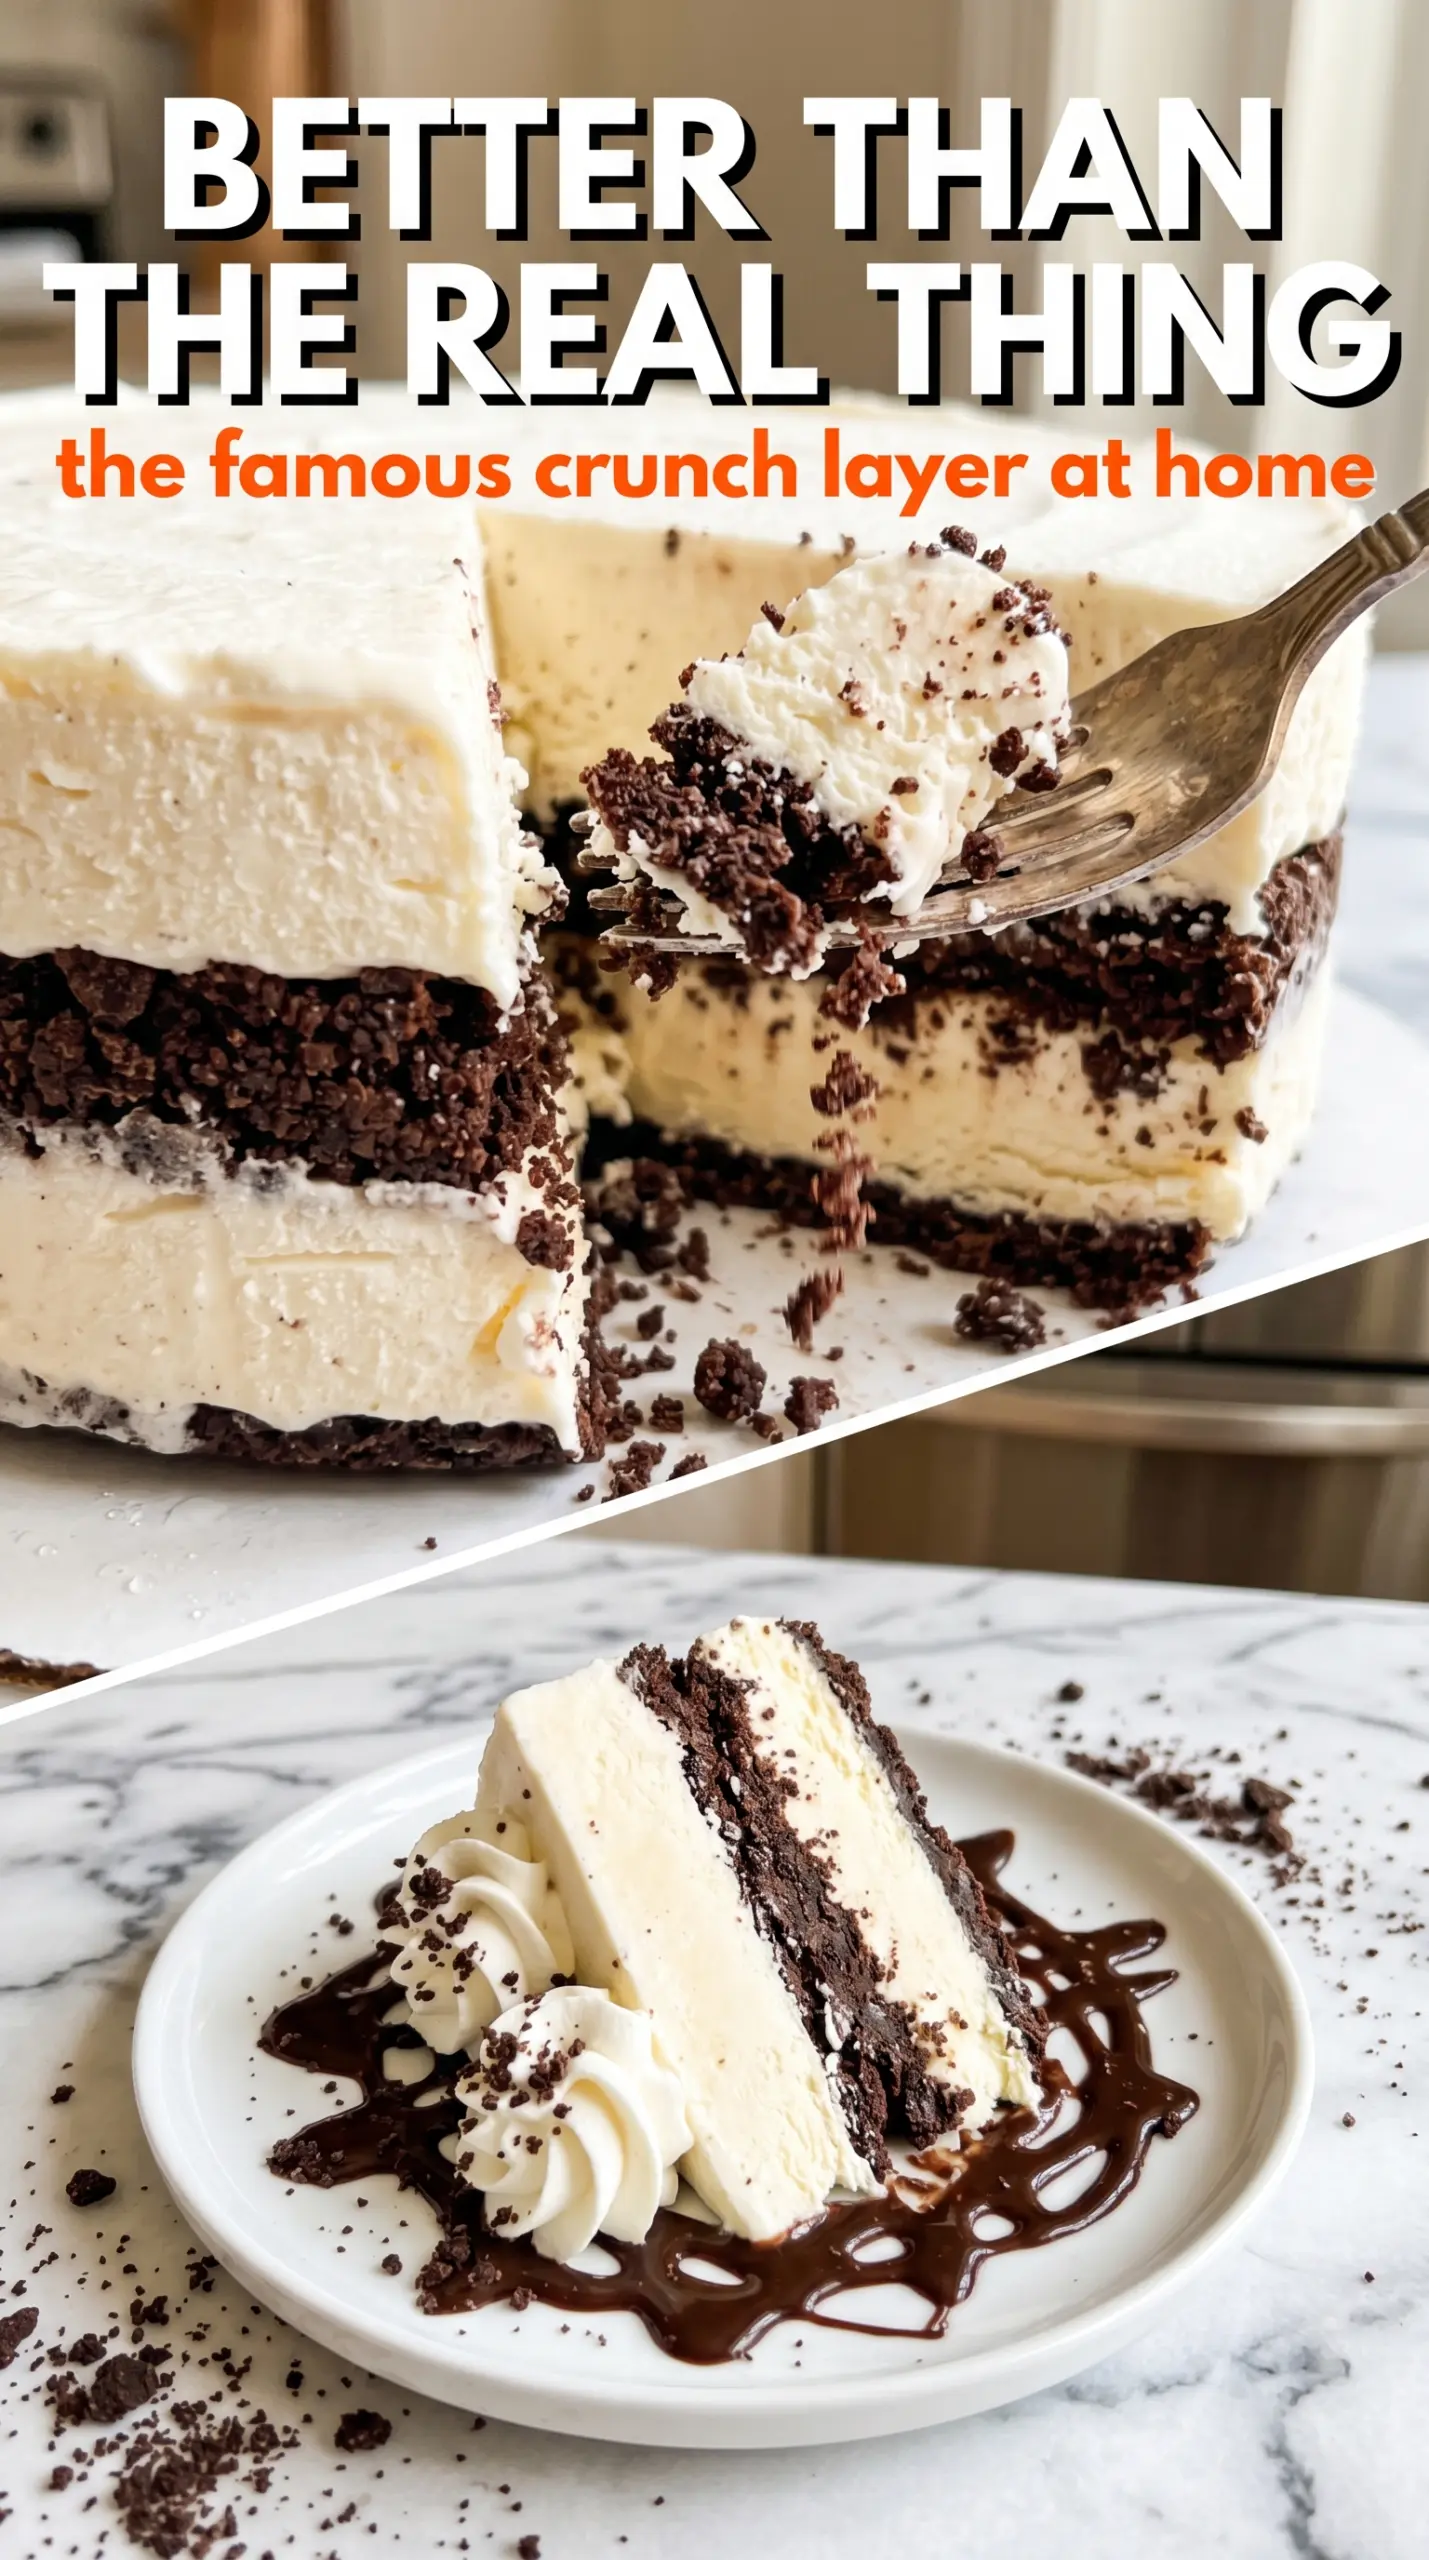
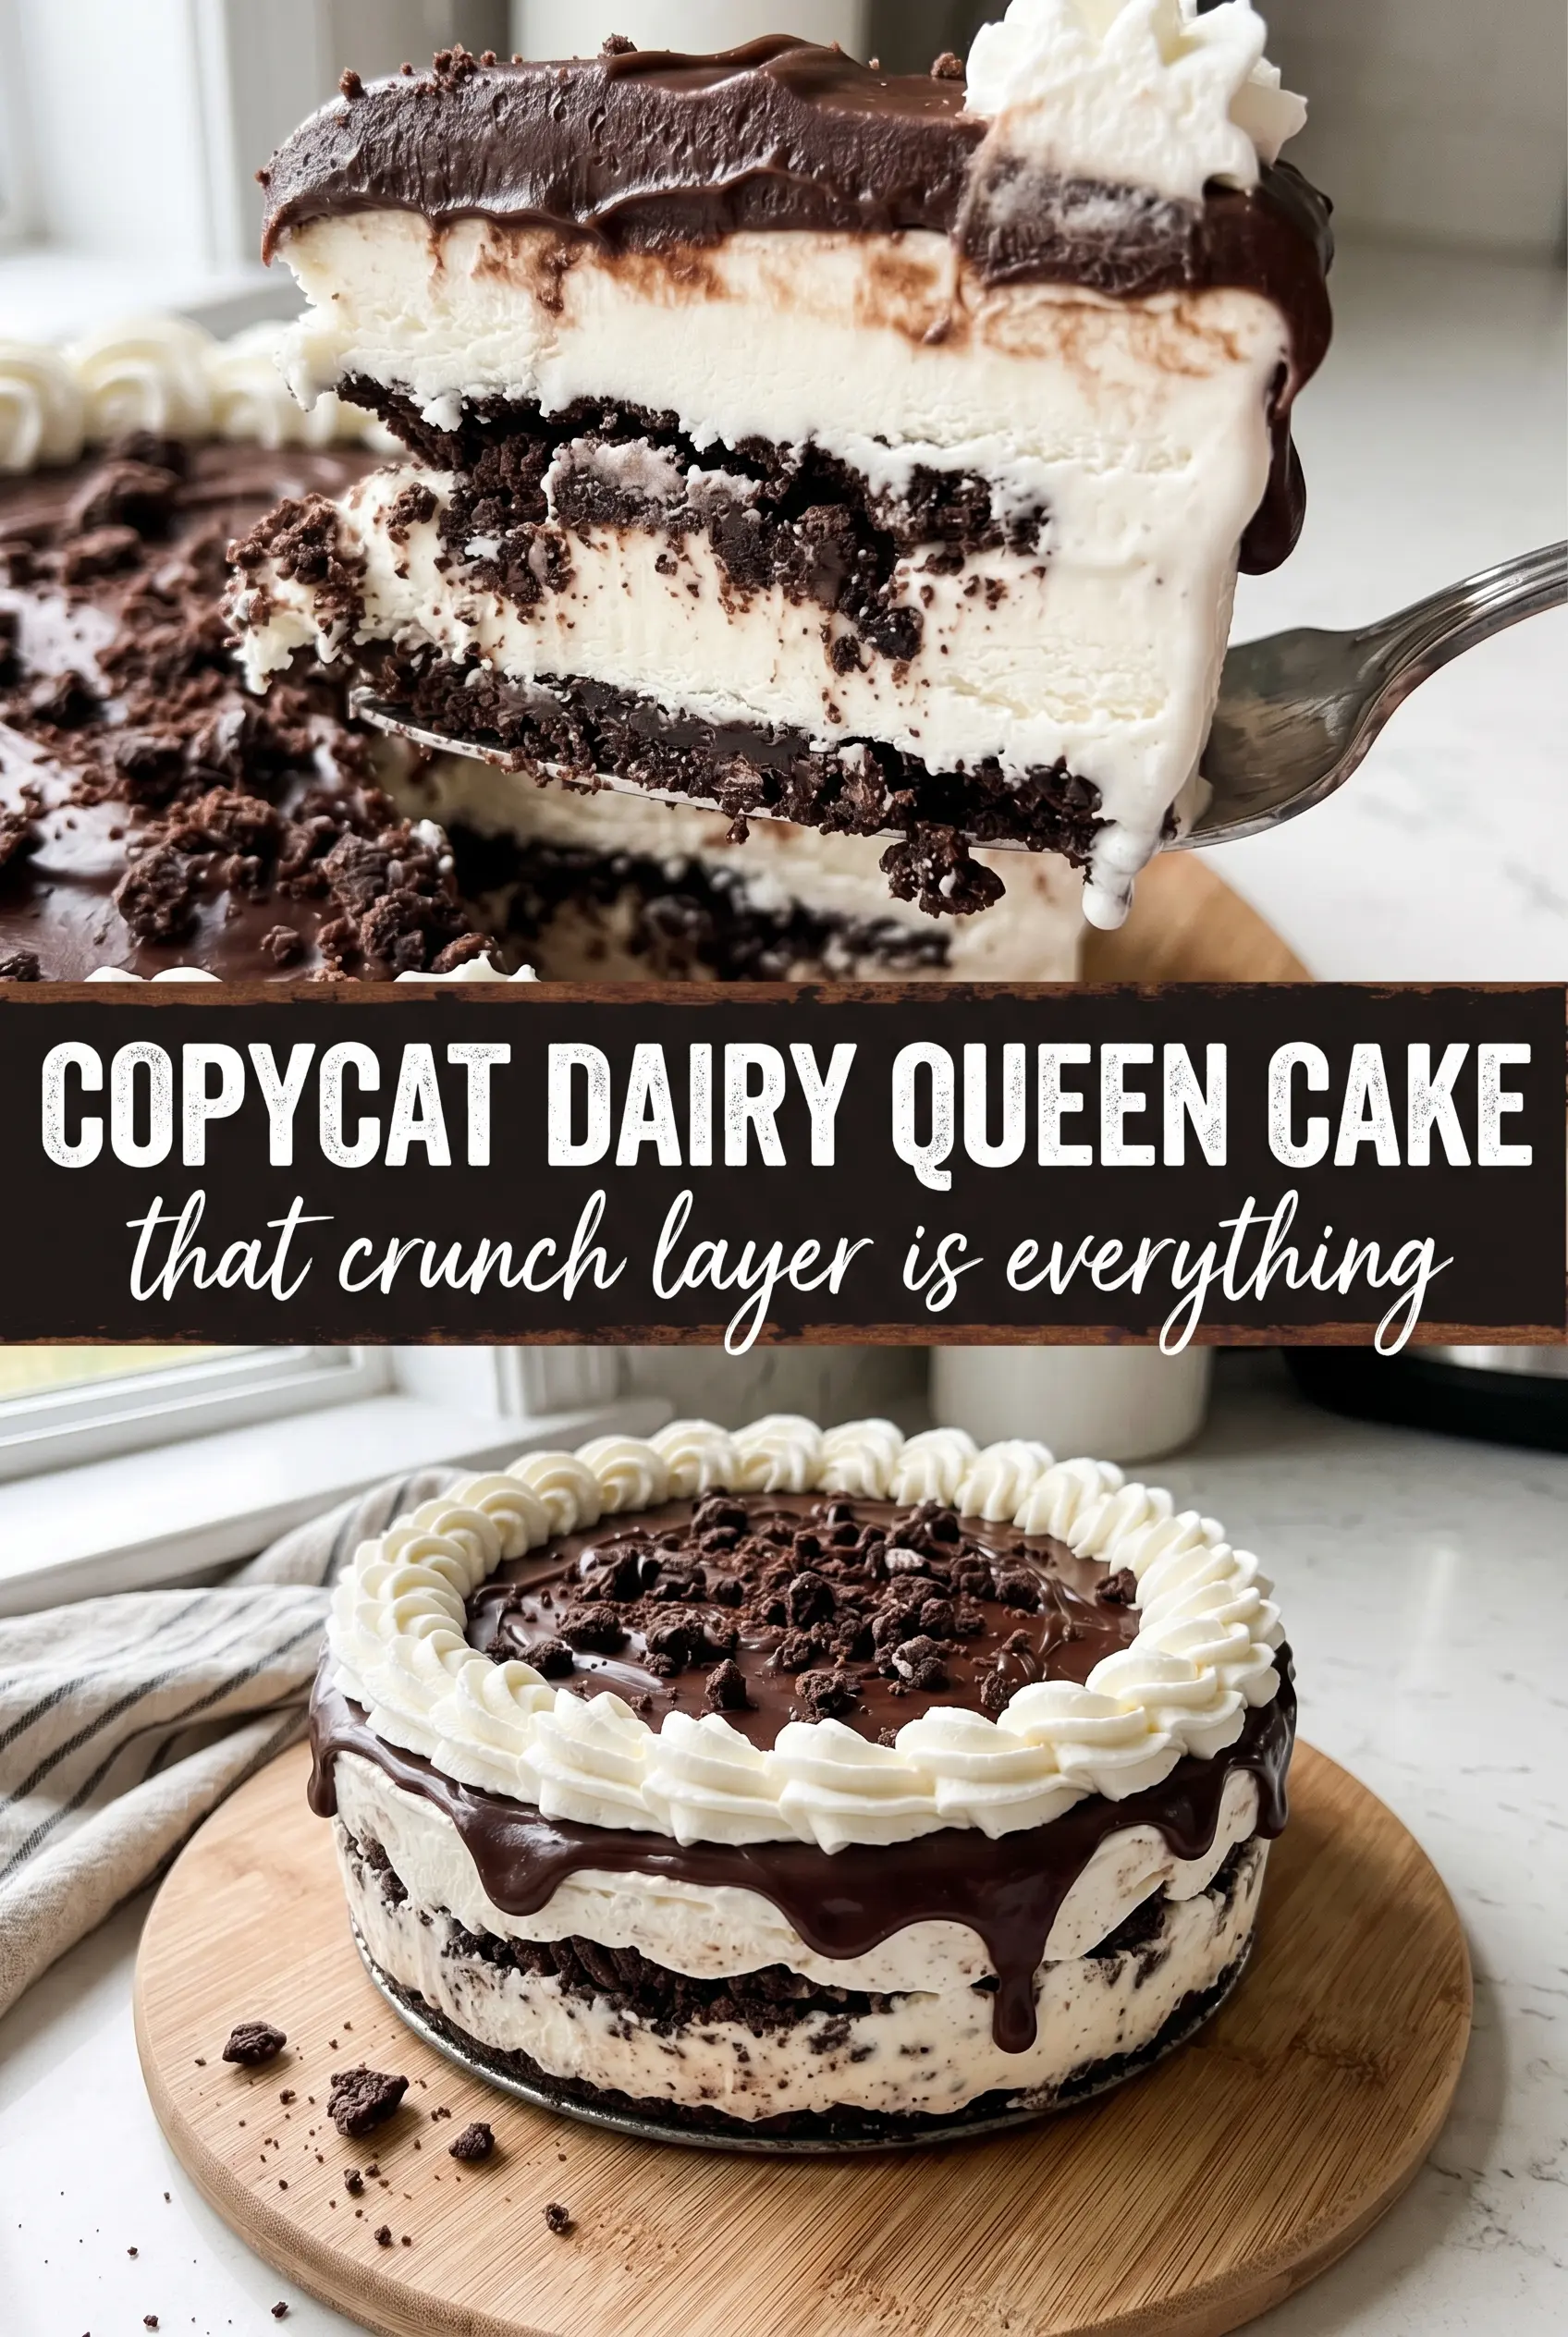
Cold, creamy layers and that unmistakable fudge-crunch center make this homemade version taste like the cake people line up for. The chocolate base stays firm enough to slice, the Oreo layer keeps its snap instead of turning into a muddy ribbon, and the vanilla top gives you the same clean contrast that makes the original so memorable.
The trick is all in the freeze time between layers. Each layer needs to be solid before the next one goes on, or the colors bleed together and the crunch turns soggy. Softened ice cream matters here too — not melted, just spreadable, so you can smooth it without tearing up the layer underneath.
Below, I’ve included the timing details that keep the layers distinct, plus the one shortcut that makes decorating much easier when you’re serving this for a birthday or party.
The fudge-and-Oreo middle set up just like the real thing, and the cake sliced cleanly after freezing overnight. My kids thought I picked it up from Dairy Queen.
Love that signature fudge-crunch center? Save this copycat Dairy Queen ice cream cake for the next birthday when you want those clean layers and classic toppings.
The Freezing Gap That Keeps the Layers Sharp
Ice cream cakes fail when people rush the layering. If the chocolate base isn’t firm before the Oreo-fudge mixture goes on, the crunch layer sinks and smears instead of staying in that distinct center stripe. The same problem happens again when the vanilla layer is added too early. You want each layer cold enough to support the next one, not just cold enough to look set on top.
The other mistake is working with ice cream that’s too soft. It should spread like thick frosting, not pour like soup. If it melts around the edges while you’re smoothing it, stop and freeze the pan for 10 to 15 minutes before continuing. That short pause saves the clean slices later.
- Chocolate ice cream — This forms the bottom layer and gives the cake its dense, dark base. Use a brand you actually like eating plain, because the flavor comes through. Let it soften just enough to spread, then pack it down firmly so there aren’t air pockets.
- Vanilla ice cream — The top layer needs to be smooth and sturdy, so a classic full-fat vanilla works best. Lower-fat versions freeze harder and can taste icy after a long freeze.
- Oreos — These create the signature crunch. Crushing them by hand leaves some bigger pieces, which is exactly what you want for texture. Finely ground crumbs turn the middle layer pasty.
- Hot fudge sauce — This binds the cookies into that iconic middle stripe. Warm it just enough to stir easily, but don’t make it piping hot or it can melt the ice cream underneath.
- Whipped topping — Cool Whip gives you the stable, bakery-style finish that holds up in the freezer. Fresh whipped cream is lighter, but it softens faster and won’t hold the same look for long.
- Chocolate shell or ganache — Either one gives you a decorative finish. Chocolate shell hardens fast and gives that classic crackly look, while ganache stays softer and slices a little cleaner.
What Each Ingredient Is Actually Doing in This Ice Cream Cake
- Base layer (cookies, cake, or graham cracker) — This provides structure and stability. Crushed and mixed with butter creates a firm foundation.
- Ice cream (the main star) — Use quality ice cream or make homemade. Softness matters for layering.
- Sauce or topping between layers (fudge, caramel, or fruit) — This adds moisture, flavor, and prevents dryness. Don’t skip this layer.
- Frosting or whipped cream (optional outer layer) — This prevents freezer burn and adds creaminess. Stabilized whipped cream works best.
- Freezing time (at least 4-6 hours) — This sets the layers so cake slices cleanly. Longer freezing prevents melting during serving.
- Room temperature before serving (5-10 minutes) — This softens the cake slightly for better texture. Serve immediately after thawing.
- Toppings (chocolate, nuts, cookies, or sprinkles) — These add visual appeal and texture. Add right before serving.
- Storage (in freezer at 0°F or below) — This prevents ice crystal formation and maintains quality. Cover with plastic wrap.
Building the Cake So the Fudge Layer Stays Crunchy
Pressing in the Chocolate Base
Spoon the softened chocolate ice cream into your pan and work it all the way to the corners with an offset spatula or the back of a spoon. Press it down evenly so the layer freezes as a solid slab instead of a patchwork of soft spots. Freeze it for 1 hour, or until the surface feels hard to the touch. If your pan is warm from the freezer door being open, give it a few extra minutes instead of adding the next layer too soon.
Mixing the Signature Crunch Center
Stir the crushed Oreos with the hot fudge until every crumb is coated but not drowned. You want a thick, spreadable mixture that holds together when you lift a spoonful. Spread it gently over the frozen chocolate layer so you don’t gouge through it. If the fudge is too stiff, warm it for a few seconds and stir again; if it’s too loose, the middle won’t hold that classic crunchy bite.
Adding the Vanilla Top
After the crunch layer has frozen, spread the softened vanilla ice cream over the top and smooth it all the way to the edges. Work from the center outward with light pressure so you don’t pull up the Oreo layer underneath. Freeze this layer long enough that it sets completely before decorating — that’s what keeps the whipped topping from sliding around later. The cake should feel firm and cold all the way through before you move on.
Finishing and Decorating
Spread the whipped topping over the vanilla layer in an even blanket, then drizzle on the chocolate shell or ganache and add sprinkles right away. If you wait too long with chocolate shell, it hardens in the bowl before it hits the cake. After decorating, freeze the cake for at least 2 more hours so everything locks in place. For the cleanest slices, let the cake sit on the counter for 5 to 10 minutes before cutting.
How to Adapt This for Different Freezers and Different Crowds
Gluten-Free Version
Swap in gluten-free chocolate sandwich cookies for the Oreo layer. The texture stays close to the original, though some gluten-free cookies soften a little faster, so keep the freeze time generous if you want that crisp middle.
Dairy-Free Version
Use dairy-free chocolate and vanilla ice creams, plus a dairy-free whipped topping. Check the fudge sauce carefully, since many brands contain milk. The result won’t taste exactly like the original, but you’ll still get the same layered structure and a clean frozen slice.
Springform Pan for Cleaner Slices
A 10-inch springform pan makes unmolding easier if you want a round cake with tall, bakery-style sides. Line the bottom with parchment and chill it well before releasing the ring. A 9×13 pan works fine for a crowd, but the slices will look more casual.
Make-Ahead Party Timing
This cake is actually better made a full day ahead. The layers set more firmly overnight, and the slices come out cleaner the next day. If you’re serving it for a party, decorate it the morning of or just before serving so the topping stays neat.
Storage and Reheating
- Refrigerator: Not recommended. This is an ice cream cake, so it softens too quickly in the fridge.
- Freezer: Wrap tightly and freeze for up to 1 week for the best texture. After that, the whipped topping can pick up freezer flavor and the ice cream may become icy.
- Reheating: No reheating needed. For serving, let the cake sit at room temperature 5 to 10 minutes so the knife cuts through the layers without shattering the top.
Questions I Get Asked About This Recipe
Copycat Dairy Queen Ice Cream Cake
Ingredients
Equipment
Method
- Spread the softened chocolate ice cream into the bottom of a 9x13 pan or 10-inch springform, pressing into an even layer. Freeze for 1 hour until firm, and the surface should look set and not wobbly.
- Mix the crushed Oreo cookies with the hot fudge sauce until the crumbs are evenly coated. Spread this crunch layer evenly over the frozen chocolate ice cream, then freeze for 30 minutes until the middle layer firms up.
- Spread the softened vanilla ice cream over the Oreo crunch layer and smooth completely so the edges are sealed. Freeze for at least 4 hours until hard, with the top layer looking matte and fully set.
- Spread the whipped topping over the vanilla layer in an even coat. Decorate with drizzled chocolate shell or ganache and sprinkle colorful sprinkles on top, then freeze at least 2 more hours before serving so slices hold their shape.